SC-F9200 Series Revision B
DISASSEMBLY & ASSEMBLY Disassembly and Assembly Procedure 228
SE Group Confidential (Related Staff Only)
Figure 3-178. Make a space
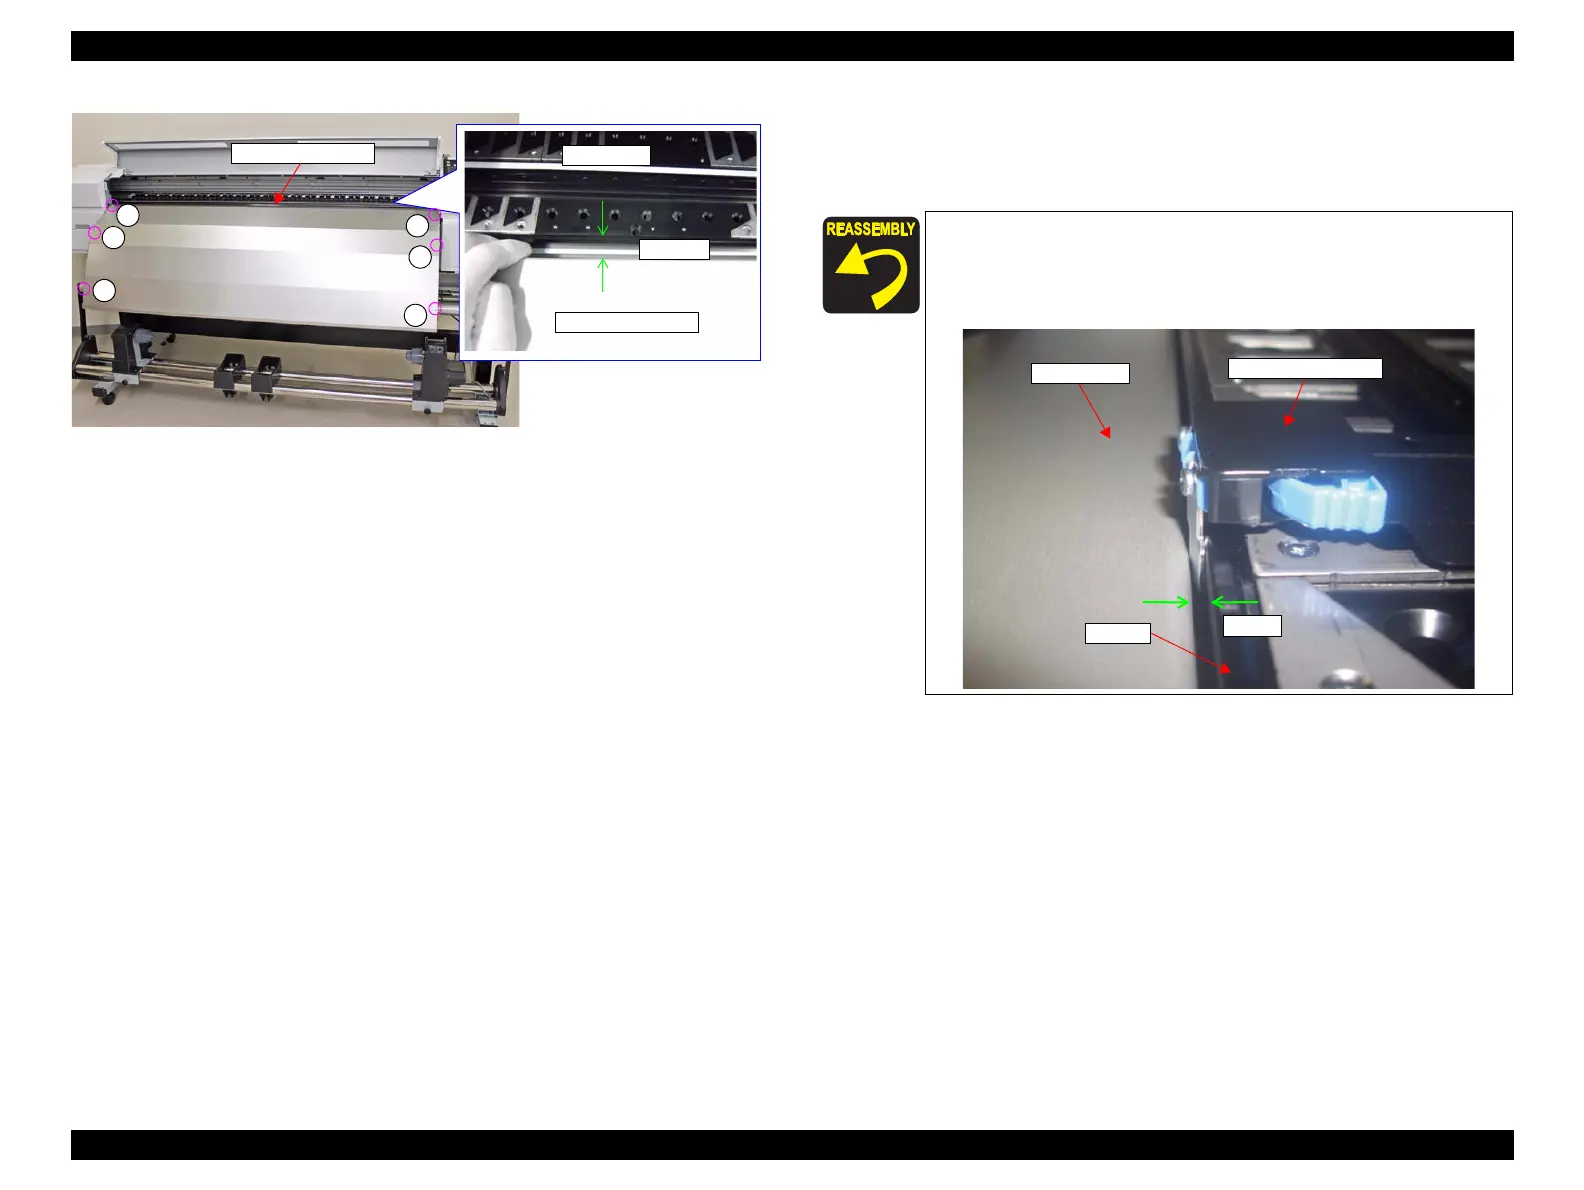
5. Remove the fourteen screws, and remove the Platen. (Remove the seven screws on
the inner side using a stubby screwdriver.)
C) Silver M3x30 S-tite screw: 14 pcs
After Heater
B
Platen
After Heater
Space
B
B
B
B
B
When installing the Platen, make sure to tighten the screws while
pressing the Platen toward the rear. Otherwise, the gap between
the Platen and After Heater will be too narrow, so the Media
Holding Plate cannot be moved.
Media Holding Plate
After Heater
Space
Platen

 Loading...


