SC-F9200 Series Revision C
ADJUSTMENT Head Related Checks and Adjustments 316
SE Group Confidential (Related Staff Only)
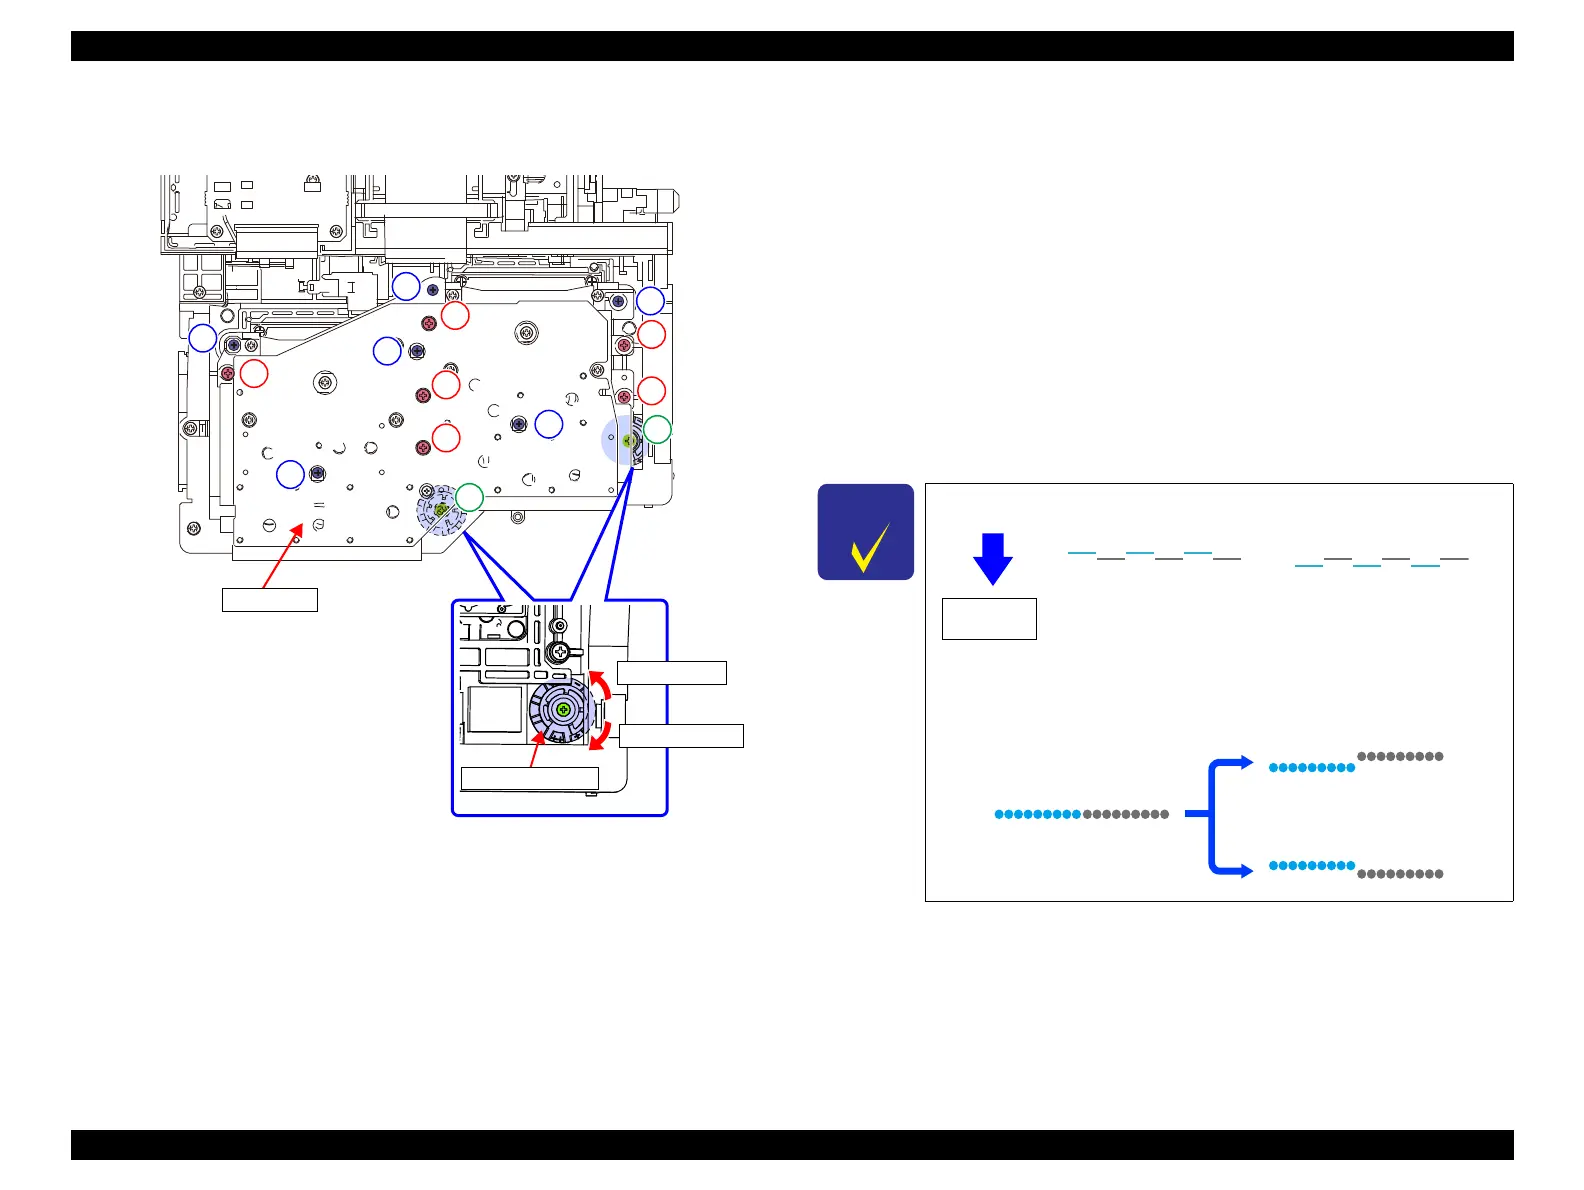
Figure 4-38. Correcting the Head Inclination
14. Tighten the six screws to secure the Head Holders (three screws each). Tighten the
screws in the order shown below.
Head 1: G --> H --> I
Head 2: J --> K --> L
15. Tighten the screw to secure the Adjustment Knob.
16. Tighten the six screws to secure the Duct CR. (there is no particular order to
tighten them.)
17. Attach the CR Cover.
18. Press the F12 key of the keyboard to lock the CR unit.
19. Print the pattern and see if the inclination is corrected. If not, repeat the procedure
until normal pattern is printed.
A
B
C
D
E
F
G
H
I
J
K
L
M
N
Adjustment Knob
Minus direction
Plus direction
Duct CR
For which direction to turn the knob, see below.
The lines move about one-dot’s width when the knob is moved
by five or six notches.
Paper feed
direction
When Cyan lines lie
below Black lines,
turn counterclockwise
When Cyan lines lie
above Black lines,
turn clockwise

 Loading...


