SC-F9200 Series Revision C
ADJUSTMENT Other Printer Checks and Adjustments 363
SE Group Confidential (Related Staff Only)
x
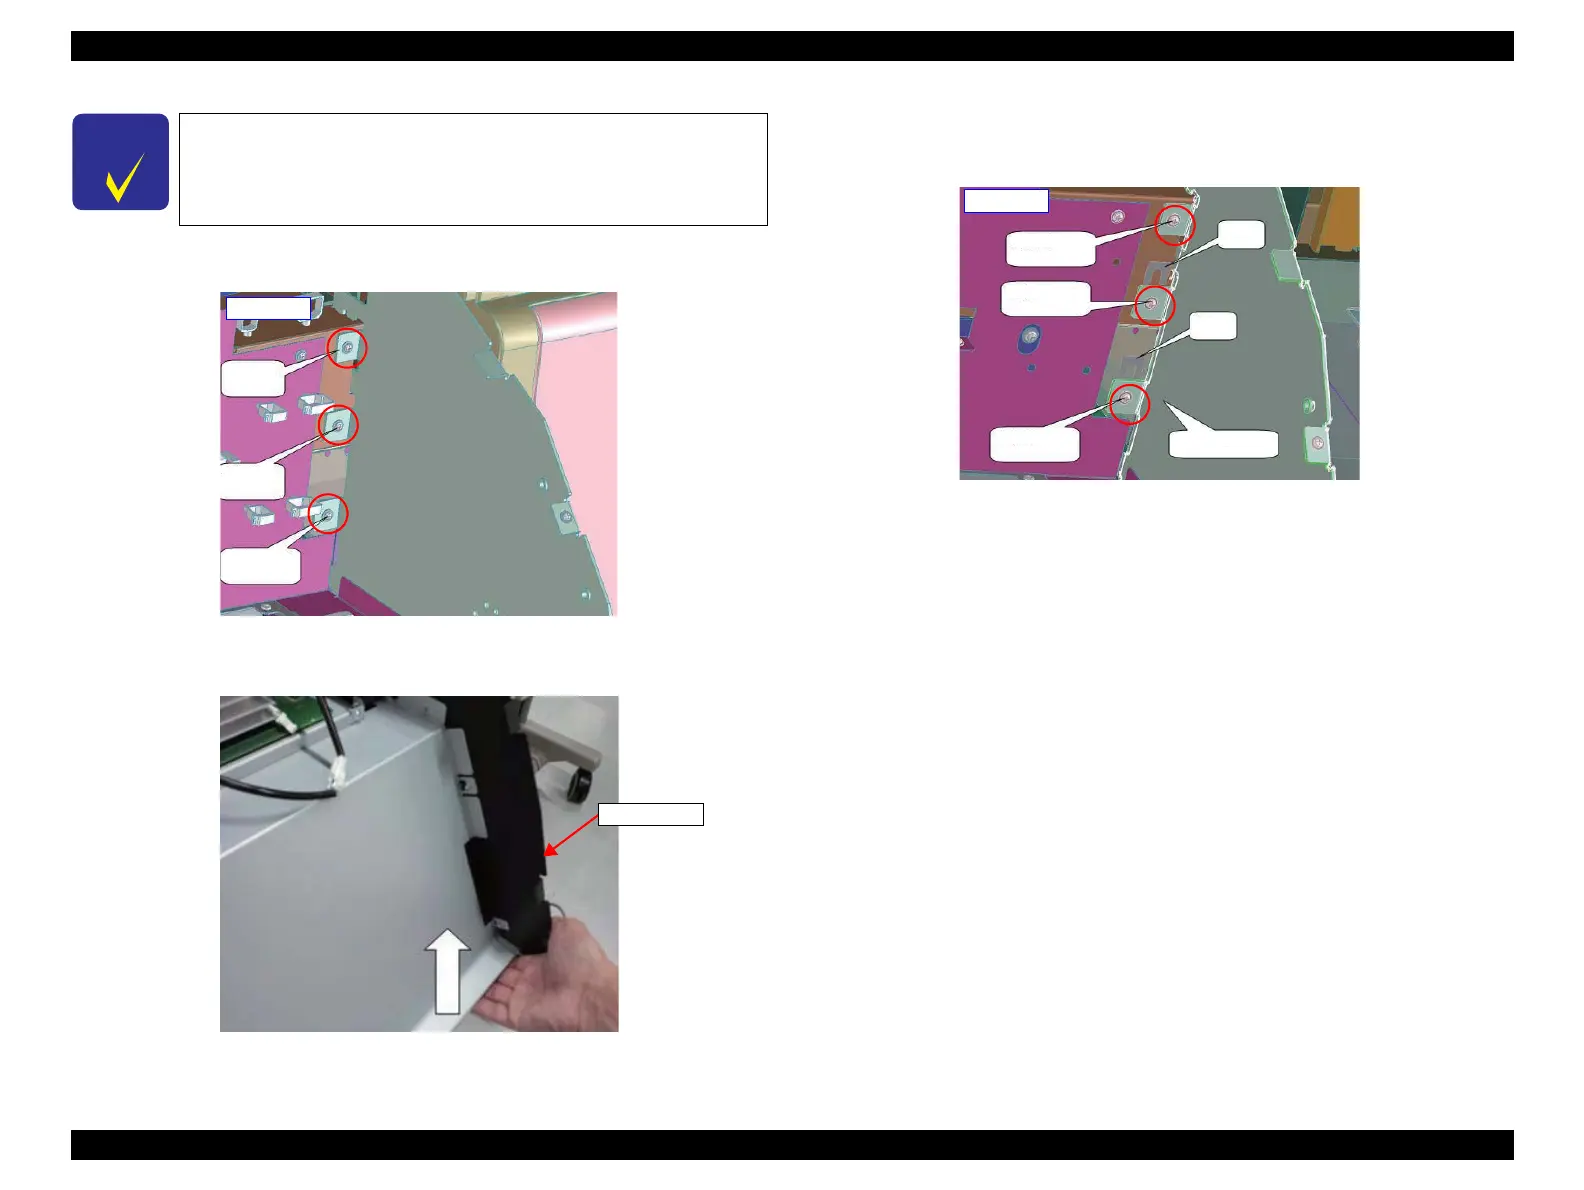
4. Loosen the three screws at home side.
Figure 4-87. AH Standard Adjustment (1)
5. Lift the bottom of the Heater Frame by 10 mm.
Figure 4-88. AH Standard Adjustment (2)
6. Attach the shims: two to screw (1) and four to screw (2).
7. Tighten the three screws.
Figure 4-89. AH Standard Adjustment (3)
8. Install the Sub-E Board Cover.
9. Install the After Heater.
10. Measure the amount of deformation.
If the amount is between -2 to -1 mm: End of the adjustment.
If the amount is between -2.9 to -2.1 mm or between 1.1 mm to 1.9 mm:
Perform the AH Position Adjustment (P. 364).
The following procedure is described for the case of -5 mm
deformation.
Shim
Home side
Shim
Heater Frame
Screw
Screw (1)
Screw (2)

 Loading...


