(2) (2) Press the d/u buttons to select a paper
thickness value between 0.1 to 1.5 mm, and
then press the Z button.
For the paper's thickness, check the paper's
manual or with your local dealer.
F
Press the W button to close the menu.
Refer to the instructions for details on how to
perform both auto and manual adjustment.
Aligning the print head automatically
A
Press the [ button to display the
Maintenance Menu.
B
Press the d/u buttons to select Head
Alignment, and then press the r button.
C
Press the d/u buttons to select Alignment, and
then press the r button.
D
Press the d/u buttons to select Auto, and then
press the r button.
E
Press the d/u buttons to select the type of
alignment pattern, and then press the r button.
If you have already performed Head Alignment
from the computer, select Uni-D. If you are
performing Head Alignment for the first time,
select Bi-D 5-Color.
F
Press the Z button.
The sensor reads the adjustment pattern while
it is printing, and automatically registers the
optimum adjustment value to the printer.
Note:
If the results of the Bi-D 5-Color alignment are
unsatisfactory, execute Uni-D alignment. If the
results of the Uni-D alignment are unsatisfactory,
execute Bi-D All alignment.
Aligning the print heads manually
When doing Manual Alignment, align with Uni-D
first, and then with Bi-D 2-Color. If you want to make
more precise adjustments, try Bi-D All.
A
Press the [ button to display the
Maintenance Menu.
B
Press the d/u buttons to select Head
Alignment, and then press the r button.
C
Press the d/u buttons to select Manual, and
then press the r button.
D
Press the d/u buttons to select Uni-D, and
then press the r button.
E
Press the Z button.
The adjustment pattern is printed on the
loaded paper.
The alignment pattern prints repeatedly from
side to side of the paper.
Note:
Multiple adjustment patterns are printed for cut
sheets. Once printing the first sheet is complete,
load the next sheet of paper.
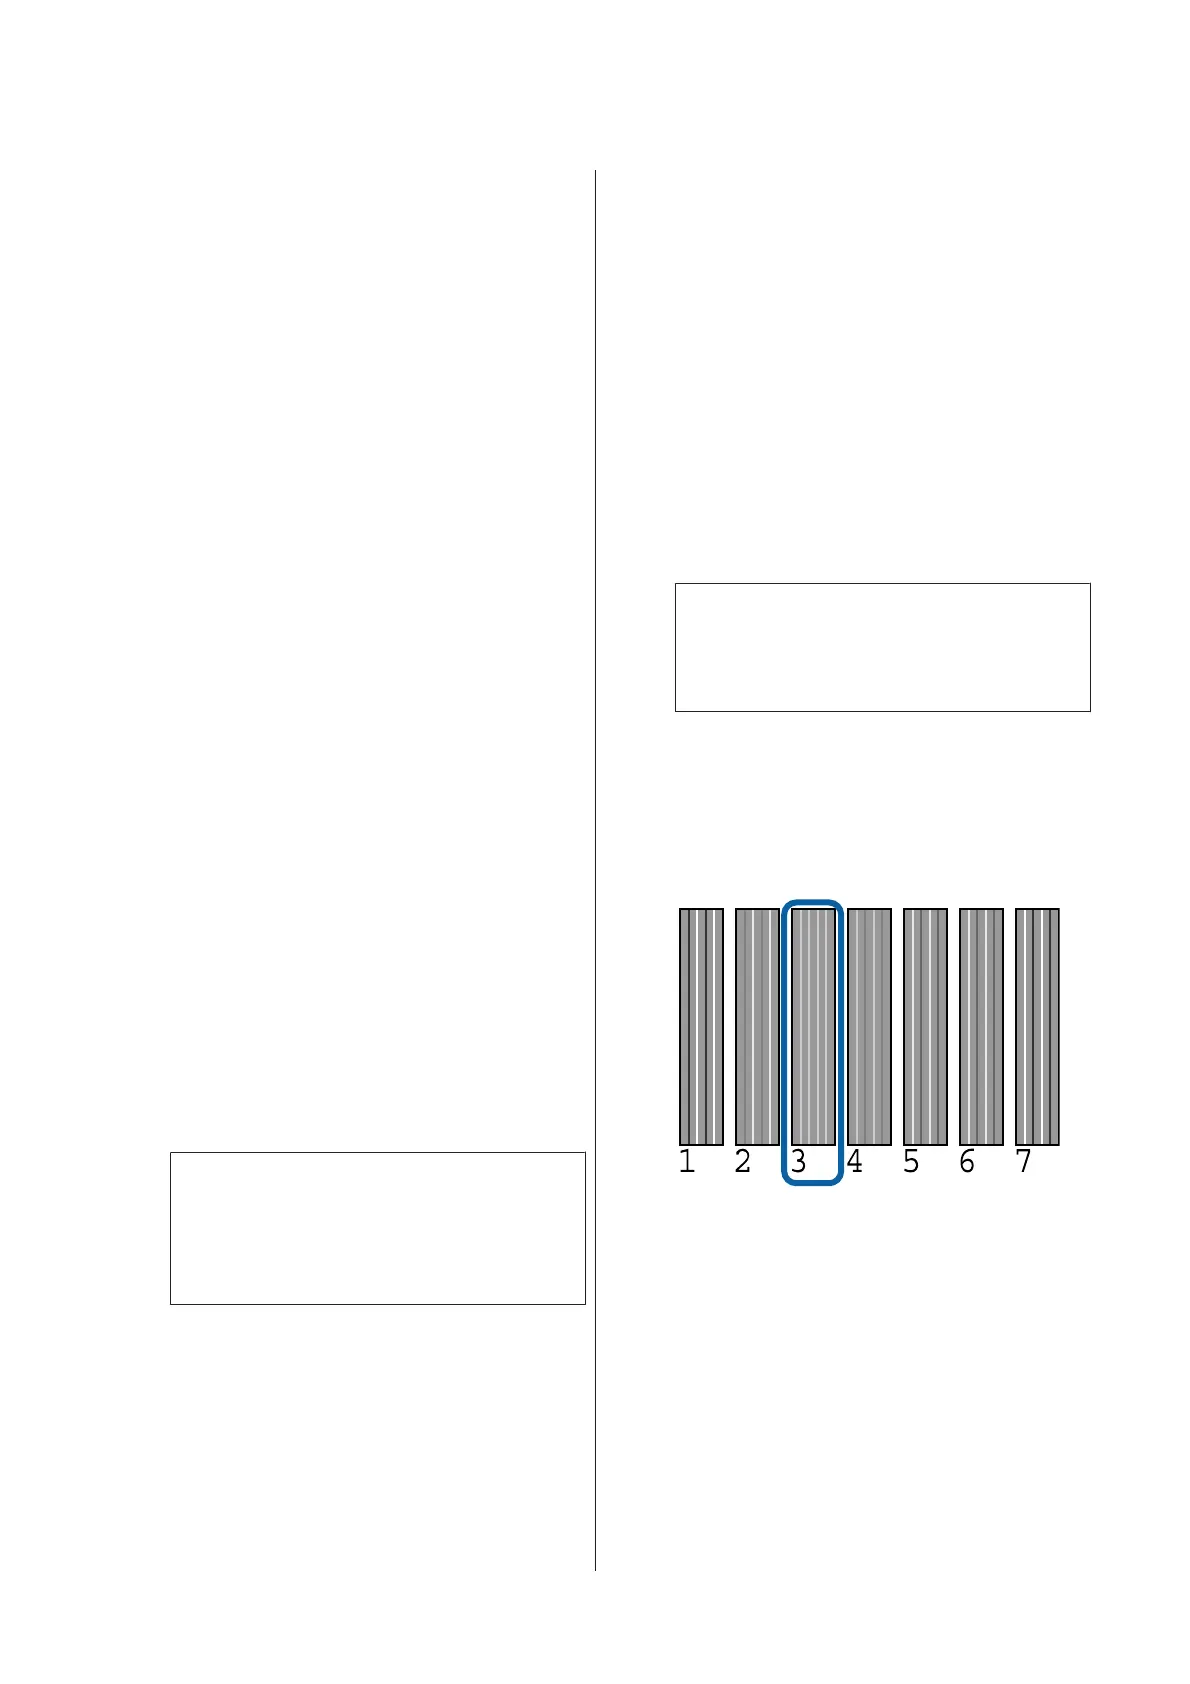
F
Note the numbers of the patterns with the
fewest white lines or in which the white lines
are most evenly spaced.
This would be pattern "3" in the example shown
in the illustration.
G
Check the abbreviation of the colors of ink
displayed on the control panel's screen. Press
the d/u buttons to select the number you
confirmed in step 6, and then press the Z
button.
H
Select the numbers for all the colors and then
press the Z button.
When the last color is set, Ready appears on the
screen.
SC-P5000 Series User's Guide
Maintenance
129

 Loading...