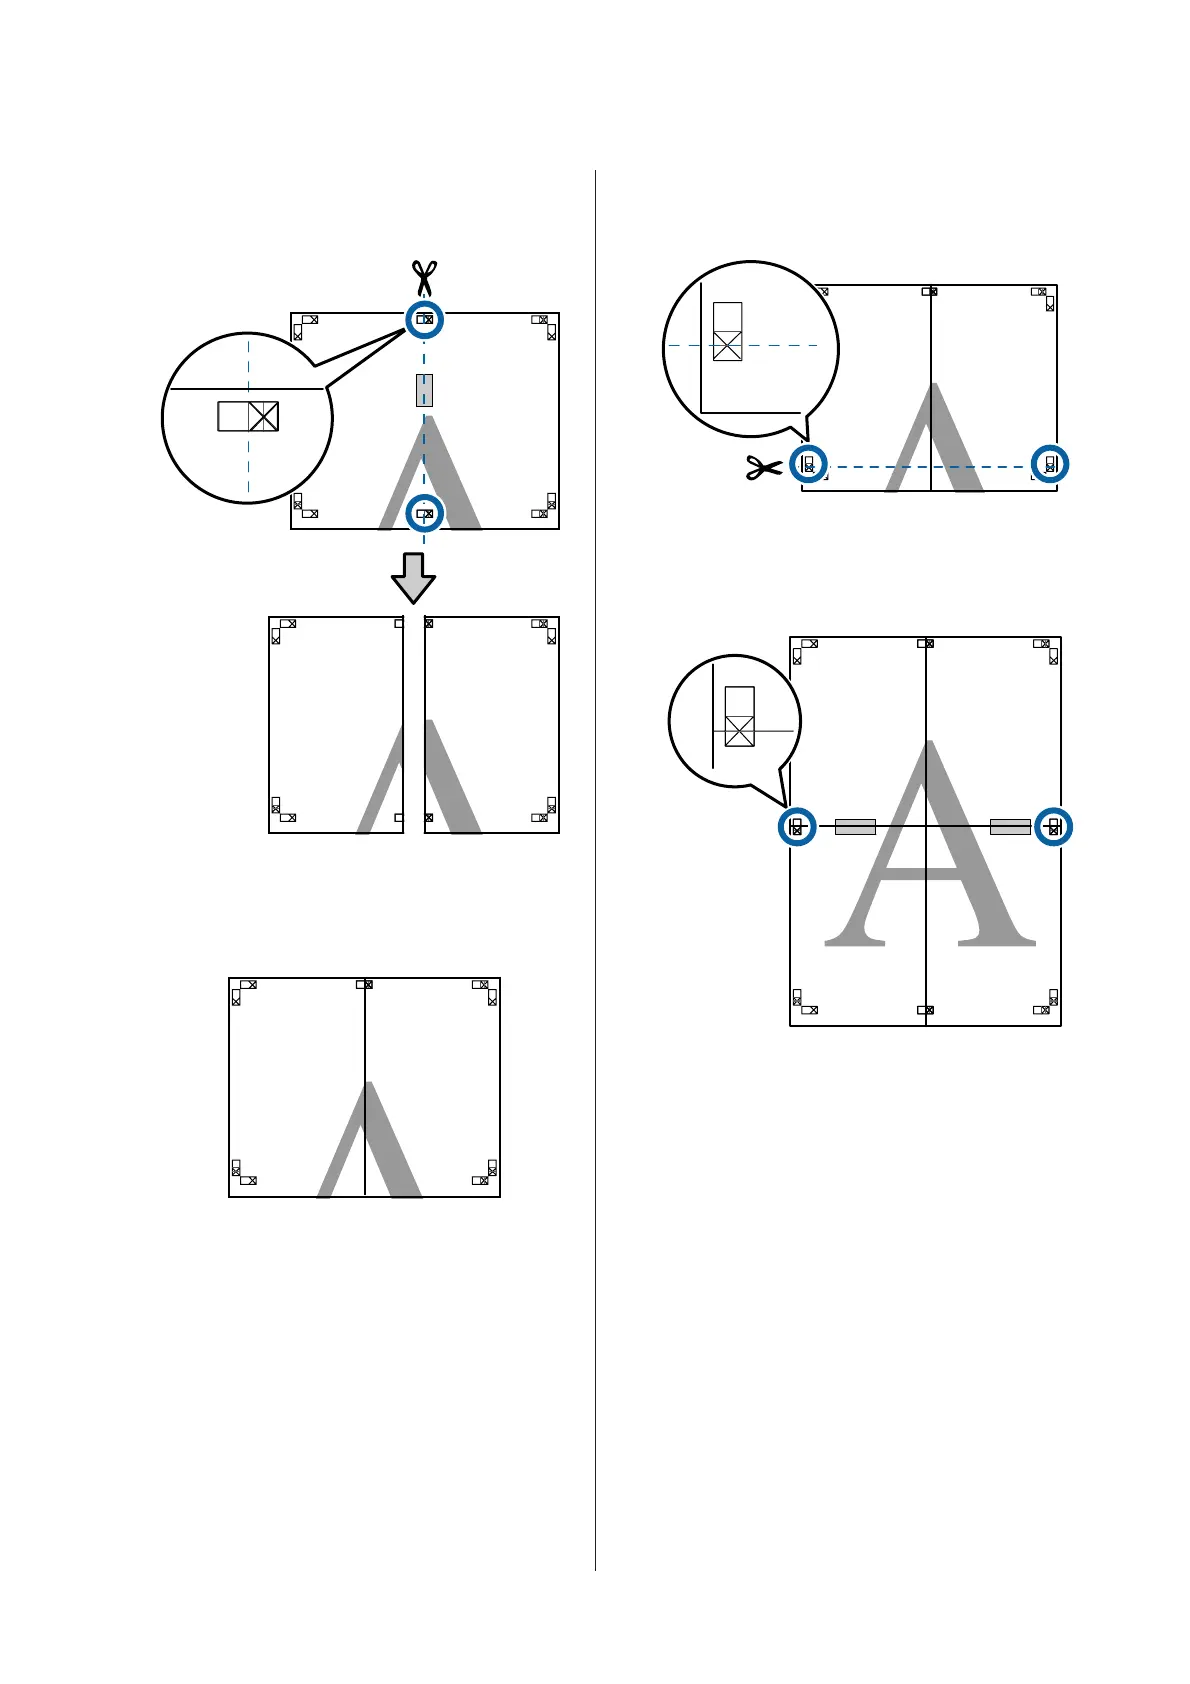
EasyManuals Logo

Epson SC-P5000 SERIES User Manual

Epson SC-P5000 SERIES
192 pages
To Next Page IconTo Next Page
To Previous Page IconTo Previous Page
Page #88 background imageLoading...
Page #88 background image
C
With the two sheets overlapping, trim the
excess by cutting along the line joining the two
cut guides (the lines to the left of the X marks).
D
Rejoin the two sheets.
Use an adhesive tape to stick the backs of the
sheets together.
E
Repeat steps 1 to 4 for the two lower sheets.
F
Trim the bottom from the upper sheets by
cutting along the line joining the two guides
(the lines above the X marks).
G
Lay the upper sheet on top of the lower sheet.
Lineup the X marks as shown in the illustration
below, and temporarily fasten them using an
adhesive tape on the back.
SC-P5000 Series User's Guide
Printing Varieties
88

Table of Contents

Other manuals for Epson SC-P5000 SERIES

Questions and Answers:

Question and Answer IconNeed help?

Do you have a question about the Epson SC-P5000 SERIES and is the answer not in the manual?

Epson SC-P5000 SERIES Specifications

General IconGeneral
Max Print Resolution2880 x 1440 dpi
ConnectivityUSB, Ethernet
Operating SystemsWindows, macOS
Max Print Size17" wide
Ink PaletteCyan, Yellow, Light Cyan, Light Light Black, Matte Black, Photo Black
Media TypesFine art paper, photographic paper, canvas
Ink TypeUltraChrome HDX pigment ink
Number of Ink Colors10 (with Light Light Black)

Related product manuals