Adjustment
Rev. A
4-
No
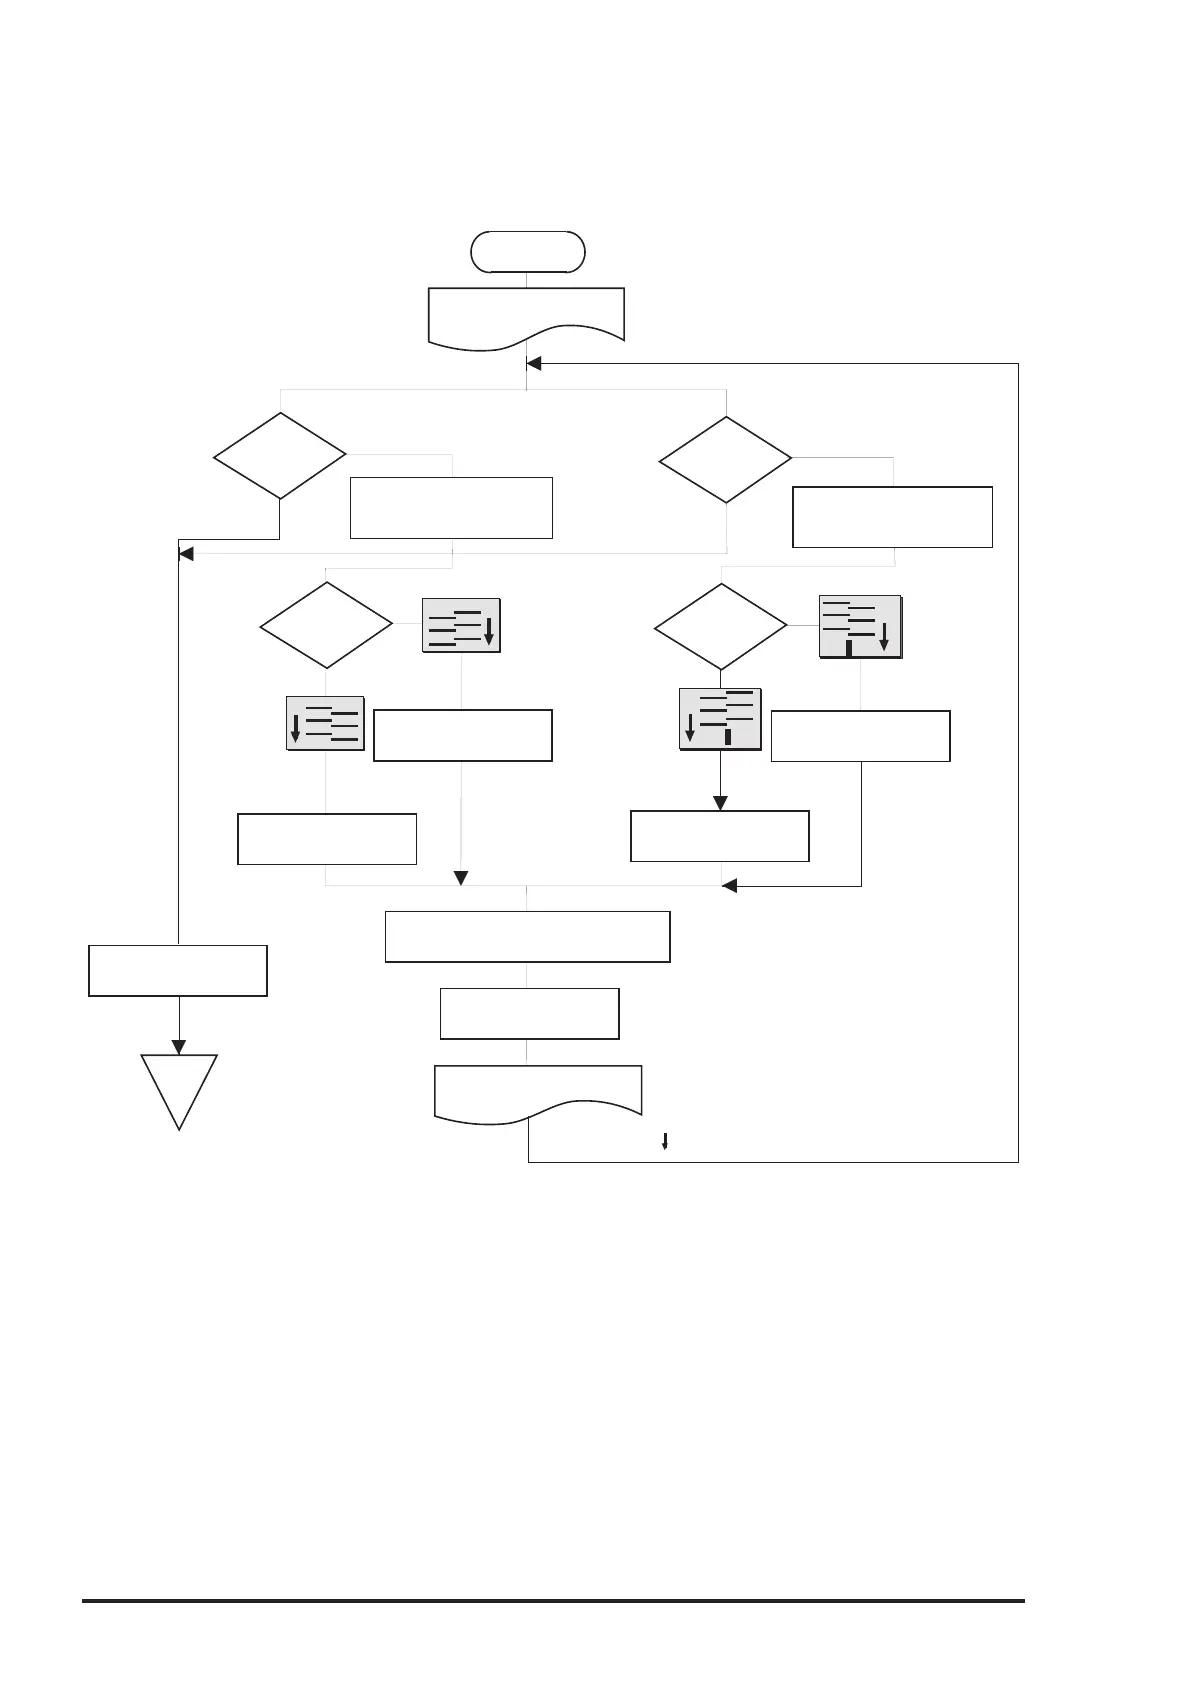
The printer prints the head
angle adjustment pattern.
Move the black head
adjust lever right.
Fasten the black/color head fixing screw
while holding the arm of the printhead.
Press "Space" key.
Press "Return" key.
Loosen the color head fixing
screw by turning it 1/4.
head angular
OK?
Move the color head
adjust lever right.
Move the color head
adjust lever left.
The printer prints another head
angule adjustment pattern.
head angle
OK?
Yes
Is
the color
Is
the black
Start
End
*
*
* : The direction in which paper is fed.
Move the black head
adjust lever left.
What
does the pattern
show?
*
What
does the pattern
show?
*
*
Loosen the black head fixing
screw by turning it 1/4.
(See Figure 3-6 in Chapter 3.)
(See Figure 3-6 in Chapter 3.)
Yes
No
Figure 4-5. Head Angle Adjustment Flowchart