EPSON Stylus COLOR 3000
Rev. A
3-
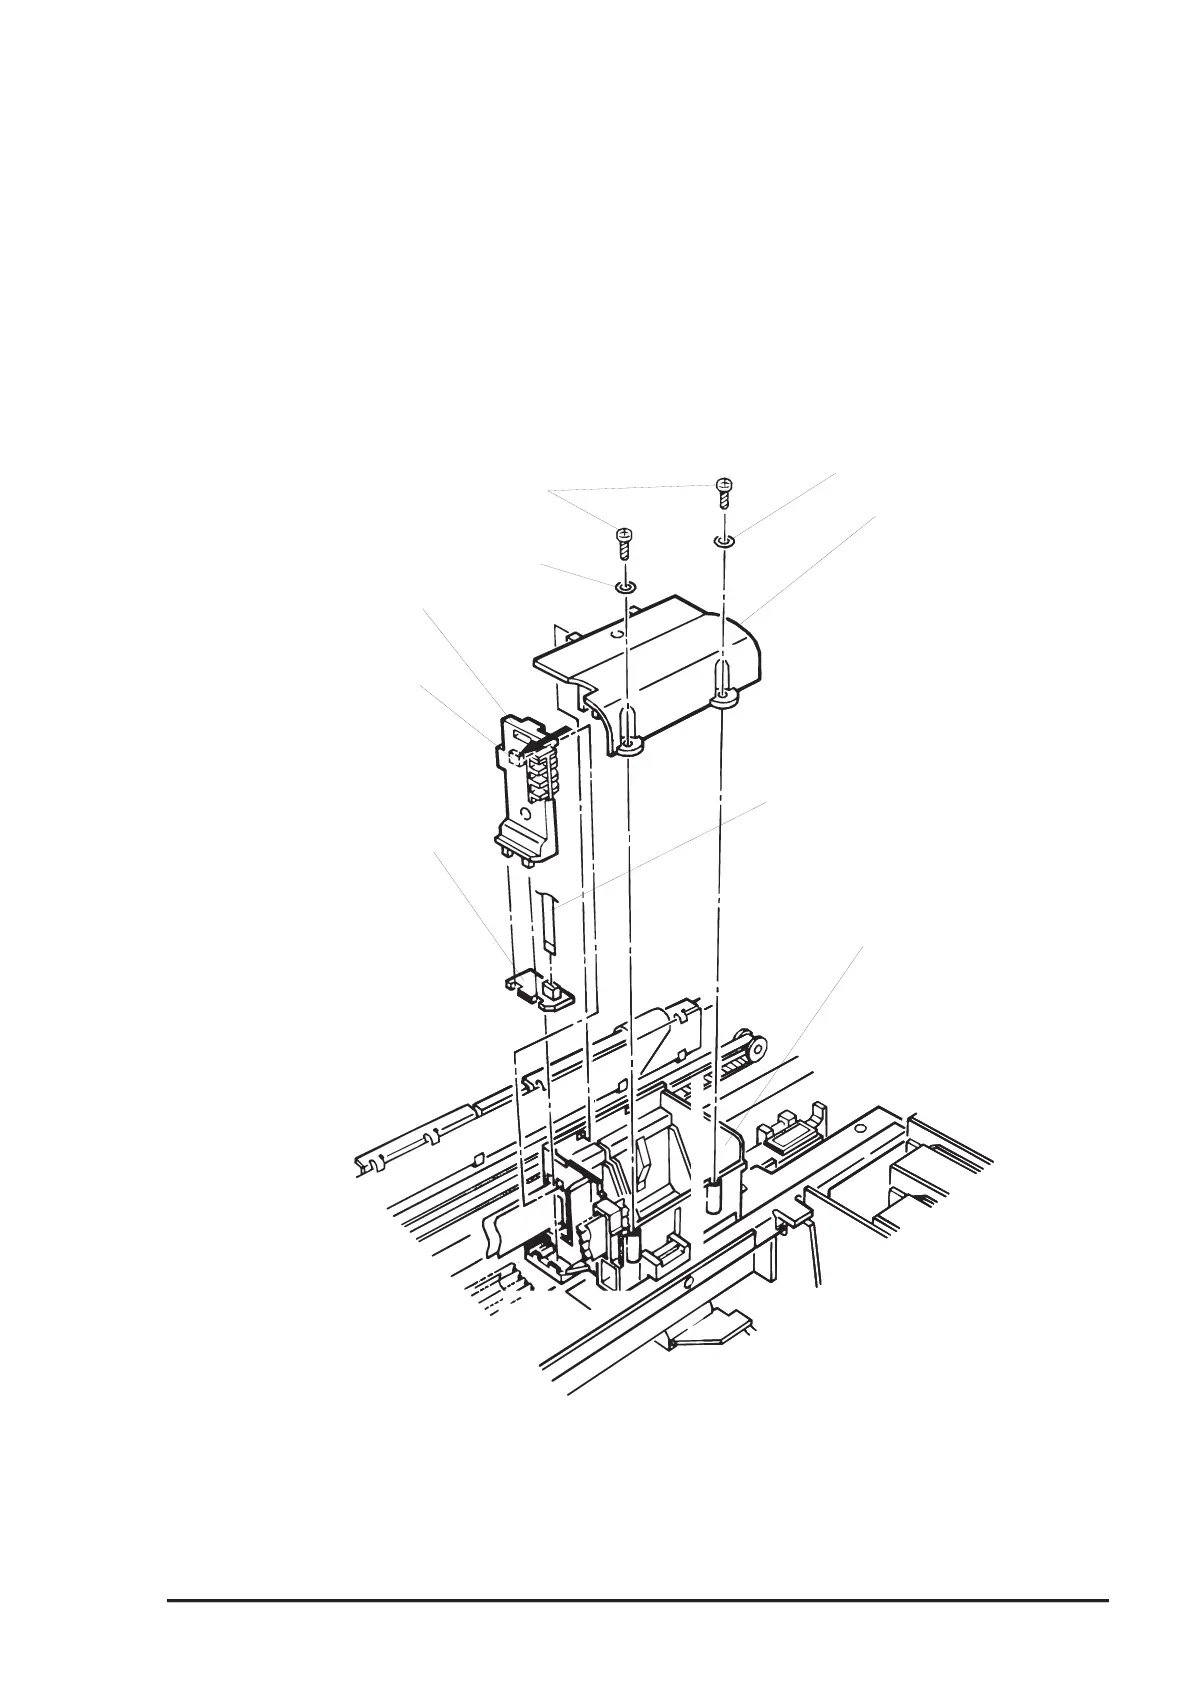
3.2.3 CR PW (Paper Width) Sensor Board Assembly Removal
1. Remove the upper housing. (See Section 3.2.1.)
2. Remove 2 screw (CBP, 3X8) and 2 plain washer (3X0.5X7) securing the damper cover to the CR unit.
Note) If the any ink cartridge is installed, remove it to avoid ink leakage during disassembly and
assembly.
3. Remove the damper cover.
4. Inset tweezers into the small cutout inside the CR unit to push the notch. Then remove the CR PW
sensor cover covering the black and color cables by pulling it up.
5. Remove the CR PW sensor board assembly from the black head cable.
CBP Screws (3x8)
Plain Washer (3X0.5X7)
Damper Cover
CR PW Sensor Connector Cable
for the Black Head
CR Unit
CR PW Sensor Board
Assembly
Plain Washer (3X0.5X7)
CR PW Sensoe Cover
Notch
Fi
ure 3-5. CR PW Sensor Board Assembl
Removal