EPSON Stylus COLOR 3000
Rev. A
3-1
3.2.11 Printer Mechanism Disassembly
Section 3.2.11.1 thorough to Section 3.2.11.18 describe procedures for printer mechanism unit
disassembly.
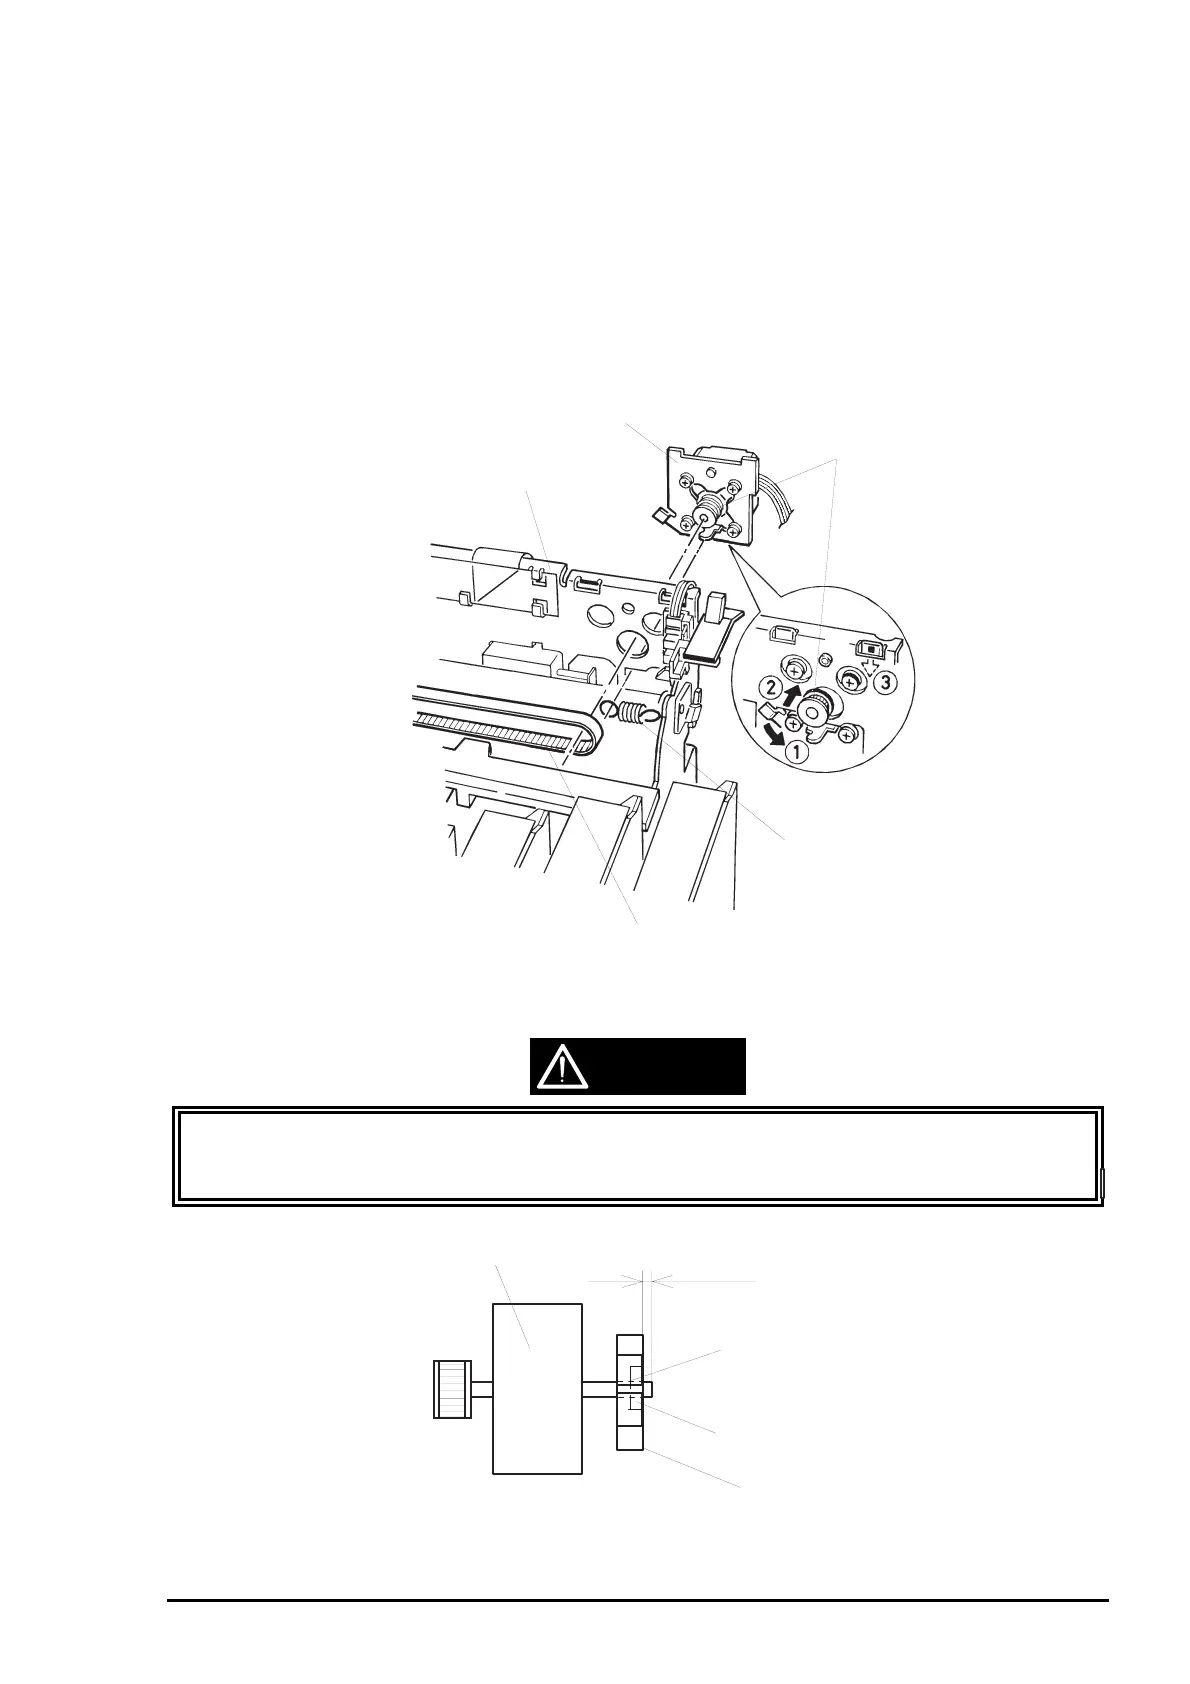
3.2.11.1 CR Motor Removal
1. Remove the printer mechanism unit. (See Section 3.2.6.)
2. Dismount the belt tension spring to loosen the timing belt.
3. Remove the timing belt from the pulley on the CR motor.
4. Release the joint for the CR motor and base frame assembly by turning the motor counterclockwise in
the order shown by the steps 1 to 3 in Figure 3-13. Then remove the CR motor by pulling it toward the
bottom edge of the base frame assembly.
CAUTION
CR motor fan and CR motor assembly are 2 separate parts. Therefore be sure to mount the
CR motor fan with specified adhesive when replacing the CR motor. Make sure that you
leave some portion of 0 to 2 mm on the end of the CR motor shaft, as shown in Figure 3-14.
Base Frame Assembly
CR Motor
CR Motor Pulley
Timing Belt
Belt Tension Spring
Figure 3-13. CR Motor Removal
CR Motor Assembly
Indent side facing outward
CR Motor Fan
Adhesion
Shaft End :0~2 mm
Figure 3-14. Adhering the CR Motor Fan to the CR Motor