Disassembly and Assembly
Rev. A
3-3
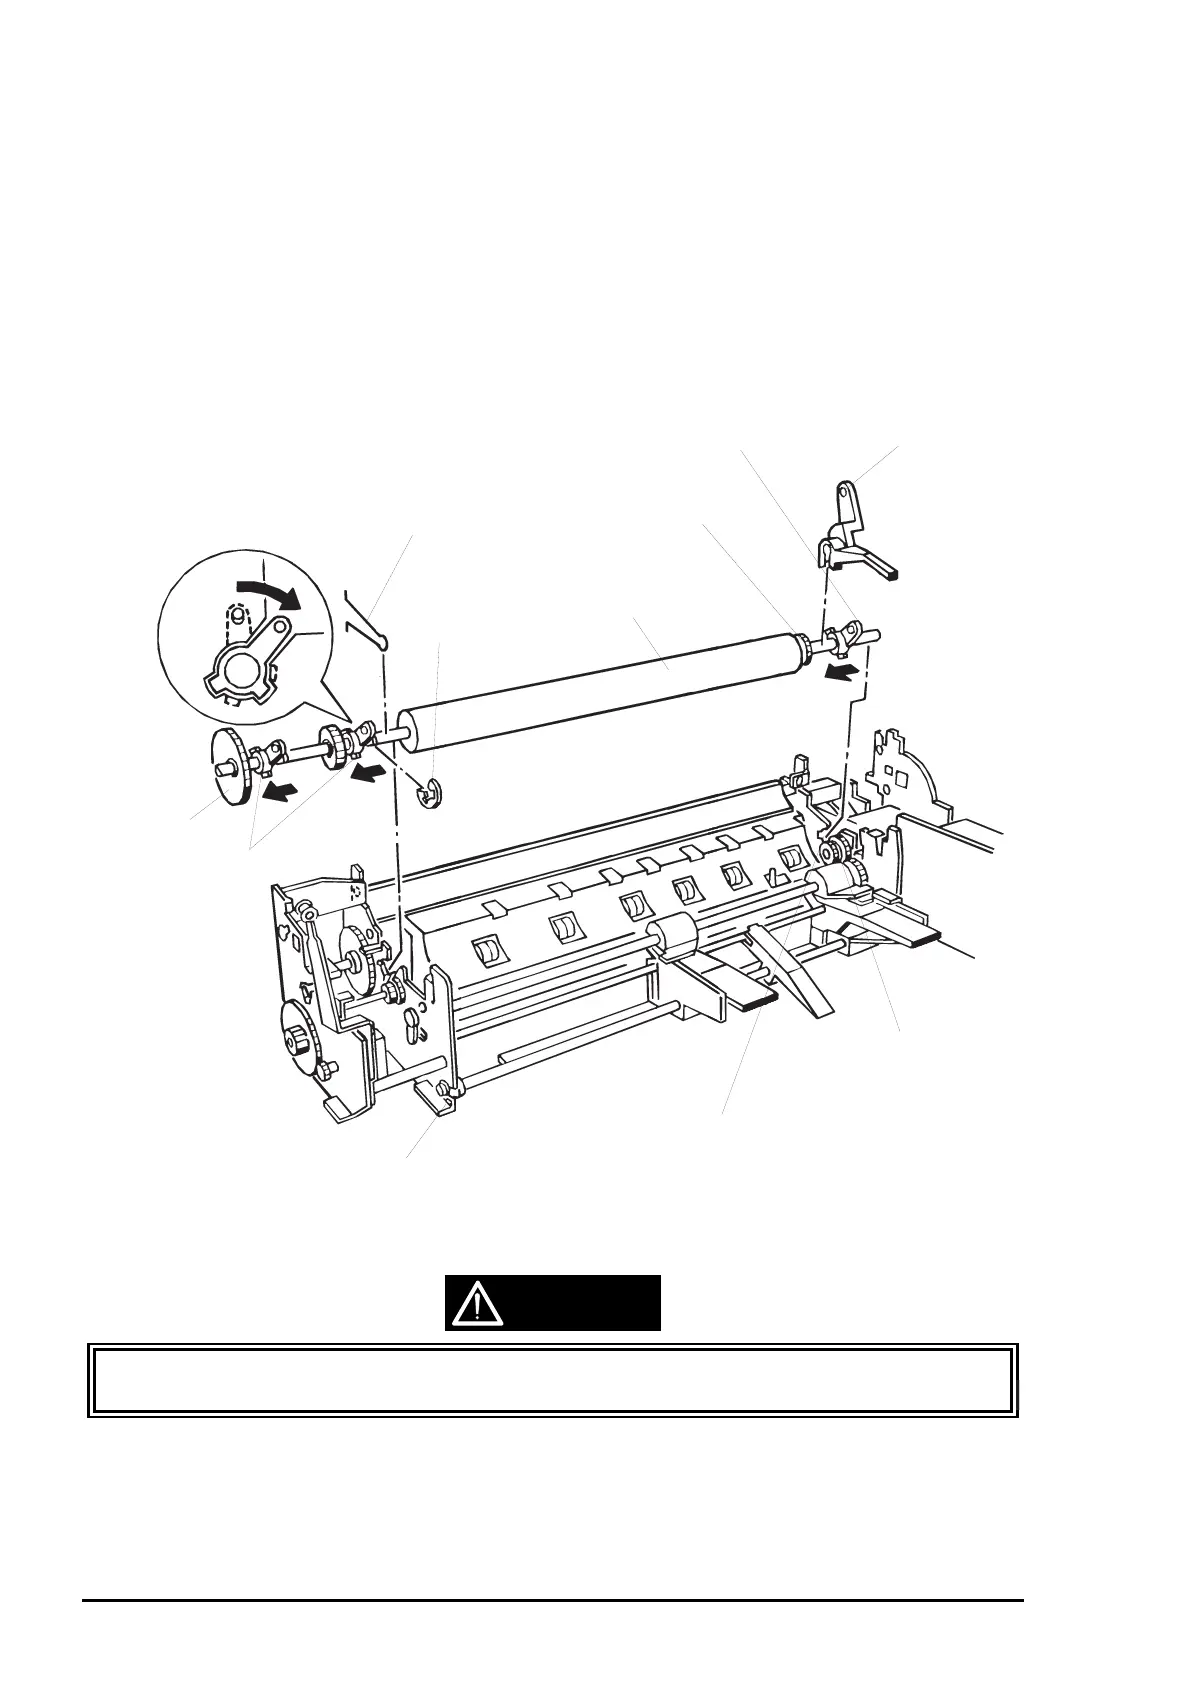
3.2.11.16 PF Roller Removal
1. Remove the printer mechanism unit. (See Section 3.2.6.)
2. Remove the paper eject frame unit. (See Section 3.2.11.6.)
3. Remove the CR unit. (See Section 3.2.11.14.)
4. Remove the base frame assembly. (See Section 3.2.11.15, Step 4 to 10.)
5. Remove the roller contact spring in the left part of the PF roller.
6. Remove the trigger lever from the PF roller.
7. Turn the PF roller bushings at the right and left ends of the PF roller and release joints with right/left
frame assemblies and left main frame assembly.
8. Remove 1 E-ring attached to the left end of the PF roller.
9. Shift the PF roller left and release the joints for the PF roller gear (24) and ASF transmission ratchet.
Then remove the PF roller.
Do not touch the gears with your bare hands. Otherwise they will be damaged and lose
accuracy.
Trigger Lever
ASF Transmission Ratchet
Left Main Frame Assembly
Gear (56.4)
Roller Contact spring
Gear (24)
PF Roller Bushings
PF Roller Bushing
Trigger Transmission Lever
PF Roller
E-ring
Figure 3-34. PF Roller Removal
CAUTION

 Loading...


