EPSON Stylus CX3500/CX3600/CX3650/CX4500/CX4600 Revision A
DISASSEMBLY AND ASSEMBLY Disassembly 155
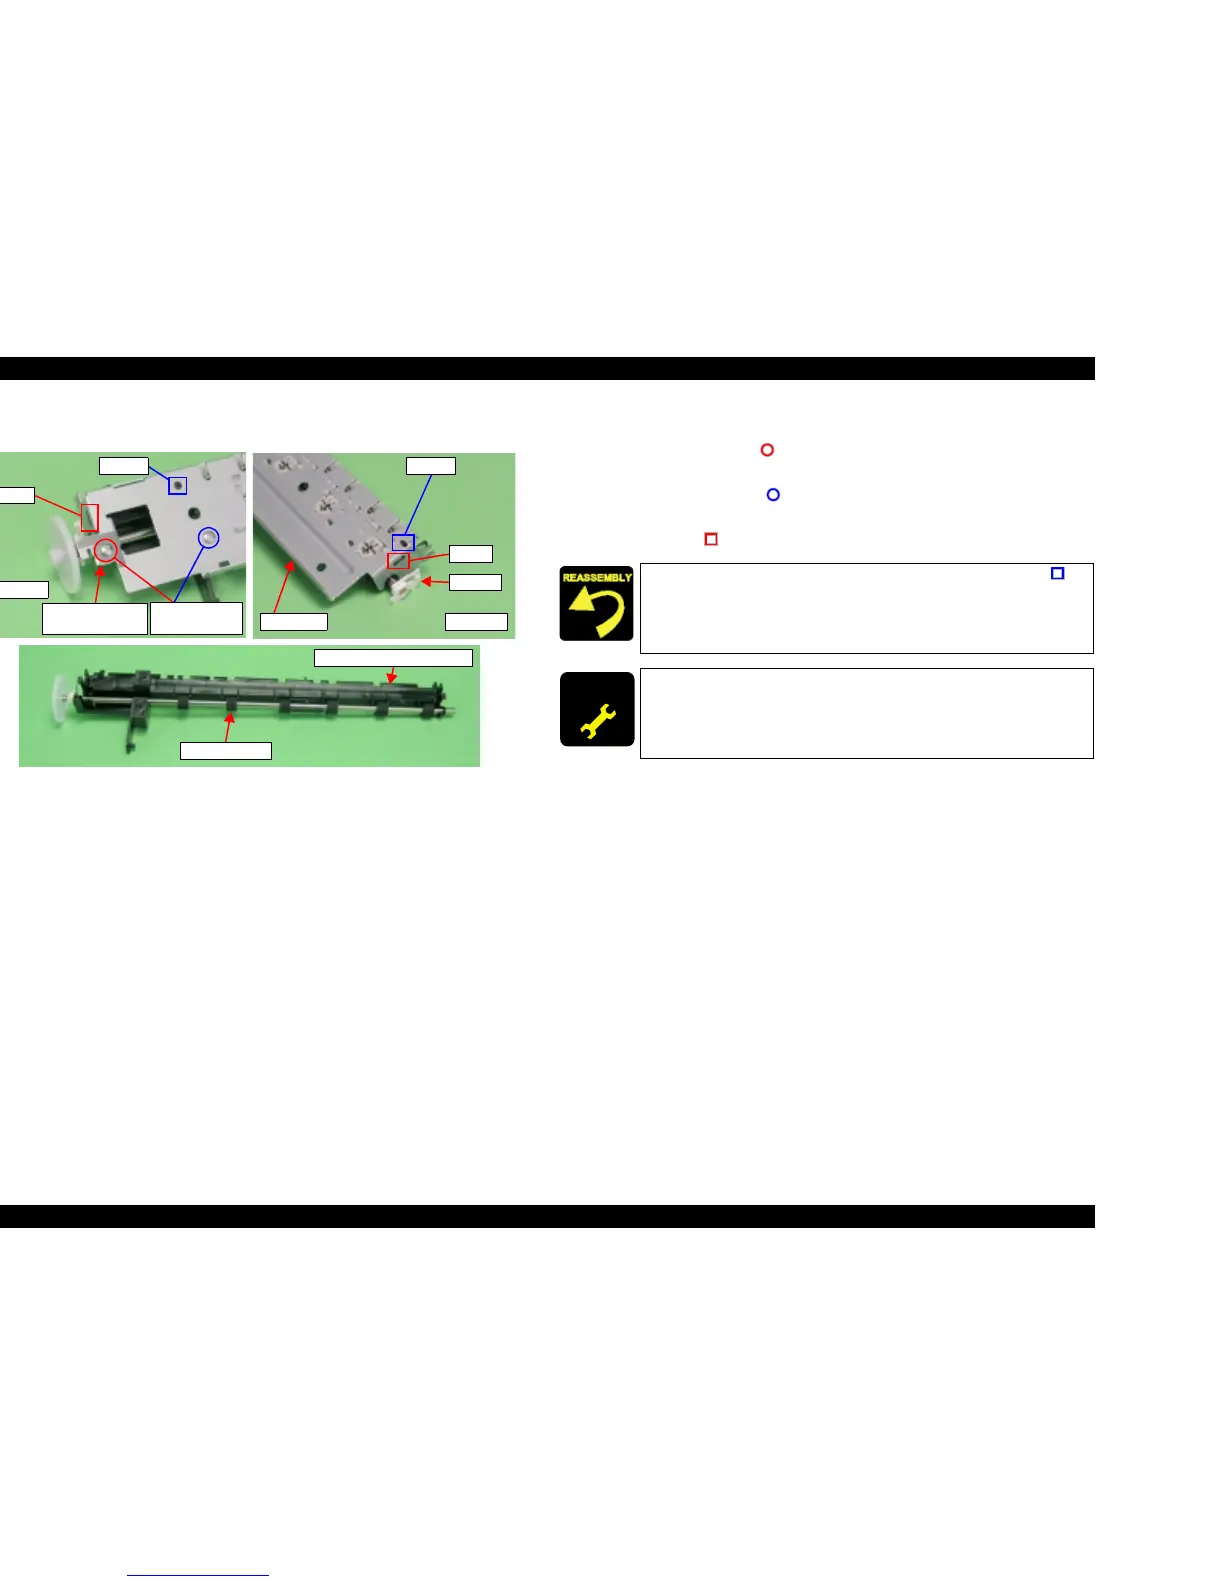
V External View (2)
Figure 4-46. EJ Frame Unit Removal (2)
6. Remove the right Bush 5 from EJ Frame Unit.
7. Remove the screw (x1, ) for securing EJ Frame Grounding Spring, and
then remove EJ Frame Grounding Spring.
8. Remove the screws (x1, ) for securing Front Paper Guide Support.
9. Remove Front Paper Guide Support along with EJ Roller Unit while releasing
the hooks (x2, ) for securing Front Paper Guide Support.
Right side
Bush 5
Hook
Dowel
EJ Frame
Left side
Hook
Dowel
C.B.S 3x6 F/Zn
(4±1kgfcm)
EJ Frame
Grounding Spring
Front Paper Guide Support
EJ Roller Unit
T Align positioning holes (x2) of EJ Frame with dowels (x2, ) of
Front Paper Guide Support.
T Confirm that EJ Roller Unit operates smoothly.
ADJUSTM ENT
REQUIRED
When changing the Front Paper Guide Support for new one, always
apply grease G-46 to the specified portions.
T Refer to Chapter 6, Figure 6-8 (p.178)

 Loading...


