EPSON Stylus CX3500/CX3600/CX3650/CX4500/CX4600 Revision A
ADJUSTMENT Adjustment by using adjustment program 166
5.2.10 Head angular adjustment
V Adjustment procedure
1. Set Normal Paper A4/Letter on the Paper Support.
2. Select “Head angular adjustment” in the Adjustment Program.
3. Click the [Print] button to print following two head angular check patterns.
• Band pattern
• Raster offset pattern
4. Check the printed patterns and select a pattern number that has the least
amount of misalignment.
5. Click the [Input] button to write the adjustment value of checked items.
6. Print the check pattern again, and check the adjustment result.
V [Treatment procedure for NG product]
1. Replace the Print Head with new one again.
2. Print the check pattern, and check the adjustment result.
3. If the result is NG level, confirm the installation condition of removed parts
during disassembly.
4. Perform Step 2 again.
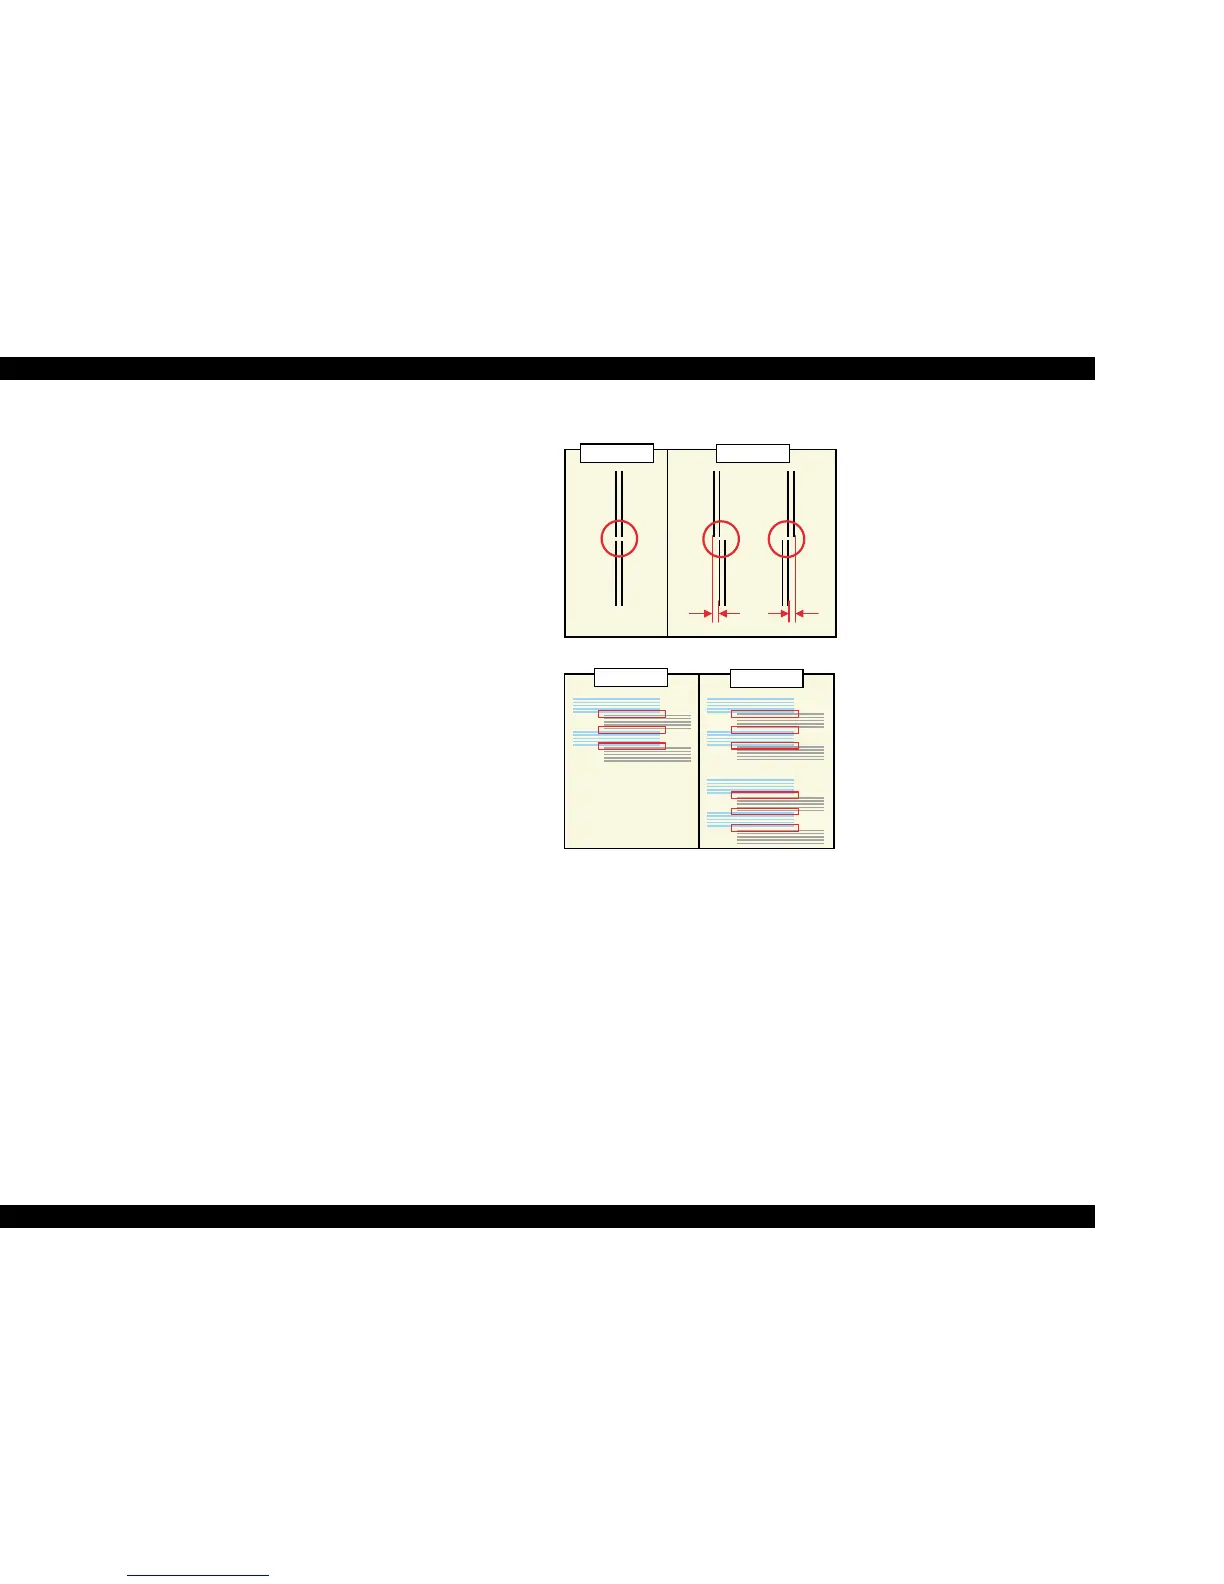
Figure 5-2. Head Angular Adjustment Printing Pattern
OK pattern
NG pattern
OK pattern
NG pattern
T Band pattern
T Raster offset pattern
[Judging Standard]
The printed line should be straight line.
[Reference]
Shift length of Head Angular pattern is MAX
±50µm
[Judging Standard]
Spaces between the cyan lines and gray lines
should be uniformed.
[Reference: Standard value in manufactory]
±70µm

 Loading...


