EPSON Stylus Photo R1900/R2880/R2000/R2000s/SC-P400 Series Revision I
Disassembly And Assembly Disassembling the Printer Mechanism 112
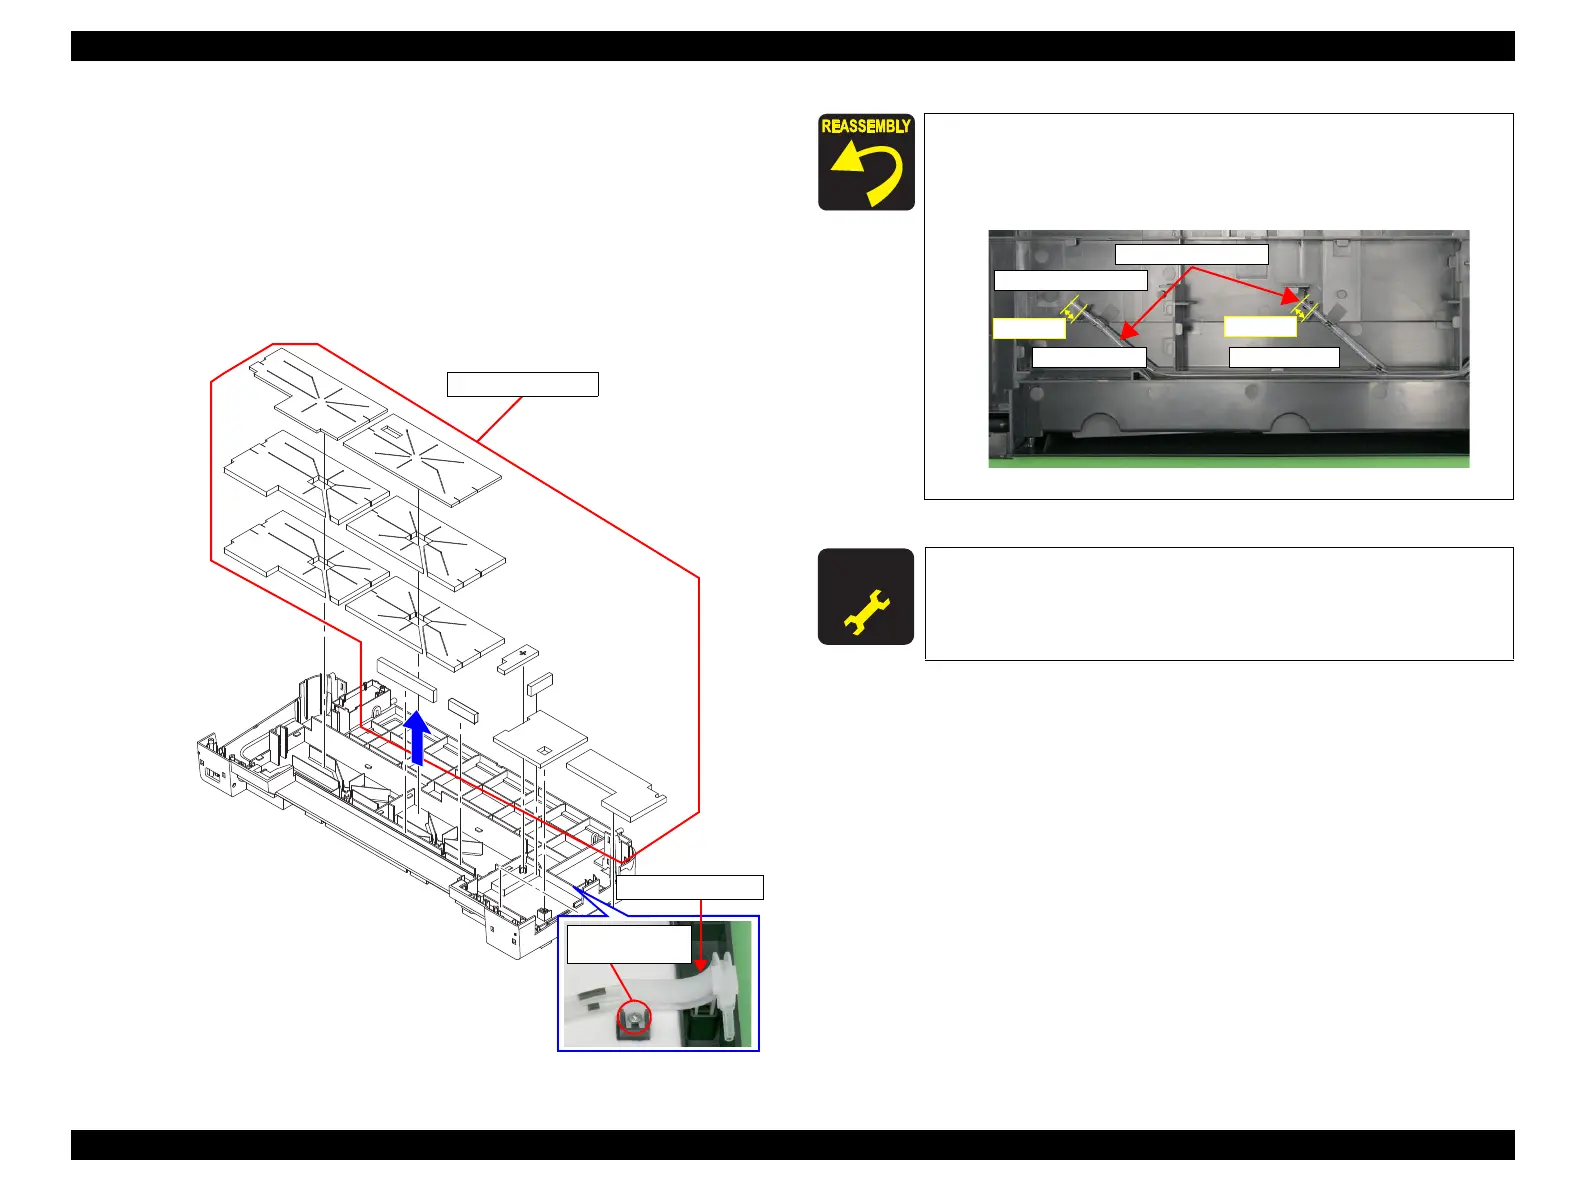
4.4.8 Waste Ink Pad / Waste Ink Tube Left/Right
1. Remove the Printer Mechanism. (Refer to 4.4.4 Lower Housing / Printer
Mechanism (p.98))
2. Remove the C.B.P. M3 x 8 screw that secures the Ink Tube Holder, and remove
the Ink Tube Holder.
3. Remove the 12 Waste Ink Pads from the Lower Housing.
4. Remove the Waste Ink Tube Left/Right from the Lower Housing.
Figure 4-101. Removing the Waste Ink Pad
4) C.B.P. M3x8
(6±1 kgf.cm)
Waste Ink Pad
Ink Tube Holder
Check the positions and the routing of the upper and lower
Waste Ink Tubes.
0 digit side : Lower side
130 digit side : Upper side
Figure 4-102. Positions of Waste Ink Tubes
A D J U S T M E N T
R E Q U I R E D
After replacing or removing the Waste Ink Pads, always make the
required adjustments referring to the following.
•“Chapter 5 Adjustment (p.139)”
0 Digit Side130 Digit Side
Waste Ink Tubes
10±1mm
10±1mm
Waste Ink Tubes

 Loading...


