EPSON Stylus Photo R1900/R2880/R2000/R2000s/SC-P400 Series Revision I
Disassembly And Assembly Removing the Housings 79
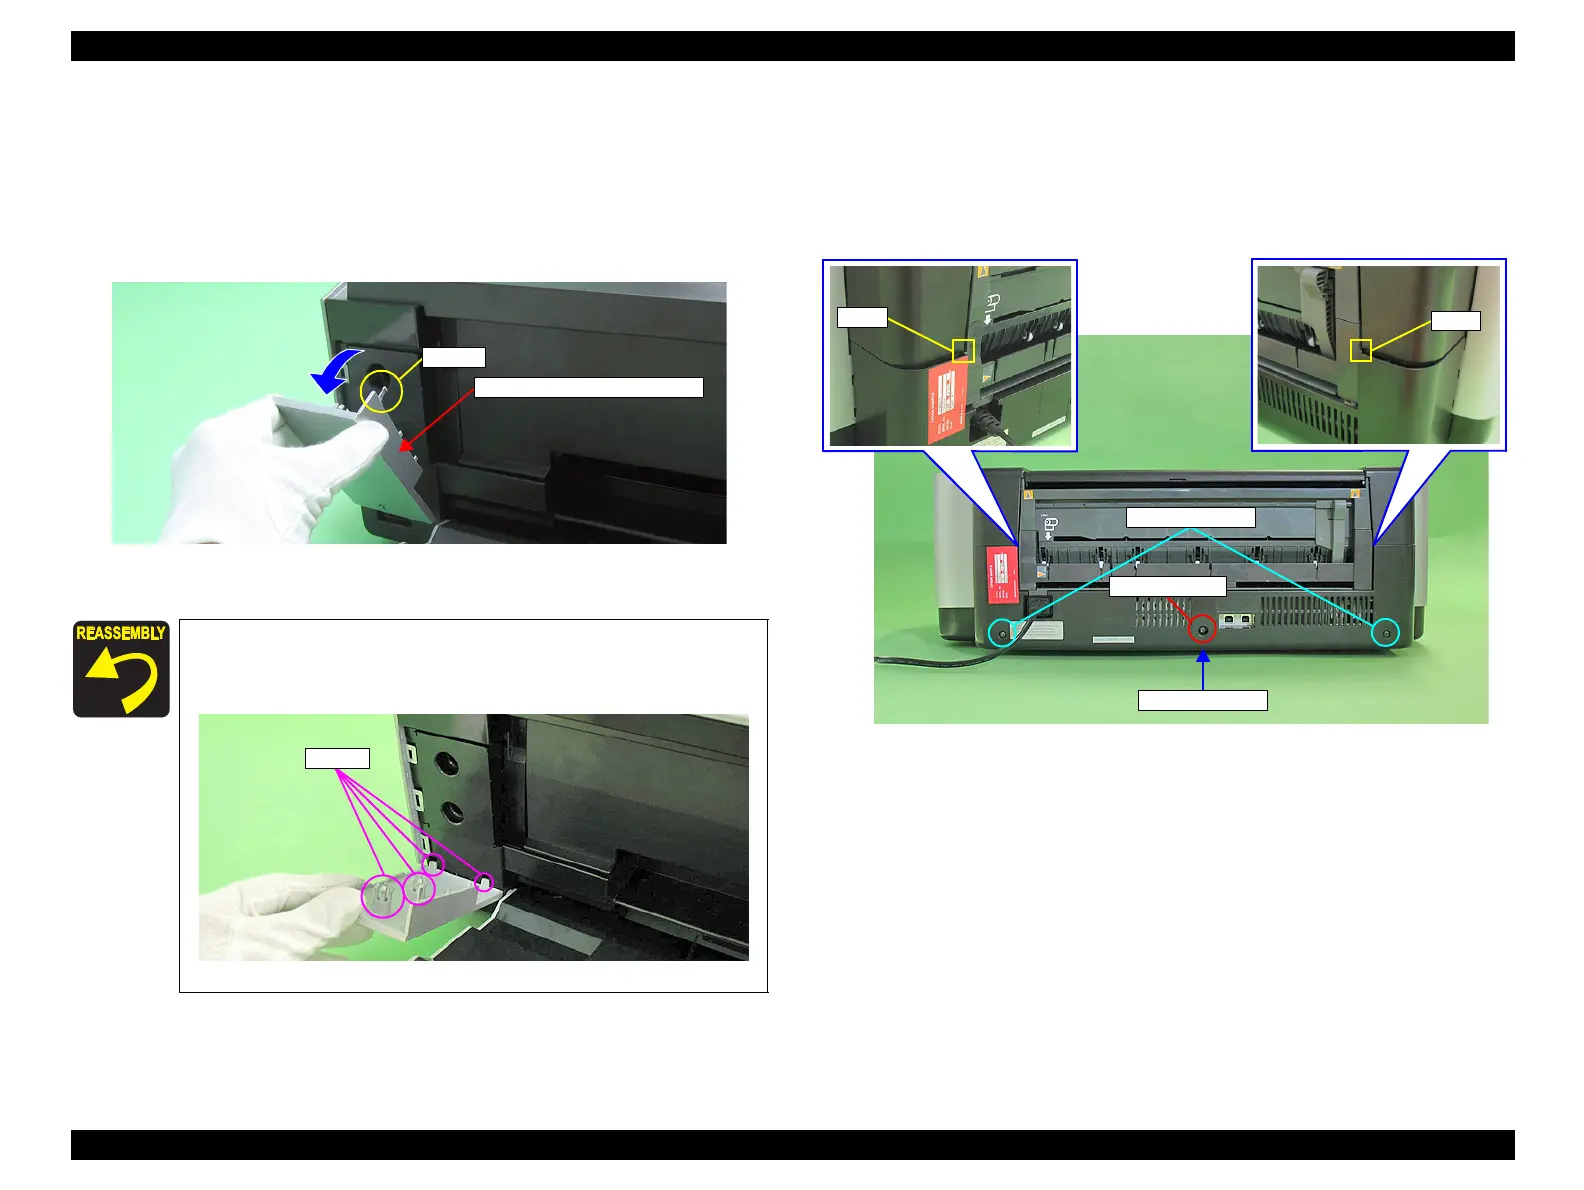
4.2.3 Front Decoration Plate Left/Right
1. Open the Stacker Assy.
2. While releasing the hook on the Front Decoration Plate Left, open the plate in the
direction of the arrow, and remove it.
3. In the same way, remove the Front Decoration Plate Right.
Figure 4-9. Removing the Front Decoration Plate Left/Right
4.2.4 Rear Housing
1. Remove the two C.B.P. M3 x 10 screws and the C.B.S. M3 x 6 screw that secure
the Rear Housing.
2. Disengage the two tabs from the Upper Housing and remove the Rear Housing.
Figure 4-11. Removing the Rear Housing
When installing the Front Decoration Plate L/R, insert the two
hooks at the bottom of them into the holes of the Lower housing,
then secure the Front Decoration Plate L/R with the other hooks.
Figure 4-10. Reinstalling the Front Decoration Plate Left/Right
Front Decoration Plate Left
Hook
1) C.B.P. M3x10
Rear Housing
2) C.B.S. M3x6

 Loading...


