EPSON Stylus Photo R1900/R2880/R2000/R2000s/SC-P400 Series Revision I
Disassembly And Assembly Disassembling the Printer Mechanism 121
4.4.14 Front Paper Guide / Paper EJ Roller /
Front Paper Guide Pad Tray
1. Remove the Paper EJ Frame Assy / Front Cover / CDR Tray Base. (p.114)
2. Release the Carriage Lock, and move the Carriage Unit to the center.
(Refer to 4.1.6
Locking/Unlocking the Carriage and Opening/Closing the CDR Tray Base (p.75))
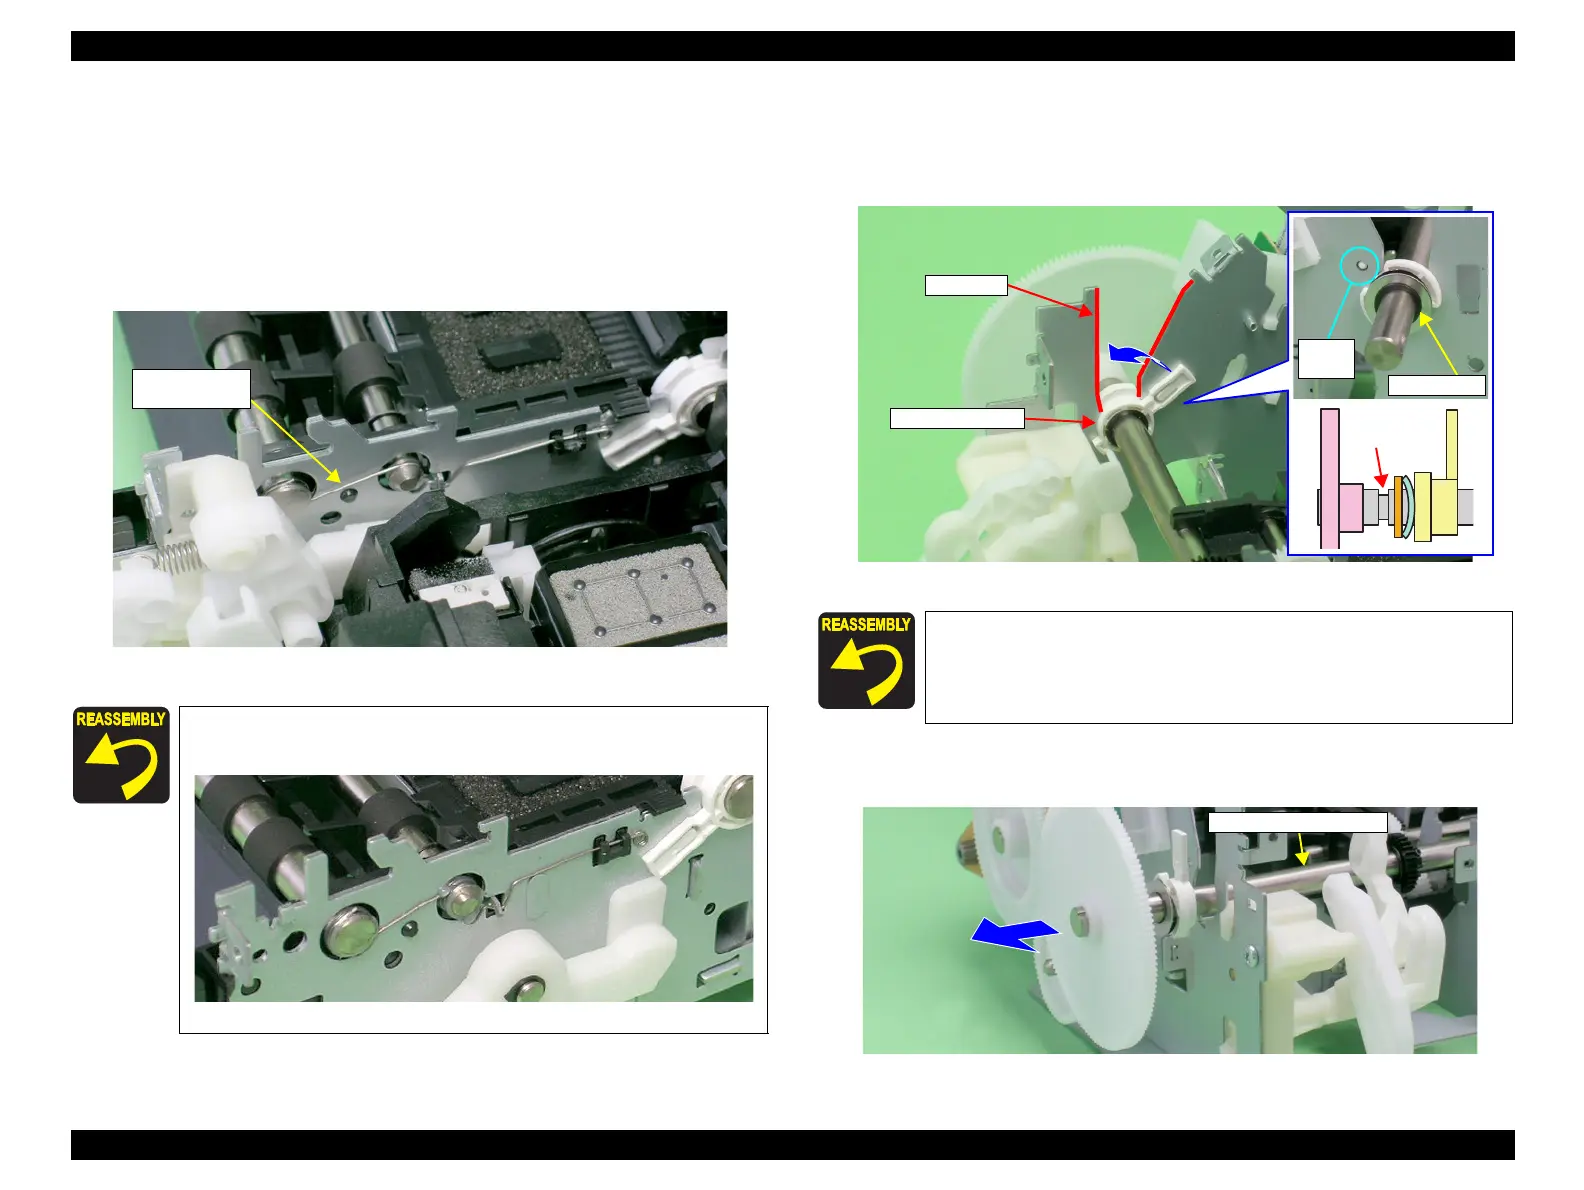
3. Remove the EJ Grounding Spring from the Main Frame with tweezers.
Figure 4-129. Removing the EJ Grounding Spring
4. Remove the Spacer from the EJ Roller Shaft.
5. Remove the guide pins on Left Bushing 8 from the Main Frame using tweezers,
and turn Left Bushing 8 toward you to align with the notches on the Main Frame.
Figure 4-131. Removing the Spacer and Rotating the Left Bushing 8
6. Slide the Front Paper EJ Roller to the left, and remove the Left Bushing 8 from the
Main Frame.
Figure 4-132. Removing the Left Bushing 8
Referring to Figure 4-130, correctly install the EJ Grounding
Spring.
Figure 4-130. Reinstalling the EJ Grounding Spring
Insert the spacer into the groove on the Front Paper EJ Roller.

 Loading...


