EPSON Stylus Photo R1900/R2880/R2000/R2000s/SC-P400 Series Revision I
Disassembly And Assembly Disassembling the Printer Mechanism 122
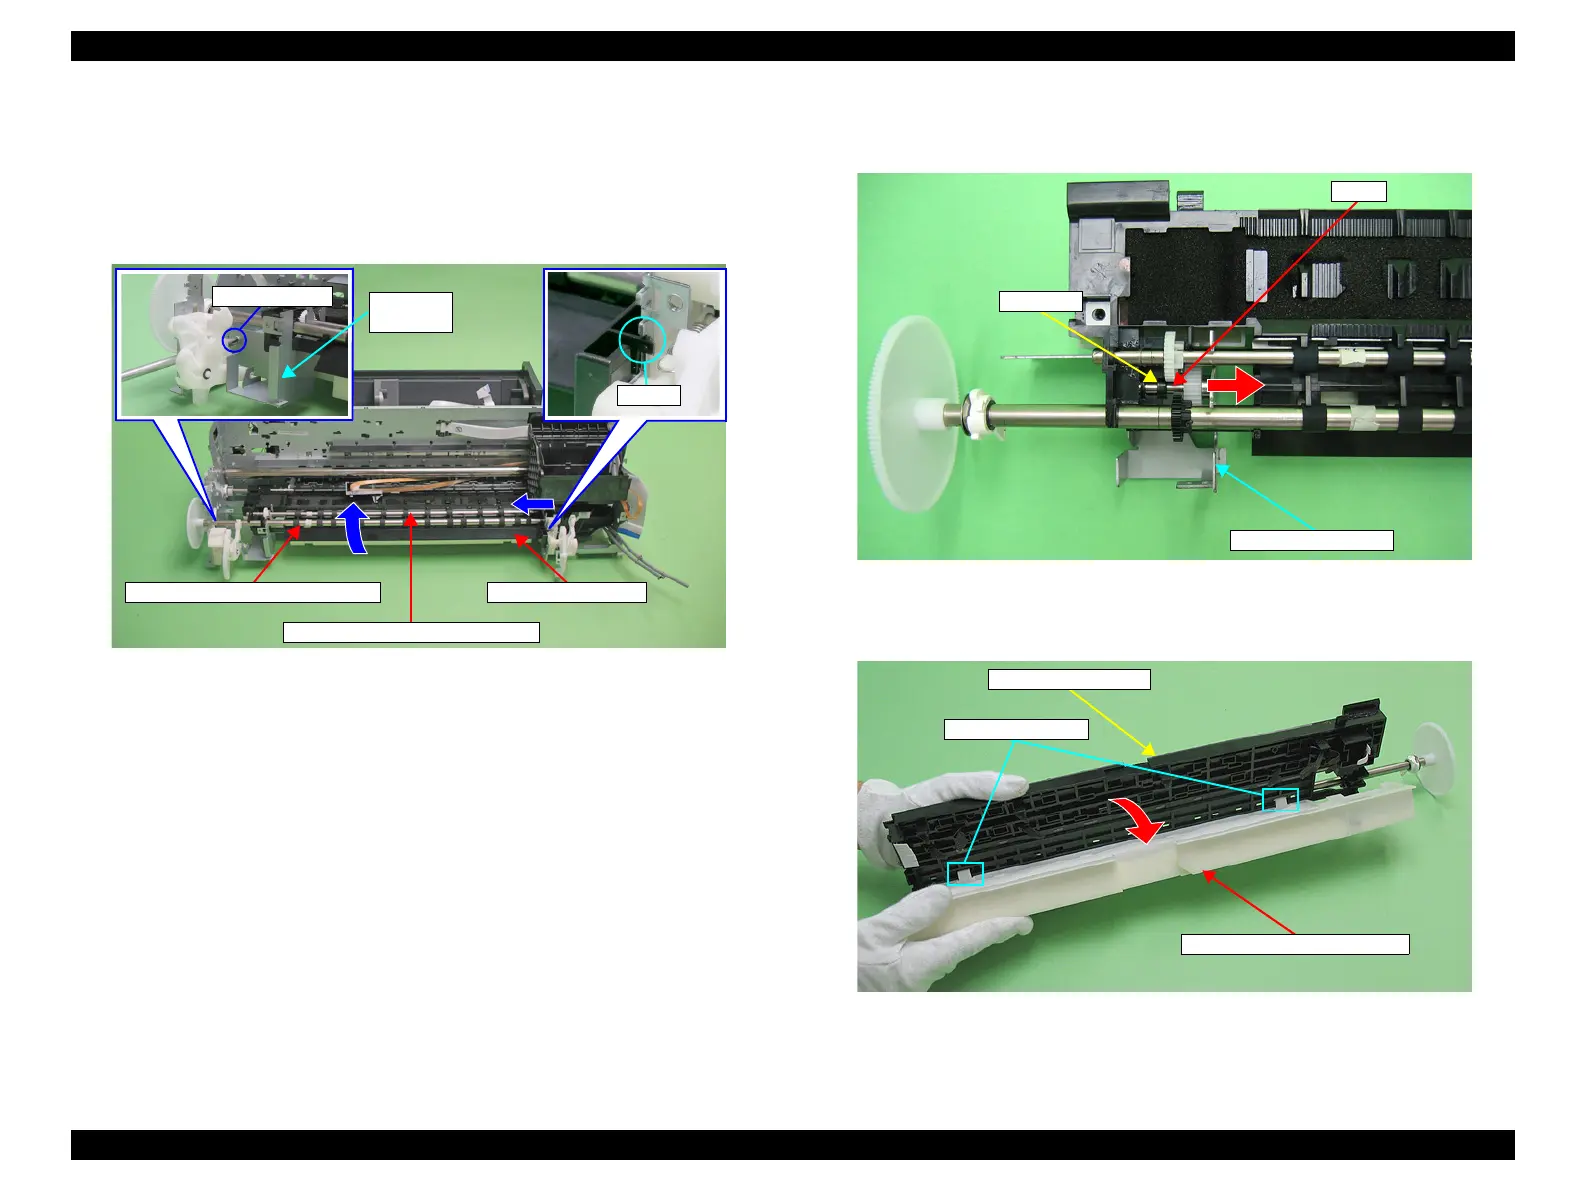
7. Return the Carriage Unit to its home position.
8. Remove the C.B.S. M3 x 6 screw that secure the Left Front Frame.
9. Release the tab that secures the Front Paper Guide from the Main Frame and slide
the Front Paper Guide to the left, and turn it until the front side faces up to remove
the Front Paper Guide together with the Paper EJ Roller.
Figure 4-133. Removing the Front Paper Guide and Paper EJ Rollers
10. Pull out the Shaft of the Left Front Frame from the bushing of the Front Paper
Guide and remove the Left Front Frame.
Figure 4-134. Removing the Front Paper Guide/Paper EJ Rollers (2)
11. Remove the Front Paper Guide Pad Tray in the direction of the arrow.
Figure 4-135. Removing the Front Paper Guide Pad Tray
Paper EJ Rollers (Front side) Front Paper Guide
Paper EJ Rollers (Back side)
Left Front Frame
Shaft
Bushing
Front Paper Guide
Front Paper Guide Pad Tray
Tabs and holes

 Loading...


