Stylus Photo R1900/R2880/R2000/R2000s/SC-P400 Series Revision I
Stylus Photo R2000/R2000s Adjustment 195
8.4.4 Adjustment Procedure
Mac address setting
<Overview>
This printer have a network function and stores there MAC address (Media Access
Control Address) in the EEPROM on the Network Board. The Network Board supplied
as an ASP does not come with the MAC address written on it, therefore, you are
required to set the MAC address to the new Network Board after replacement. The
following explains the procedure.
<Preparation>
When replacing the Network Board, make sure to note down the MAC address written
on a label on the Upper M/B Shield Plate.
<Setting flowchart>
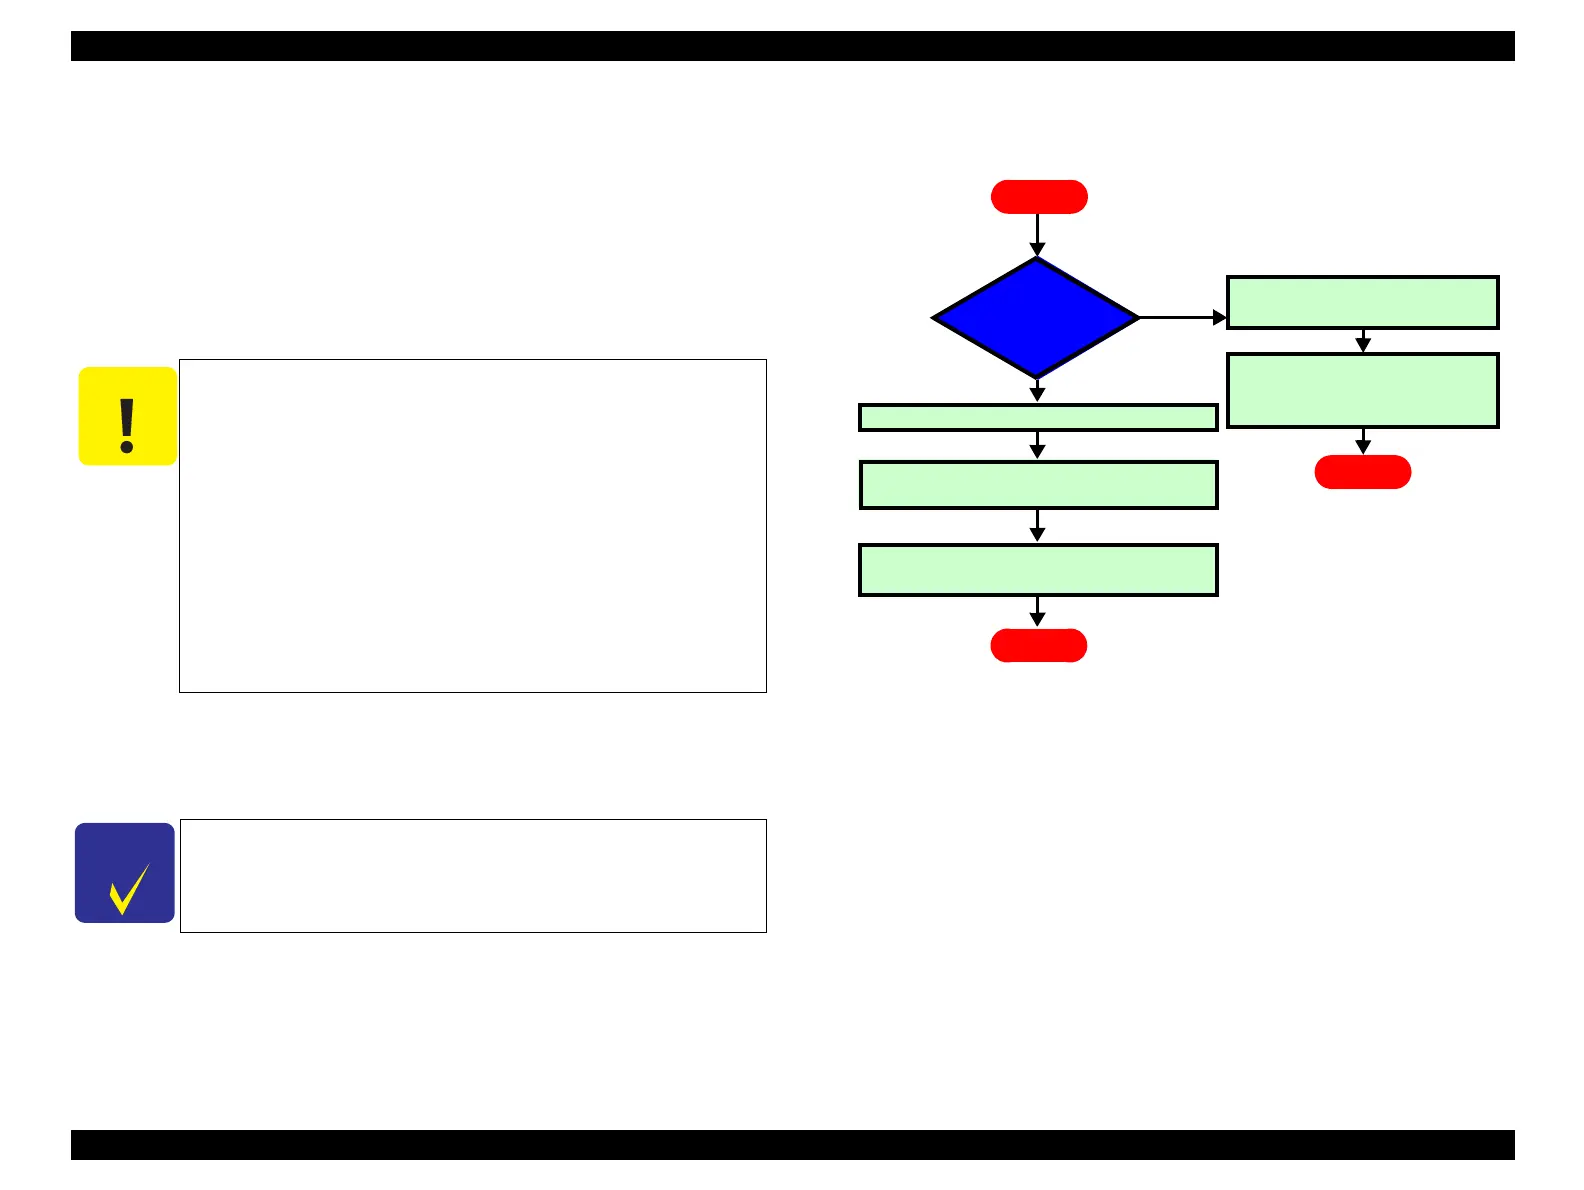
Figure 8-15. MAC Address Setting Flowchart
To avoid a conflict of MAC address on a network, make sure to
correctly follow the MAC address setting flowchart given on
the right.
The MAC Address is written correctly, The IP Address will be
initialized also.
The user should be notified of the change of MAC address
because of the following reasons.
•
If the user has set the printer’s MAC address on a router, the
repaired printer with a new MAC address cannot be
connected to the network.
•
The default printer name on a network consists of “EPSON”
and the last six digits of the MAC address. Therefore, the
printer name becomes different from the previous one.
You are required to enter the last six digits of the MAC address
(xx:yy:zz) on the adjustment program.
MAC address example: 00:00:48:xx:yy:zz
(“xx, yy, zz” represents a value unique to each printer)
Yes
No
Replace the Network Board with a new one.
Enter the new MAC address using the adjustment
program.
END
Replace the Network Board with a
new one.
END
Is the MAC address on
the label readable?
No
Attach a new MAC address label on the Upper M/
B Shield Plate.
START
Enter the MAC address written on
the label using the adjustment
program.

 Loading...


