EPSON Stylus Photo R1900/R2880/R2000/R2000s/SC-P400 Series Revision I
Adjustment Adjustment 148
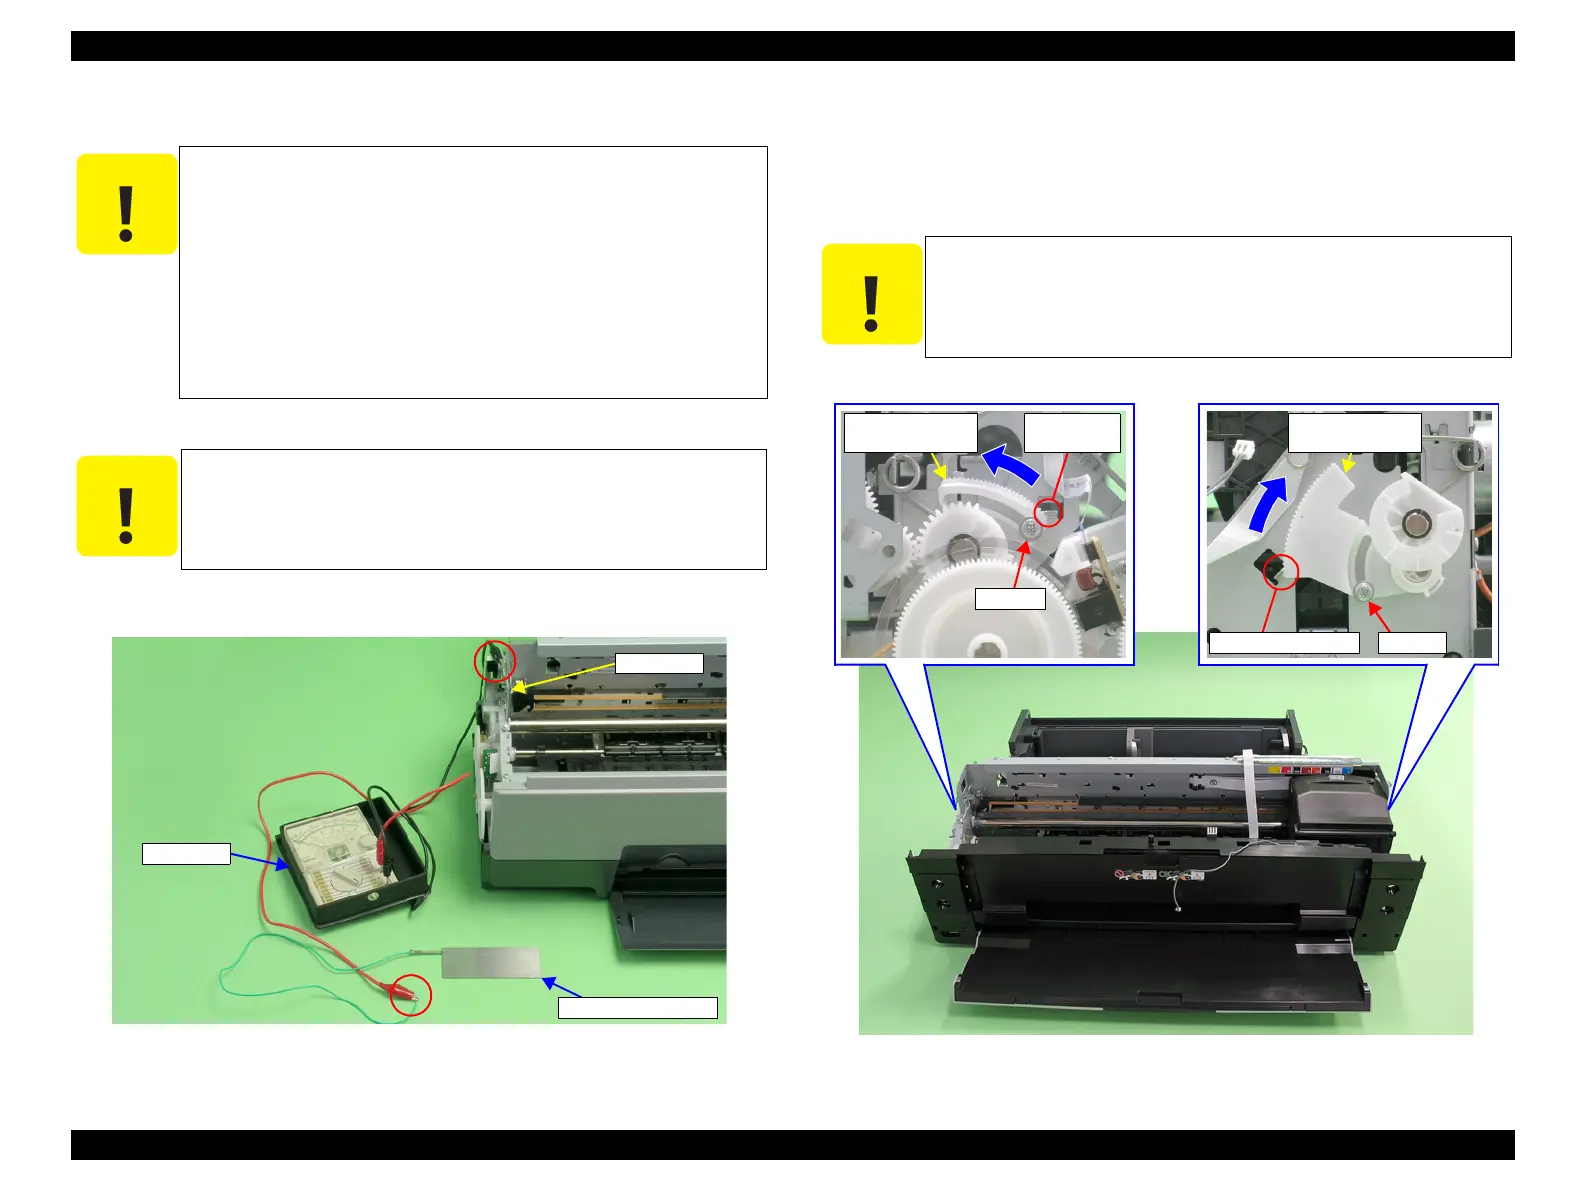
5.2.2.1 PG Adjustment Method
1. Install the printer on a level base.
2. Connect the Tester to the printer frame and Adjustment Gauge.
Figure 5-4. Connecting the Tester
3. Load unused Ink Cartridges of all colors into the Carriage Unit.
4. Loosen the screw that secures the Parallelism Adjust Bushing.
5. Turn the Parallelism Adjust Bushing upward to match the frame edge and the
bottom of the Parallelism Adjust Bushing gear.
Figure 5-5. Setting the Parallelism Adjust Bushing
Before starting PG adjustment, completely wipe drops of ink
around the Print Head. Remaining drops of ink will stick to the
continuity measurement portion of the Adjustment Gauge, and
generate continuity before the continuity measurement portion
makes contact with the metal frame around the Print Head,
interrupting accurate PG Adjustment.
As the ink in the Print Head may stick fast and damage the
Print Head during PG Adjustment, make the continuity time
detected with a tester as short as possible. (Maximum 3
minutes)
Place the printer on a level, warp-free table. Normal PG
Adjustment cannot be performed on a warped table.
Frame
Tester
Adjustment Gauge
When the Parallelism Adjust Bushing is turned upwards, the frame
rises up and PG narrows. Make sure that the frame does not come
into contact with the Print Head when performing the following
procedure.
Parallelism Adjust
Bushing
Positioning Point
Screw
Positioning
Point
Screw
Parallelism Adjust
Bushing

 Loading...


