EPSON Stylus Photo R1900/R2880/R2000/R2000s/SC-P400 Series Revision I
Adjustment Adjustment 152
5.2.3.1 How to Adjust the PF Roller Shaft Center
Support Position
1. Before performing this adjustment, remove the following parts:
Lower Housing
(Refer to 4.4.4 Lower Housing / Printer Mechanism (p98))
ASF Assy (Refer to 4.4.6 ASF Assy (p108))
Board Assy
(Refer to 4.3.1 Board Assy (Main Board/Power Supply Board)
(p86))
Carriage Unit (Refer to 4.4.5 Carriage Shaft / Carriage Unit (p100))
2. Install the printer on a level base.
3. Set the PF Roller Shaft Position Adjustment Jig in place on the Level block, and perform
zero adjustment.
Long hand position: Turn the dial to adjust the “0” position on the scale to the
long hand position with the jig set in place on the Level
block.
Short hand position: Check it.
Figure 5-13. Setting the PF Roller Shaft Position Adjustment Jig (1)
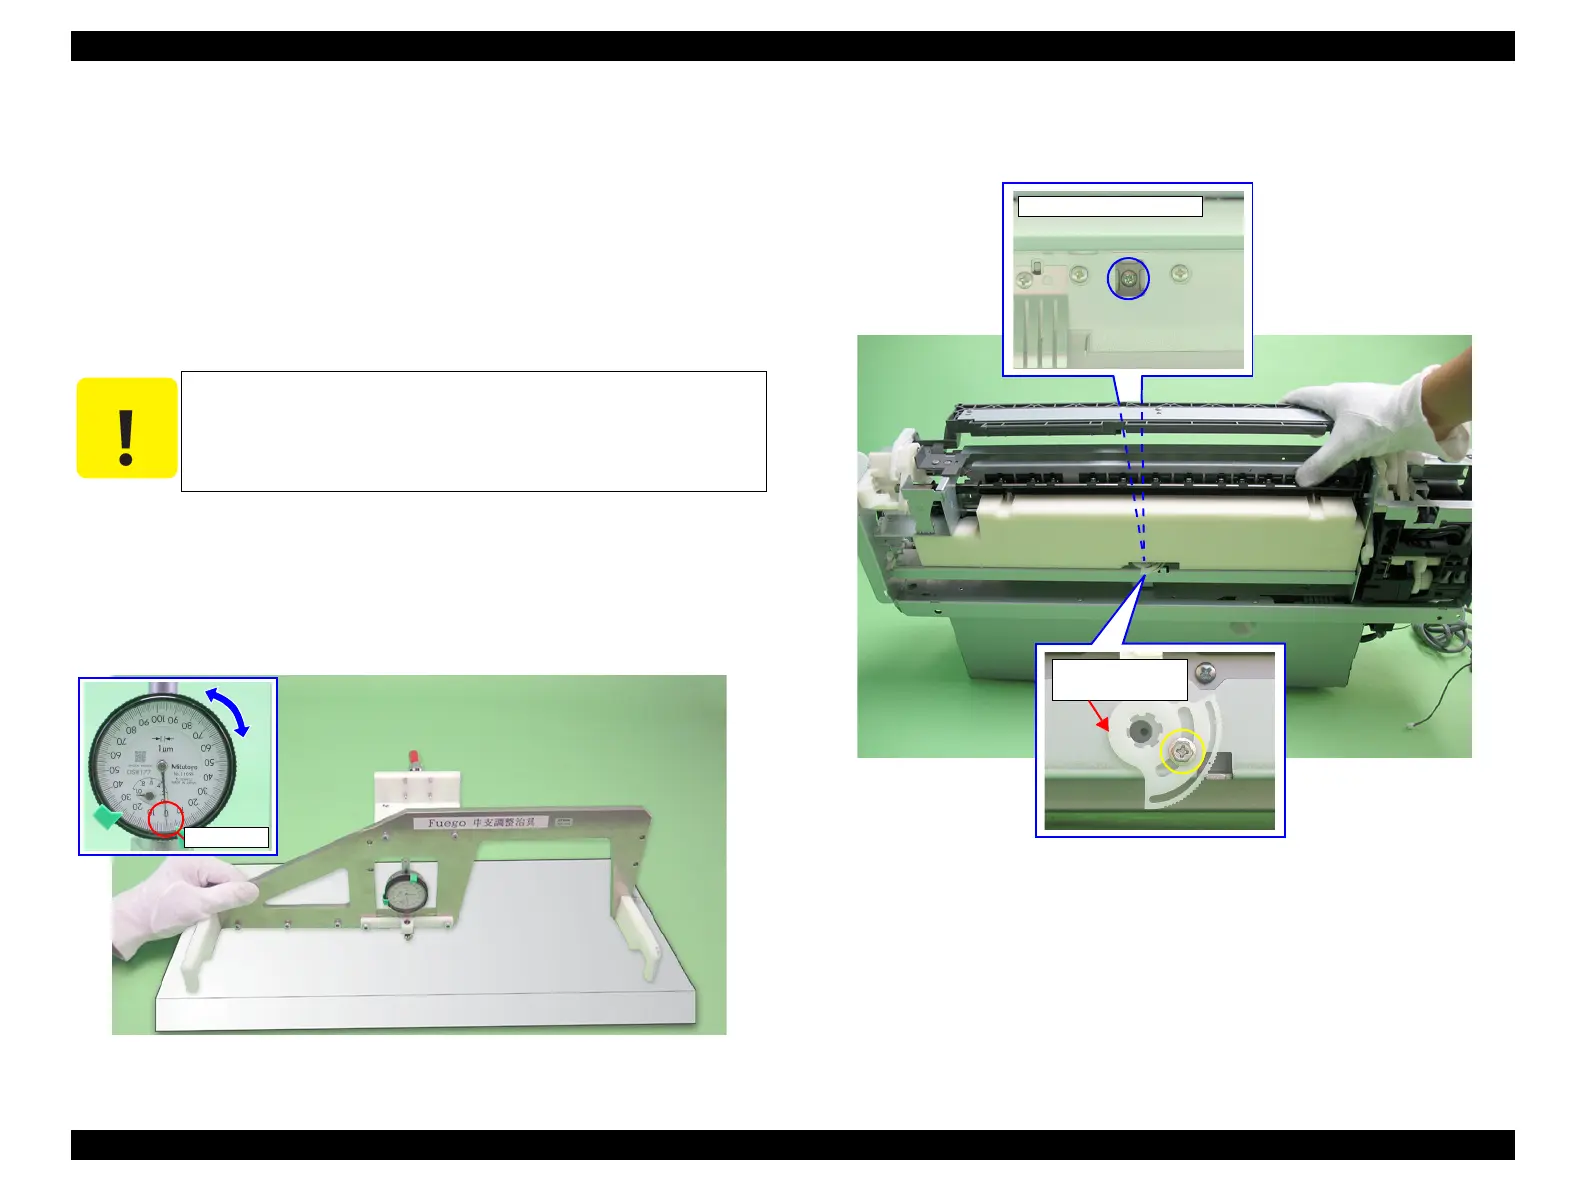
4. Tilt the Printer Mechanism at about 45 degrees, and loosen the screws that secure
the Center Support Bushing Cam and the Center Support Bush.
Figure 5-14. Center Support Bushing Cam and the Screw
Place the printer on a level, warp-free table. This adjustment
cannot be performed correctly if it is performed on a warped table.
Center Support
Bushing Cam

 Loading...


