EPSON Stylus Photo R1900/R2880/R2000/R2000s/SC-P400 Series Revision I
Troubleshooting Overview 63
Dot missing and
mixed colors
Although inks are ejected from
the Print Head to the Cap, the
trouble still occurs after
executing a cleaning cycle or
replacing the Ink Cartridges.
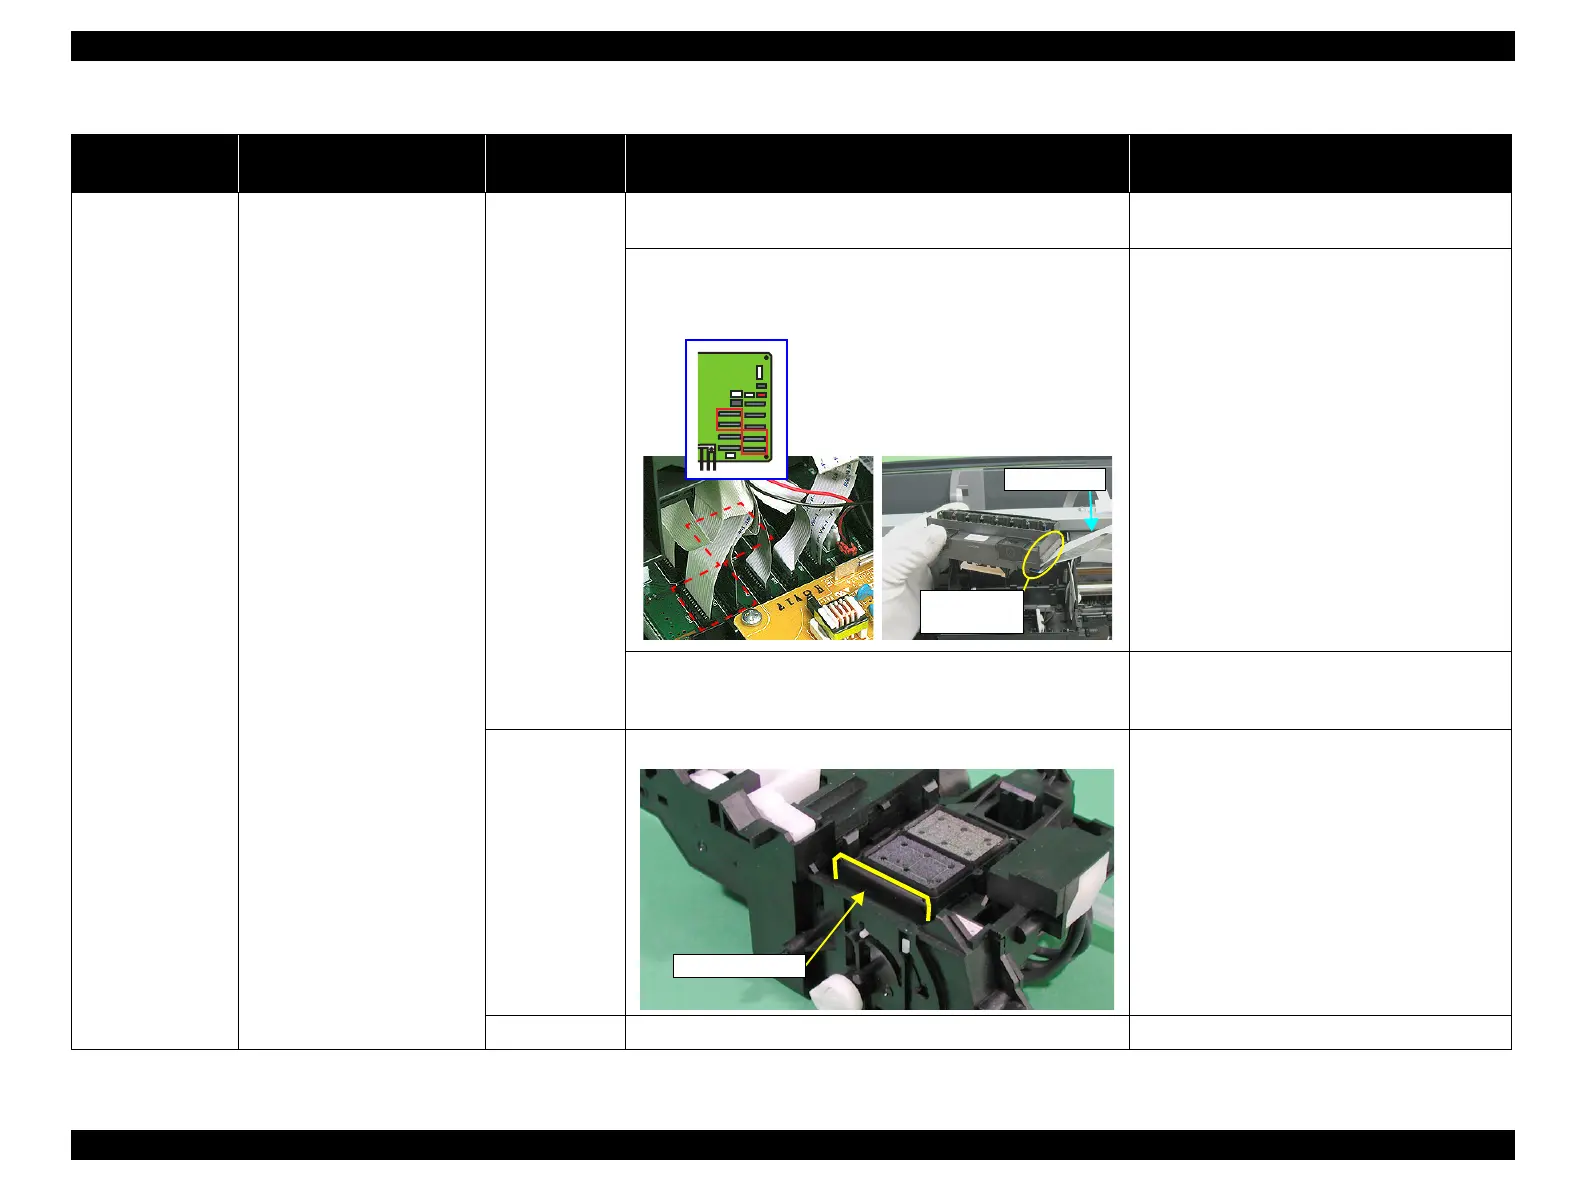
Print Head 1. Run a Nozzle Check, and check the printed pattern if it has
broken lines or missing segments.
1. After running a Head Cleaning, check the
Nozzle Check Pattern again.
2. Check that the Head FFC is securely connected to the Print Head
connector and Main Board connectors CN11, CN12, CN13, and
CN14.
2. Connect the Head FFC to the Print Head
connector and Main Board connectors CN11,
CN12, CN13, and CN14.
3. Check if the Head FFC is not damaged. 3. Replace the Head FFC with a new one.
If the trouble still occurs after replacing it,
replace the Print Head with a new one.
Ink System Unit
Cleaner Blade
1. Check if the Cleaner Blade is covered with paper dust or is bent. 1. Replace the Ink System Unit with a new one.
Main Board 1. Check the Main Board for damages. 1. Replace the Main Board with a new one.
Table 3-15. Print Quality Troubles
Observed Faults Details of the Fault
Faulty Part/
Part Name
Check Point Remedy
Head FFC
Print Head
connector

 Loading...


