T3-B T6-B Maintenance 12. Joint #4
T-B series Maintenance Manual Rev.1 111
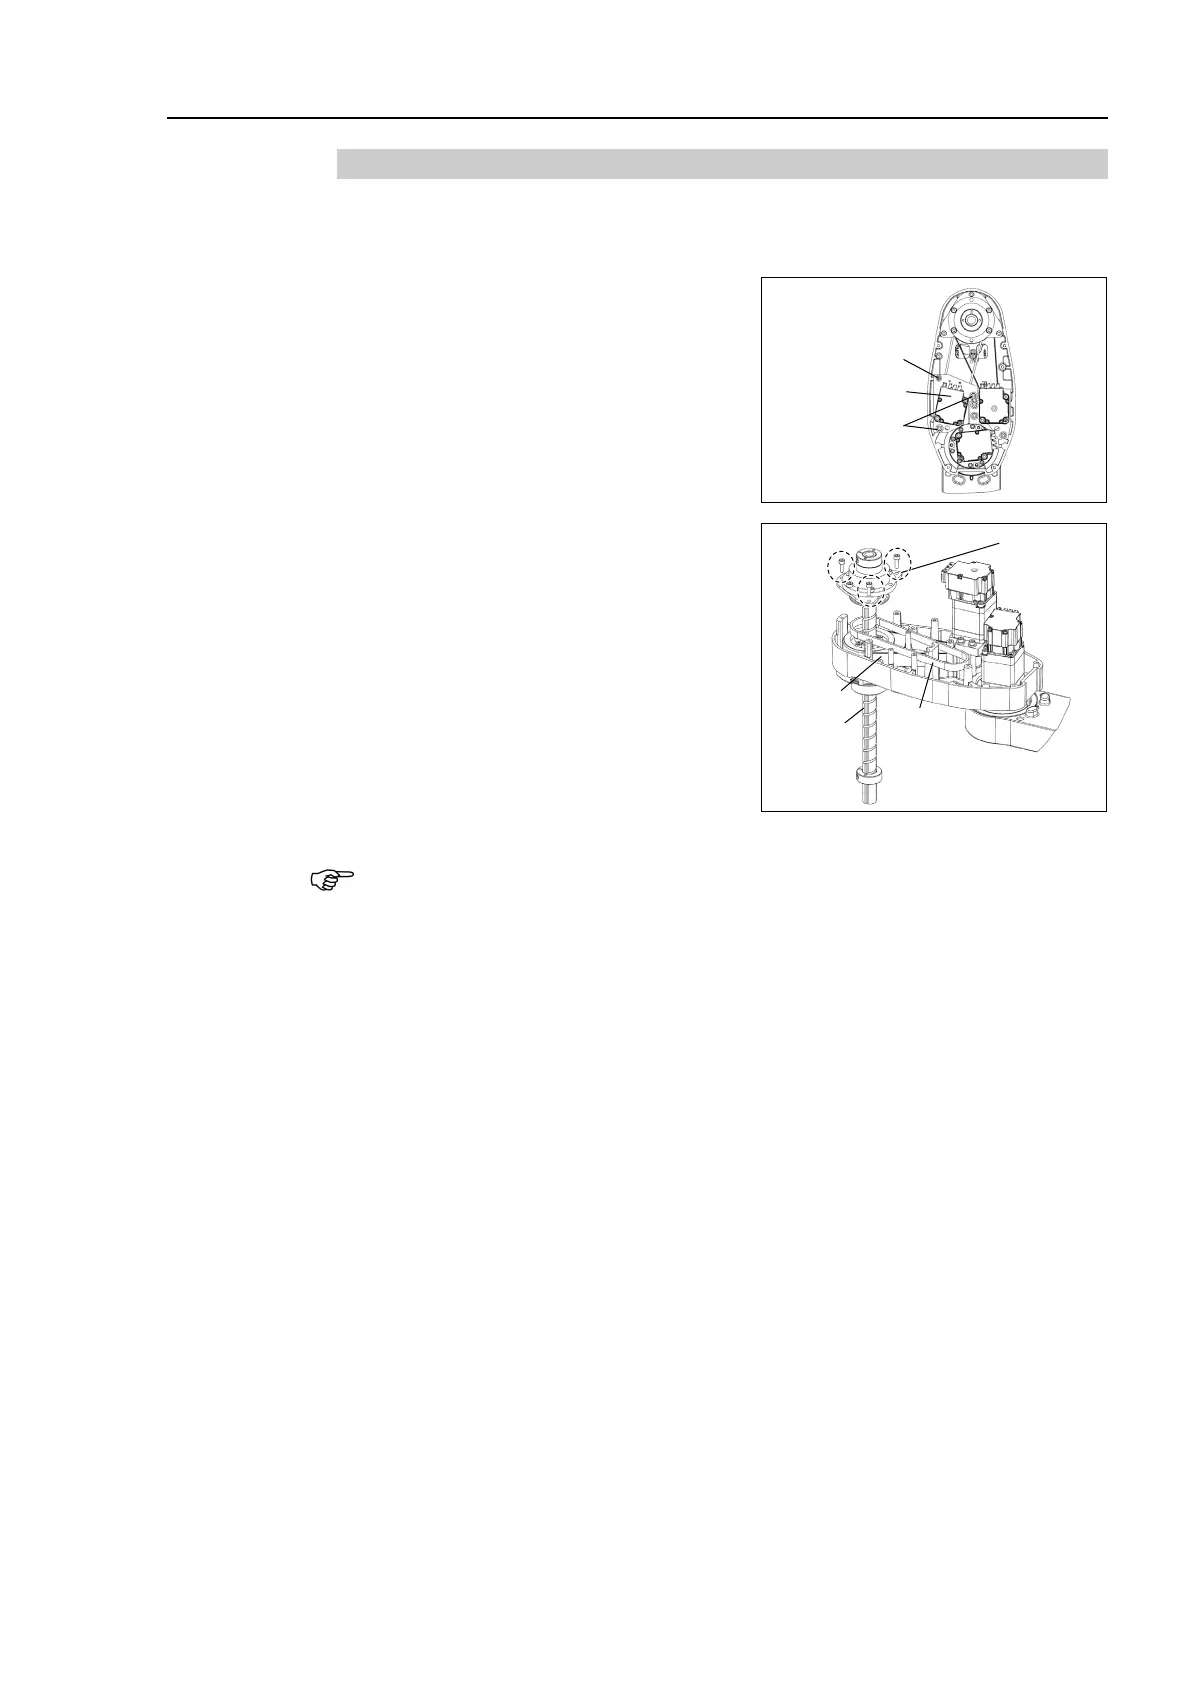
12.2.3 U Belt (T3-B)
U belt
Removal
Remove the Joint #4 motor unit.
Reference: 12.1 Replacing Joint #4 Motor “Joint #4 motor Removal”
Loosen the Joint #3 motor unit mounting
bolt.
a: 2-M4×15+M4 slotted hole washer
b: M3×12+M3 slotted hole washer
Unscrew the spline plate mounting screws.
3-M4×12
Holding the spline plate upward, pull out
the Z Belt and U belt.
socket head cap bolts, refer to “
2.4 Tightening Hexagon
Socket Head Cap Bolts
”.
Hold up the spline plate and set a new U belt around the U2 pulley.
3-M4×12
Make sure the gear grooves of the belt are fit into those of the pulleys completely.
Hold up the spline plate and set the Z belt around the Z2 pulley.
Make sure the gear grooves of the belt are fit into those of the pulleys completely.
Secure temporarily the spline plate on the Arm #2 and move the shaft up and down
several times
before securing the spline plate.
Mount the Joint #4 motor unit.
Reference: 12.1 Replacing Joint #4 Motor “Joint #4 motor Installation”
Apply the proper tension to the Z belt, and secure the Joint #3 motor unit.
Reference: 11.1 Replacing Joint #3 Motor “Joint #3 motor Installation”
Perform the calibration of Joints #3, #4.
Reference: 17. Calibration

 Loading...


