What to do if my ESAB Welding System's pressure is incorrect?
- SschmidtdanielSep 2, 2025
If the air pressure on your ESAB Welding System is outside of the proper range, check the air supply and pressure setting.
What to do if my ESAB Welding System's pressure is incorrect?
If the air pressure on your ESAB Welding System is outside of the proper range, check the air supply and pressure setting.
What to do if the pilot arc is on but the main arc does not transfer on my ESAB ESP-101 Welding System?
If the pilot arc is on but the main arc does not transfer on your ESAB Welding System, make sure the work clamp is connected to the work table.
What to do if my ESAB Welding System's torch has an error?
If your ESAB Welding System shows a torch error, it may be because the electrode is in contact with the nozzle. Check and replace consumables.
What to do if my ESAB Welding System has no air flow?
To troubleshoot no air flow in your ESAB Welding System, check the air inlet supply. The unit requires 500 cfh (14.2 cmh) at 70 to 80 psig (4.8 to 5.5 bars) with a 100 amp consumable set.
What to do if my ESAB Welding System shows "ESP-101"?
If your ESAB Welding System's display shows "ESP-101" instead of the current setting, disengage the torch trigger and restart the machine.
What to do if my ESAB Welding System's air does not shut off?
If the air does not shut off on your ESAB Welding System, check air test, the gas solenoid valve is energized when the switch is in the "on" position.
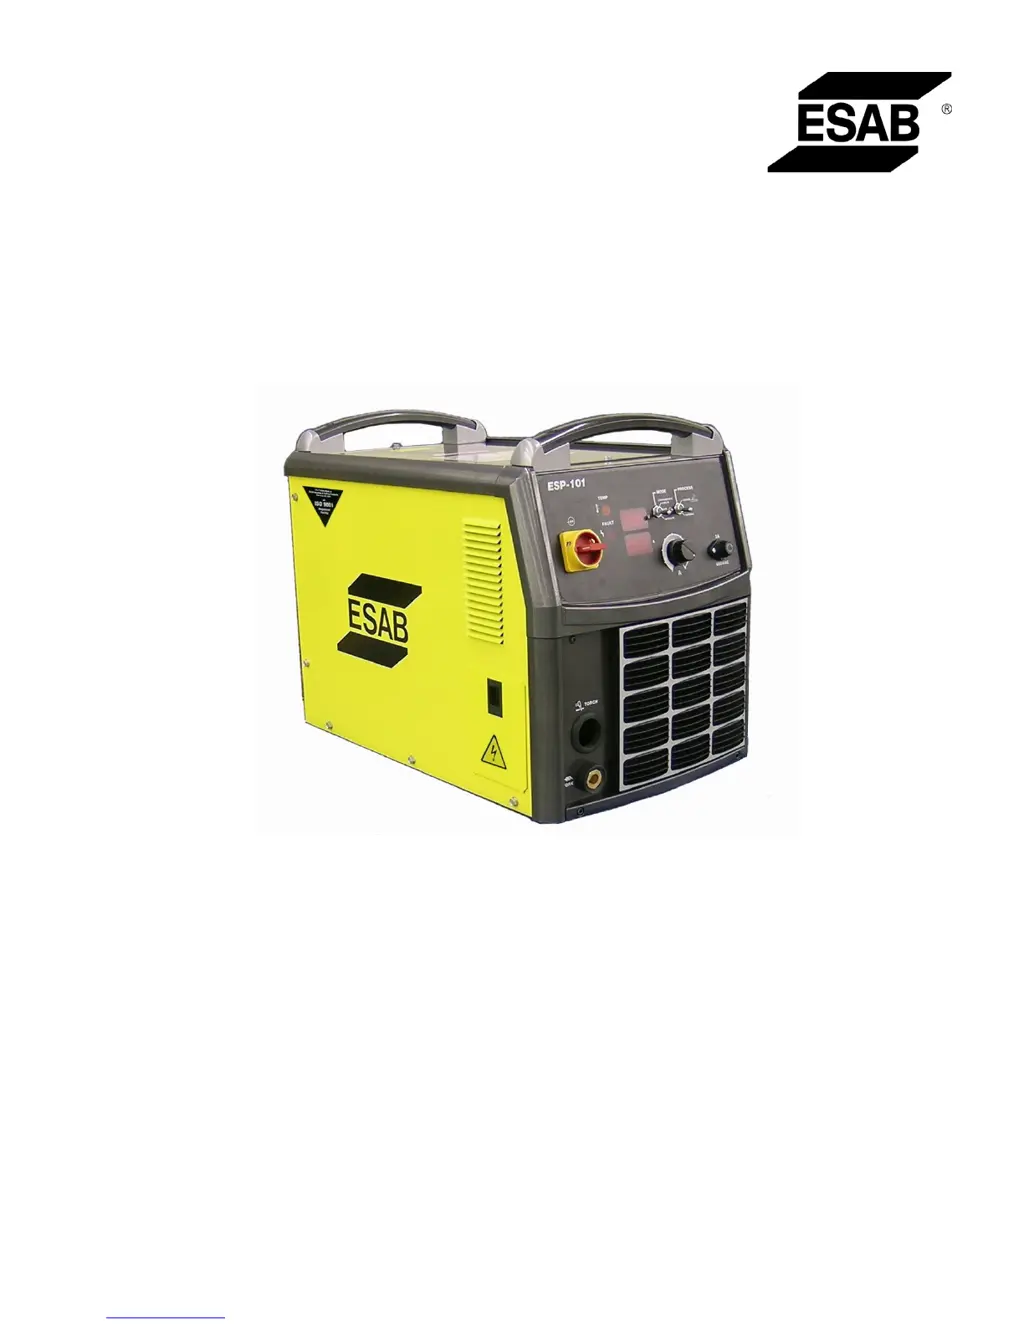
What to do if my ESAB ESP-101 Welding System overheats?
If your ESAB Welding System overheats, allow the unit to cool down and check for adequate ventilation.
What to do if the main arc is difficult to start on my ESAB ESP-101?
If the main arc is difficult to start on your ESAB Welding System, the most common reason is worn or missing consumables. Check and replace them if necessary.
Brand | ESAB |
---|---|
Model | ESP-101 |
Category | Welding System |
Language | English |
Comprehensive safety instructions for users in English, Spanish, and French.
Introduction to the ESP-101 system, its scope, and general features.
Specifics on the ESP-101 system, including specs, packages, and torch data.
Information on available system accessories and components.
Guidelines for proper installation, equipment, placement, and inspection.
Instructions for connecting the primary power input to the unit.
Specific connection details for the TUA2 Auto-Transformer.
How to connect the compressed air supply.
Connecting the unit to a CNC system.
Procedures for adjusting voltage divider and sampling output voltage.
Making secondary output connections and installing the PT-37 torch.
Installing the remote junction box for torch extension.
Explanation of all controls, displays, and indicator lamps on the unit.
Step-by-step cutting, electrode wear, and maintenance.
Factors affecting cut quality, dross formation, and troubleshooting common problems.
Routine inspection, cleaning, and general maintenance advice.
Guidelines for handling IGBTs and replacing modules.
General troubleshooting approach and list of error codes.
Detailed guides for specific issues like power, air flow, and arc problems.
Troubleshooting for junction boxes, voltage checks, and operational sequences.
Information on ordering parts, torque recommendations, and unit specifications.
Selecting air pressure units and details about the display board.