Design and function
TIG welding
099-000121-EW501
29.06.2015
5.9 TIG welding
5.9.1 Welding torch and workpiece line connection
Prepare welding torch according to the welding task in hand (see operating instructions for the
torch).
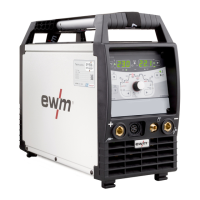
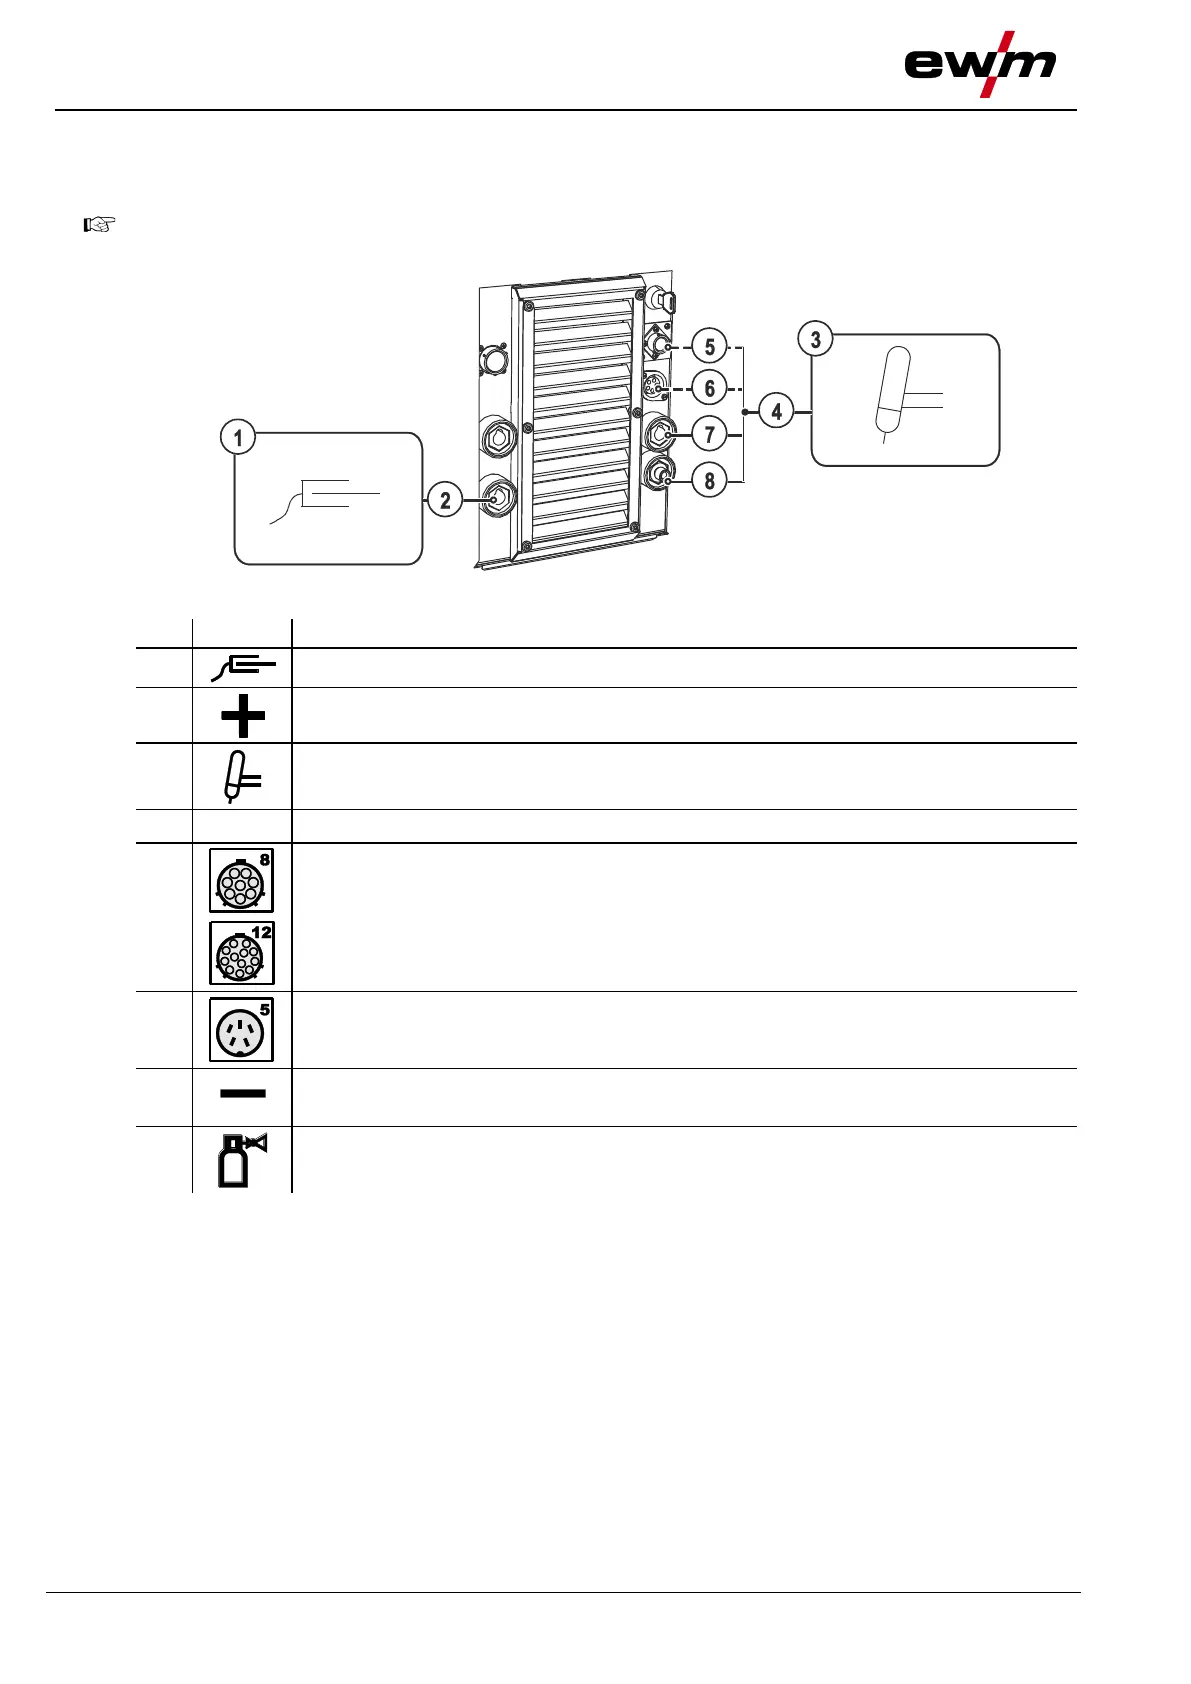
Figure 5-7
Connection socket for "+" welding current
Workpiece lead connection
Welding torch hose package
Connection socket, 8-pole/12-pole (depending on variant)
8-pole: Control cable TIG up/down or potentiometer torch
12-pole: Control cable TIG up/down torch with LED display (option)
Connection socket, 5-pole
Standard TIG torch control lead
Connection socket, "-" welding current
Welding current lead connection for TIG welding torch
G¼" connecting nipple
TIG welding torch shielding gas connection
• Insert the welding current plug on the welding torch into the welding current connection socket and
lock by turning to the right.
• Remove yellow protective cap on G¼ connecting nipple.
• Screw welding torch shielding gas connection tightly onto the G¼" connection nipple.
• Insert the welding torch control lead plug into the connection socket for the welding torch control lead
(5-pole with standard torch, 8-pole with up/down or potentiometer torch and 12-pole with up/down
torch with LED display) and tighten.
• Insert the cable plug on the work piece lead into the "+" welding current connection socket and lock by
turning to the right.