Design and function
TIG welding
099-000121-EW501
29.06.2015
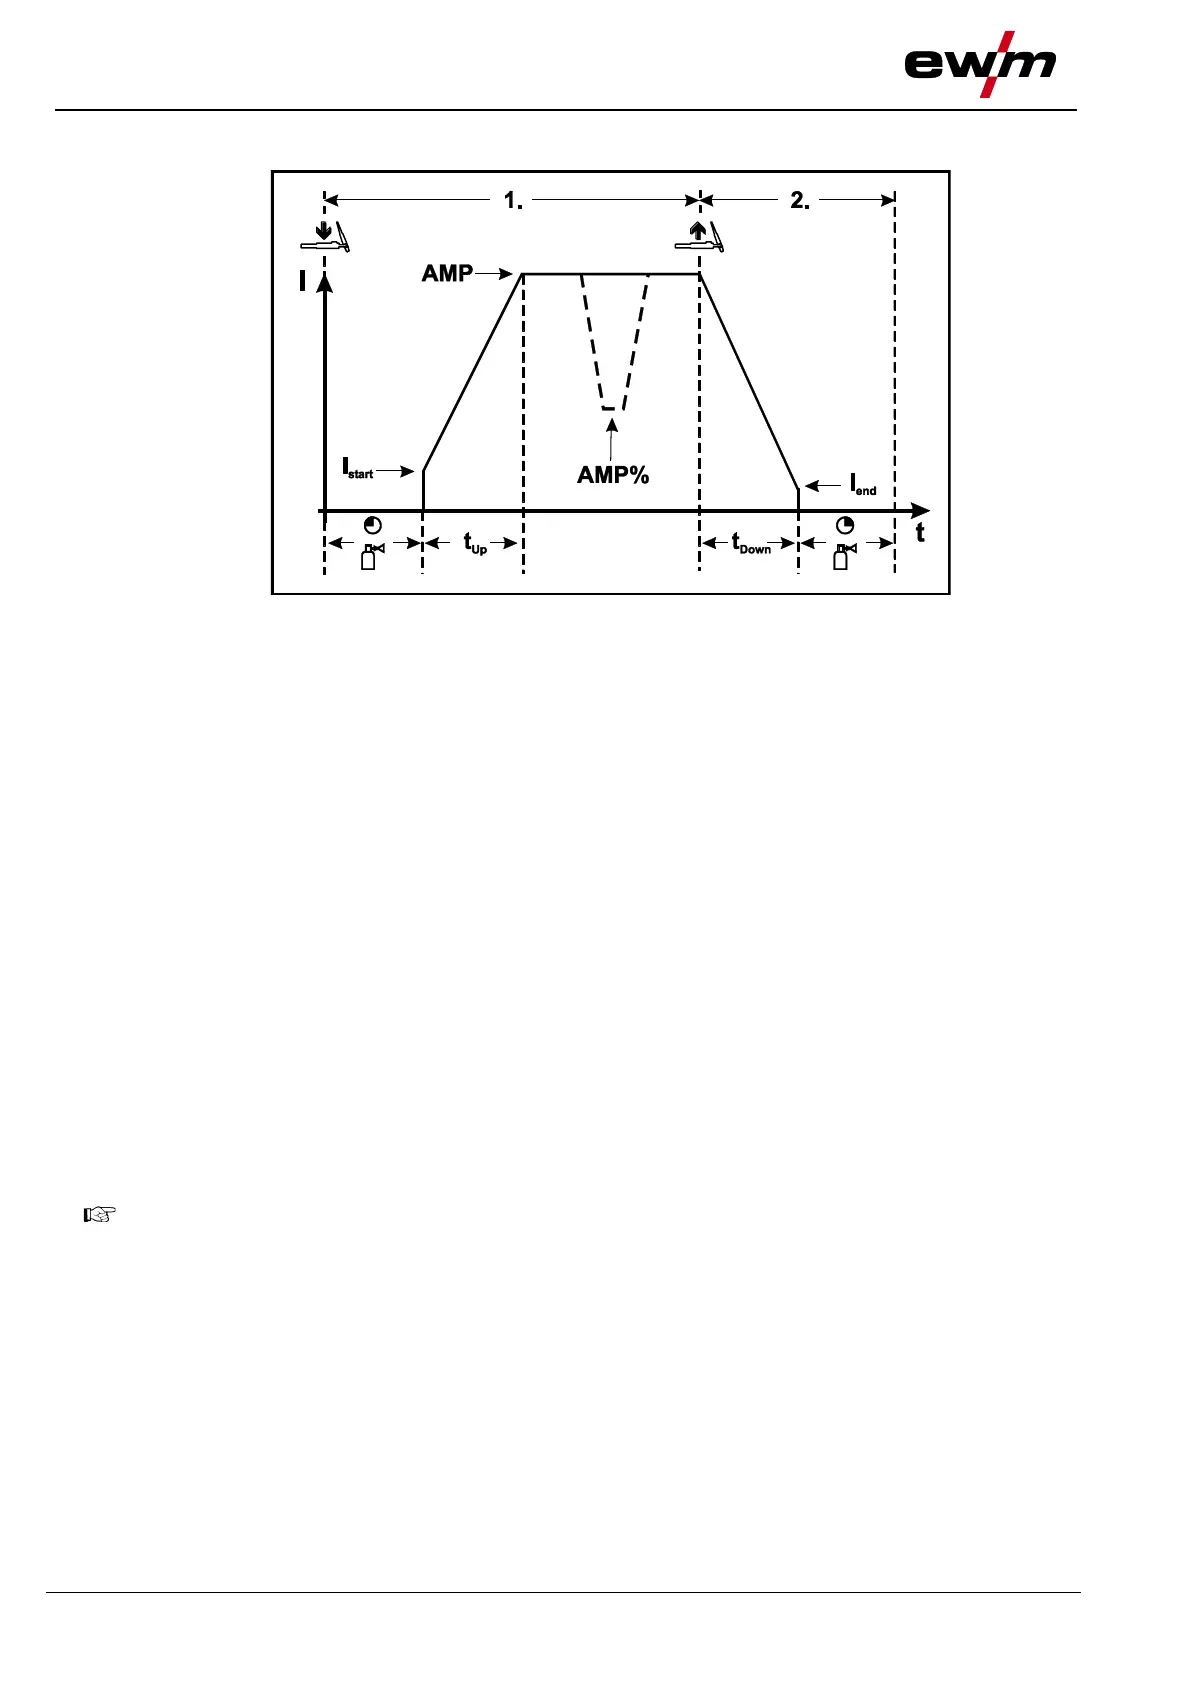
5.9.11.2 Non-latched mode
Figure 5-18
1st cycle:
• Press and hold torch trigger 1.
• The gas pre-flow time elapses.
• HF ignition pulses jump from the electrode to the workpiece, the arc ignites.
• The welding current flows and immediately assumes the value set for the ignition current I
start
.
• HF is switched off.
• The welding current increases with the adjusted up-slope time to the main current AMP.
If torch trigger 2 is pressed in addition to torch trigger 1 during the main current phase, the
welding current drops at the slope time set (tS1) to the secondary current AMP%.
After torch trigger 2 is released, the welding current rises at the slope time set (tS2) back to the
main current AMP.
2nd cycle:
• Release torch trigger 1.
• The main current falls in the set down-slope time to the
end-crater current I
end
(minimum current).
If the 1st torch trigger is pressed during the down-slope time,
the welding current returns to the main current AMP set.
• The main current reaches the end-crater current I
end
, the arc extinguishes.
• The set gas post-flow time elapses.
When the foot-operated remote control RTF is connected, the machine switches automatically to
non-latched operation.
The up- and down-slopes are switched off.