Design and function
TIG welding
099-000121-EW501
29.06.2015
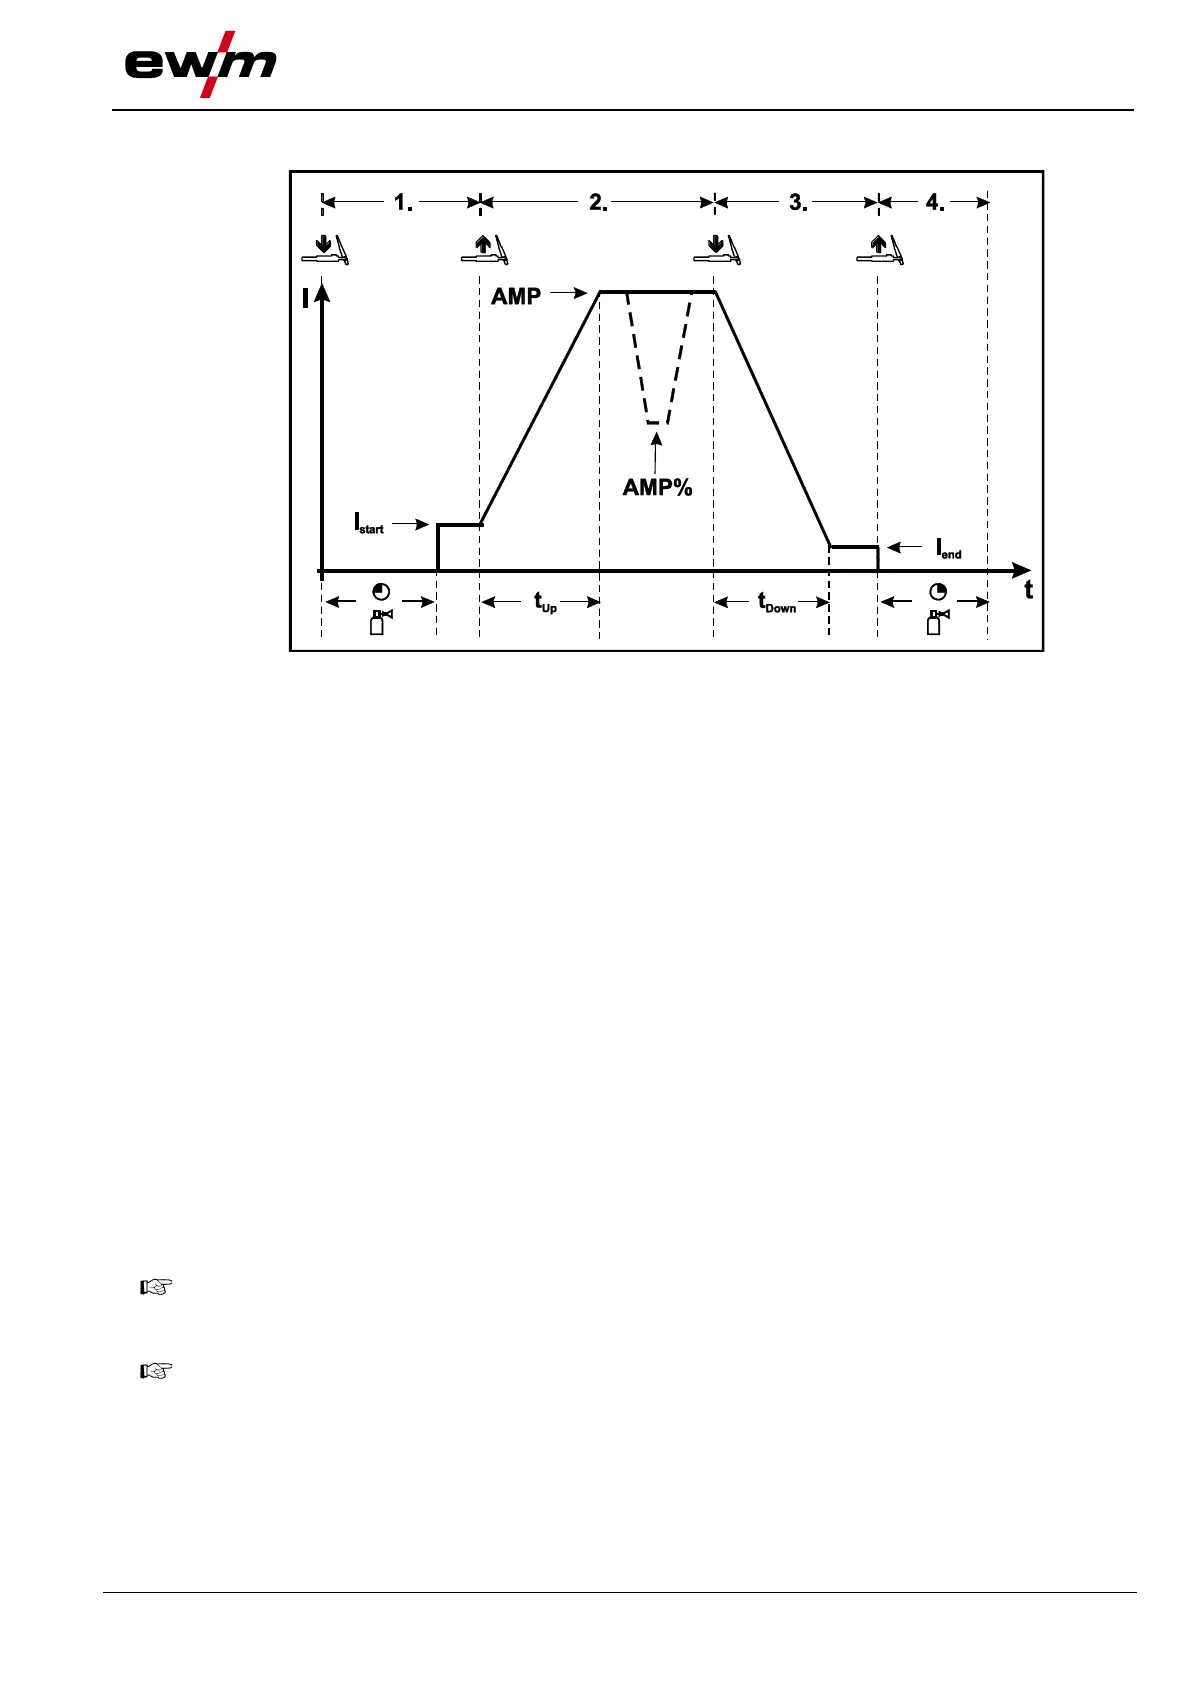
5.9.11.3 Latched mode
Figure 5-19
Step 1
• Press torch trigger 1, the gas pre-flow time elapses.
• HF ignition pulses jump from the electrode to the workpiece, the arc ignites.
• Welding current flows and immediately assumes the ignition current value set (search arc at minimum
setting). HF is switched off.
Step 2
• Release torch trigger 1.
• The welding current increases with the set up-slope time to the main current AMP.
Switching from main current AMP to secondary current AMP%:
• Press torch trigger 2 or
• Tap torch trigger 1
The slope times can be set.
Step 3
• Press torch trigger 1.
• The main current drops with the set down-slope time to the end-crater current I
end
(minimum current).
Step 4
• Release torch trigger 1, the arc extinguishes.
• The set gas post-flow time begins.
Immediate termination of the welding procedure without down-slope and end-crater current:
• Briefly press the 1st torch trigger (3rd and 4th step).
The current drops to zero and the gas post-flow time begins.
When the foot-operated remote control RTF is connected, the machine switches automatically to
non-latched operation.
The up- and down-slopes are switched off.
To use the alternative welding start (tapping start) a double-digit torch mode (11-x) has to be set
at the welding machine control. The number of torch modes available depends on the machine
type. For single-digit torch modes (1-x) this function is disabled.