Operation
T he mac hine will mo v e faster the far ther the
motion control lev ers are mo v ed from the neutral
position.
5. T o stop , position both motion control lev ers in
the neutral operate position.
Dri ving in R ev er se
1. Mo v e the motion control lev ers to the neutral
position.
2. T o mo v e rearw ard in a straight line , slo wly mo v e
both front lev ers rearw ard with equal pressure .
g344873
Figure 10
1. All levers in neutral
position
2. Front levers in rearward
position
T o tur n left or right, release pressure on the
motion control lev er to w ard the desired tur n
direction.
3. T o stop , position both motion control lev ers in
the neutral position.
Adjusting the Cutting Height
T he cutting height of the mo w er dec k is adjusted
from 1 1/2 to 5 inc hes (3.8 cm to 12.7 cm) in 1/4
inc h (6.35 mm) increments .
1. Stop the mac hine and mo v e the motion control
lev ers outw ard to the neutral loc k ed position.
2. Diseng ag e the PTO .
3. Push the button do wn on top of the lev er to
diseng ag e the dec k lift latc h. Pull the handle
all the w a y rearw ard and release the button to
latc h the cutting dec k into the 5.0 inc h (12.7 cm)
transpor t position.
T he dec k is raised b y pushing the button do wn on
top of the lev er to diseng ag e the dec k lift latc h.
T hen pull the handle rearw ard and release the
button to place it into the transpor t loc k position.
Note: W hen changing the cutting height
positions, al w ays come to a complete stop
and disenga ge the PT O .
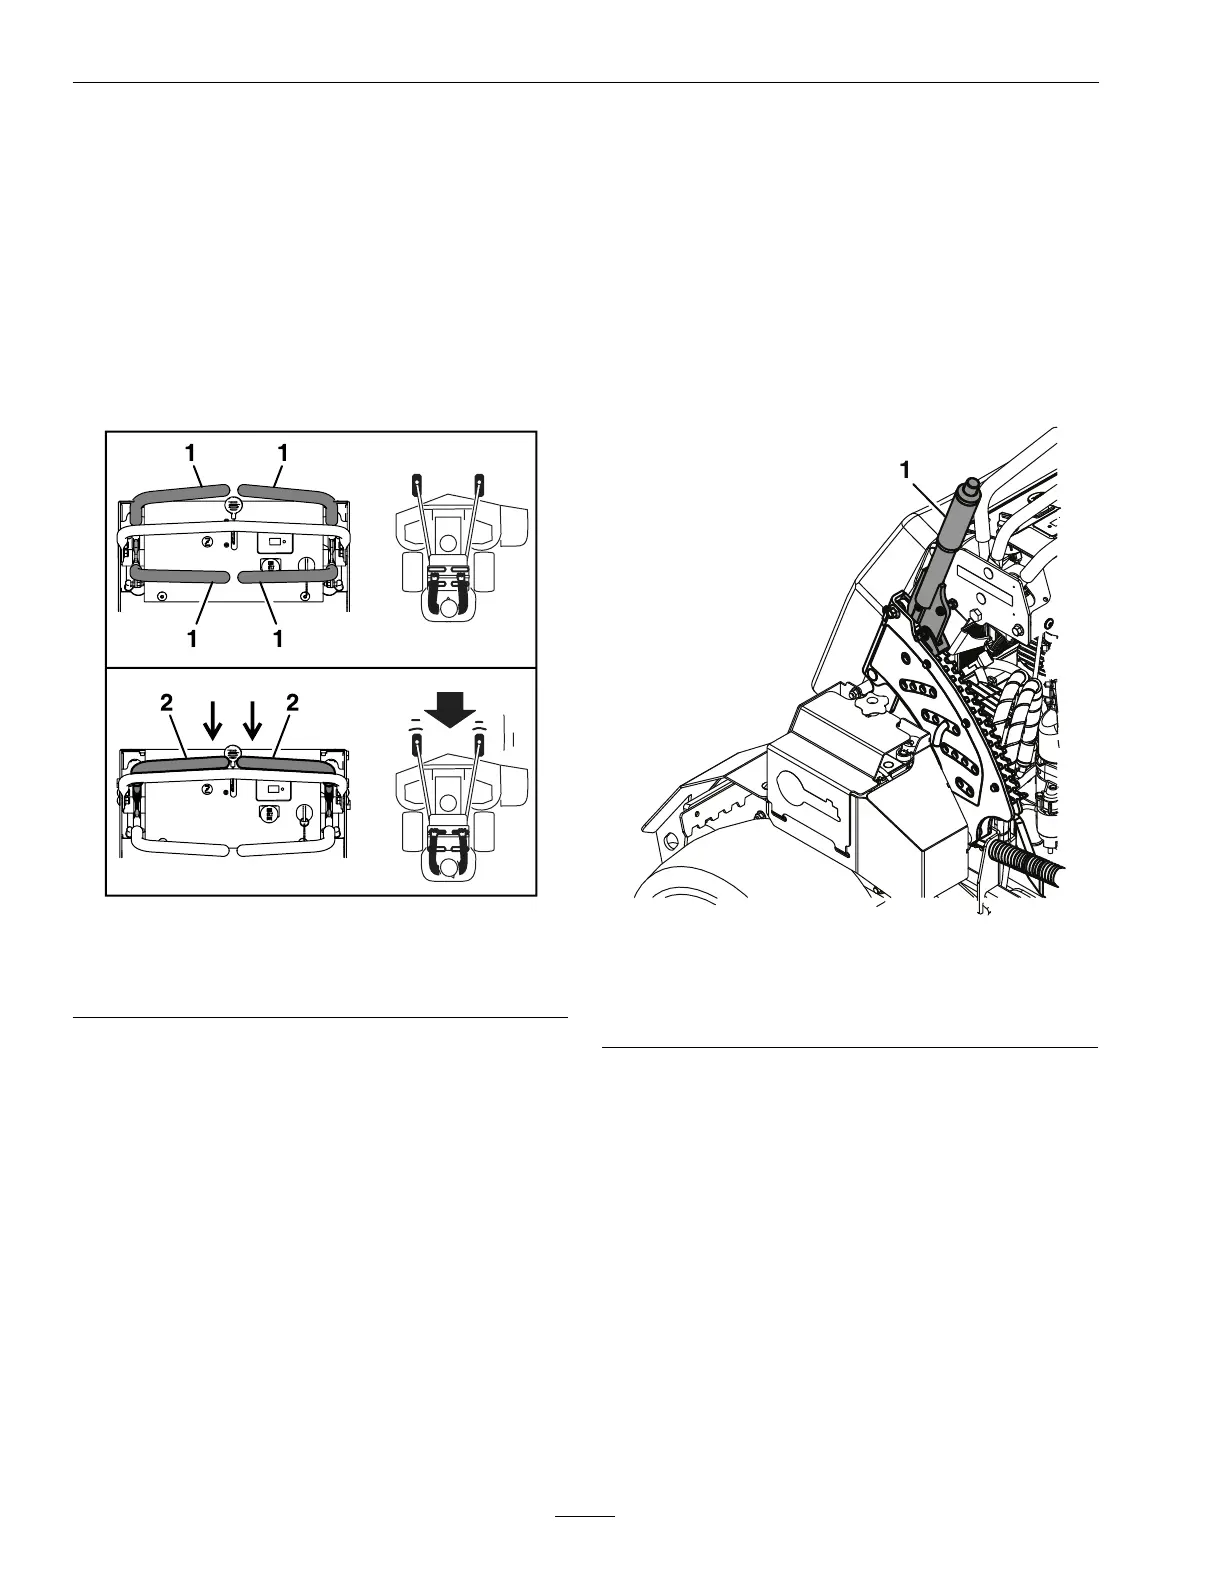
g377365
Figure 1 1
S-Series Model Shown
1. Deck lift handle
4. Inser t the height adjustment pin into the hole
cor responding to the desired cutting height.
See the decal on the side of the dec k lift plate for
cut heights .
5. Slightly pull the dec k lift handle rearw ard and
push the button do wn on top of the lev er to
diseng ag e the transpor t loc k. Slo wly release the
handle do wnw ard to allo w the dec k to lo w er to
the cutting height. R elease the button.
Adjusting the Anti-Scalp Rollers
It is recommended to c hang e the anti-scalp roller
position when the height of cut has c hang ed.
28
 Loading...