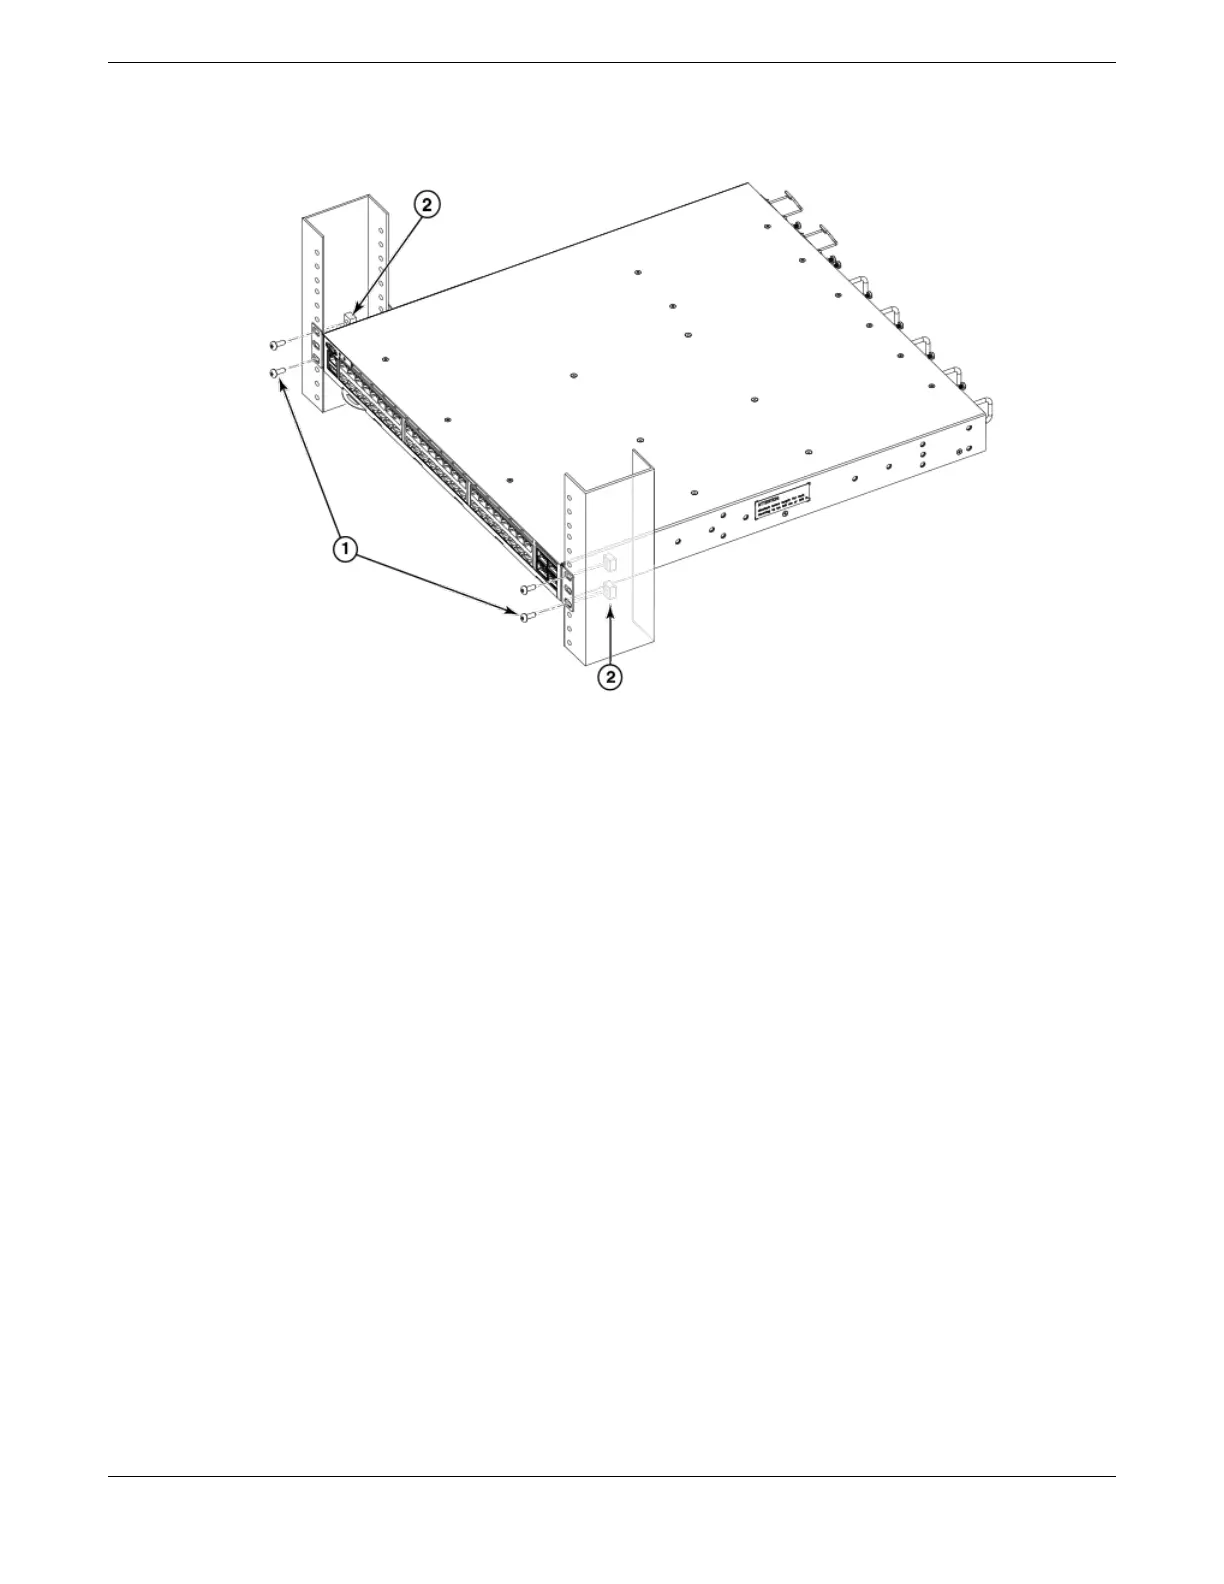
4. Tighten all the 10-32 x 5/8-in. screws to a torque of 25 in-lb. (29 cm-kg).
a. Screws, 10-32 x 5/8-in., panhead Phillips
b. Retainer nuts, 10-32
Figure 11: Attaching front brackets to a rack
Attaching the rear brackets to the rack
Complete the following steps to attach the rear brackets to the rack.
1. Select the proper length bracket for your post width. If your posts are three to five inches wide, use
the brackets marked 3-5 INCH. If your posts are five to six inches wide, use the brackets marked 5-6
INCH.
2. Position the right rear bracket in the right rear of the device, as shown in Attaching rear brackets to
the rack.
3. Attach the bracket to the right rack upright using two 10-32 x 5/8-in. panhead screws and two
retainer nuts. Use the upper and lower holes in the bracket.
4. Repeat step 2 and step 3 to attach the left rear bracket to the left rack upright.
Flush-front mounting
Mounting the Device
32 ExtremeRouting SLX 9640 Hardware Installation Guide
 Loading...