MLC 62 Series • Hardware Setup
Hardware Setup, cont’d
2-10
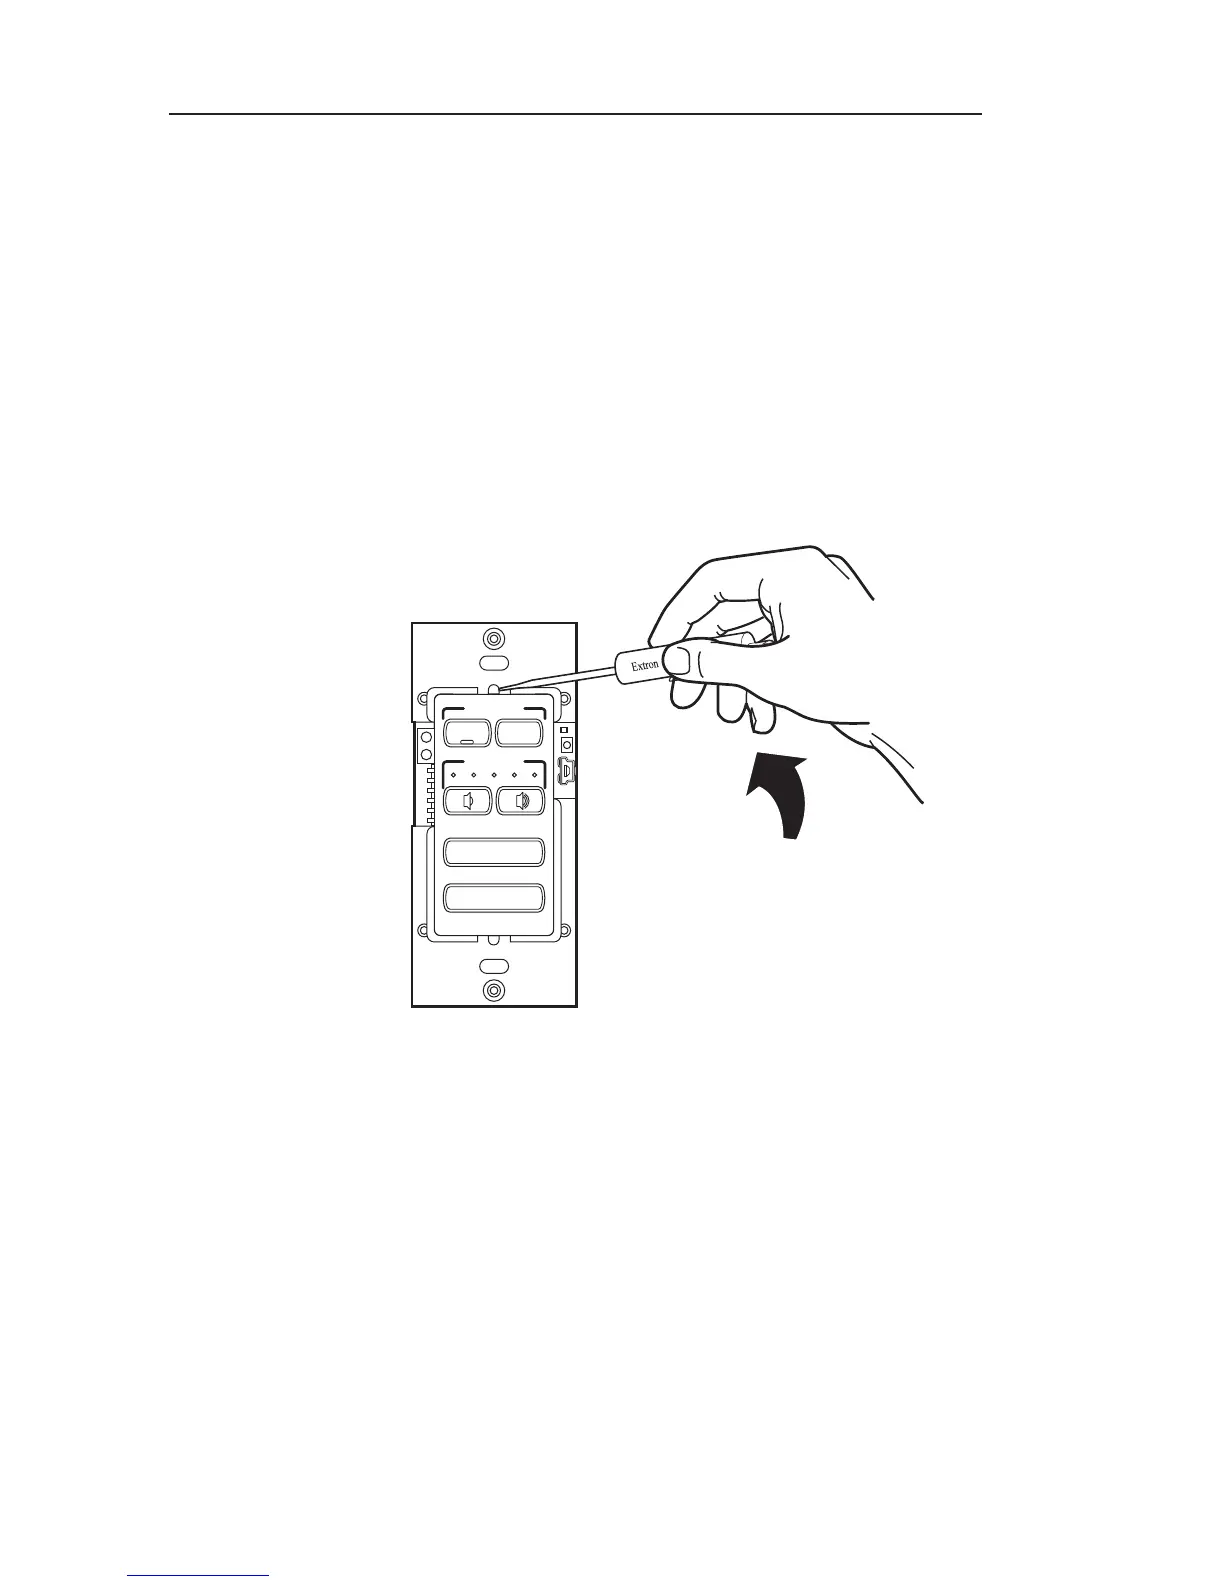
Removing and replacing the MLC 62 D faceplate
1. Remove the faceplate from the MLC 62 D as follows:
a. At the center top and bottom of the faceplate are tabs,
which insert into slots on the MLC's main board and
hold the faceplate in place.
Insert the flat end of the provided Extron Tweeker (or
other small screwdriver) into the hole above the tab at
the top (above the word "Display") and press the tab
inward and up. (See the illustration below.)
b. Pry up the top of the faceplate and lift the faceplate
off the board. If it does not come completely free of
the board, repeat step a on the tab at the bottom of the
faceplate.
VOLUME
Extron
DISPLAY
VIDEO
PC
ON
OFF
Removing the faceplate (MLC 62 D)
2. If you are switching faceplates, transfer the buttons from
the faceplate you removed to the replacement.
3. Make any desired button replacements. (See "Replacing
buttons", later in this chapter.)
4. To reattach the faceplate, line up the pegs in upper-left and
lower-right corners on the back of the new faceplate with
the two diagonal holes on the MLC's main board.
5. Press the faceplate onto the board with the pegs in the
holes until the tabs at the top and bottom of the faceplate
snap into their slots on the board.