MLC 62 Series • Hardware Setup
Hardware Setup, cont’d
2-12
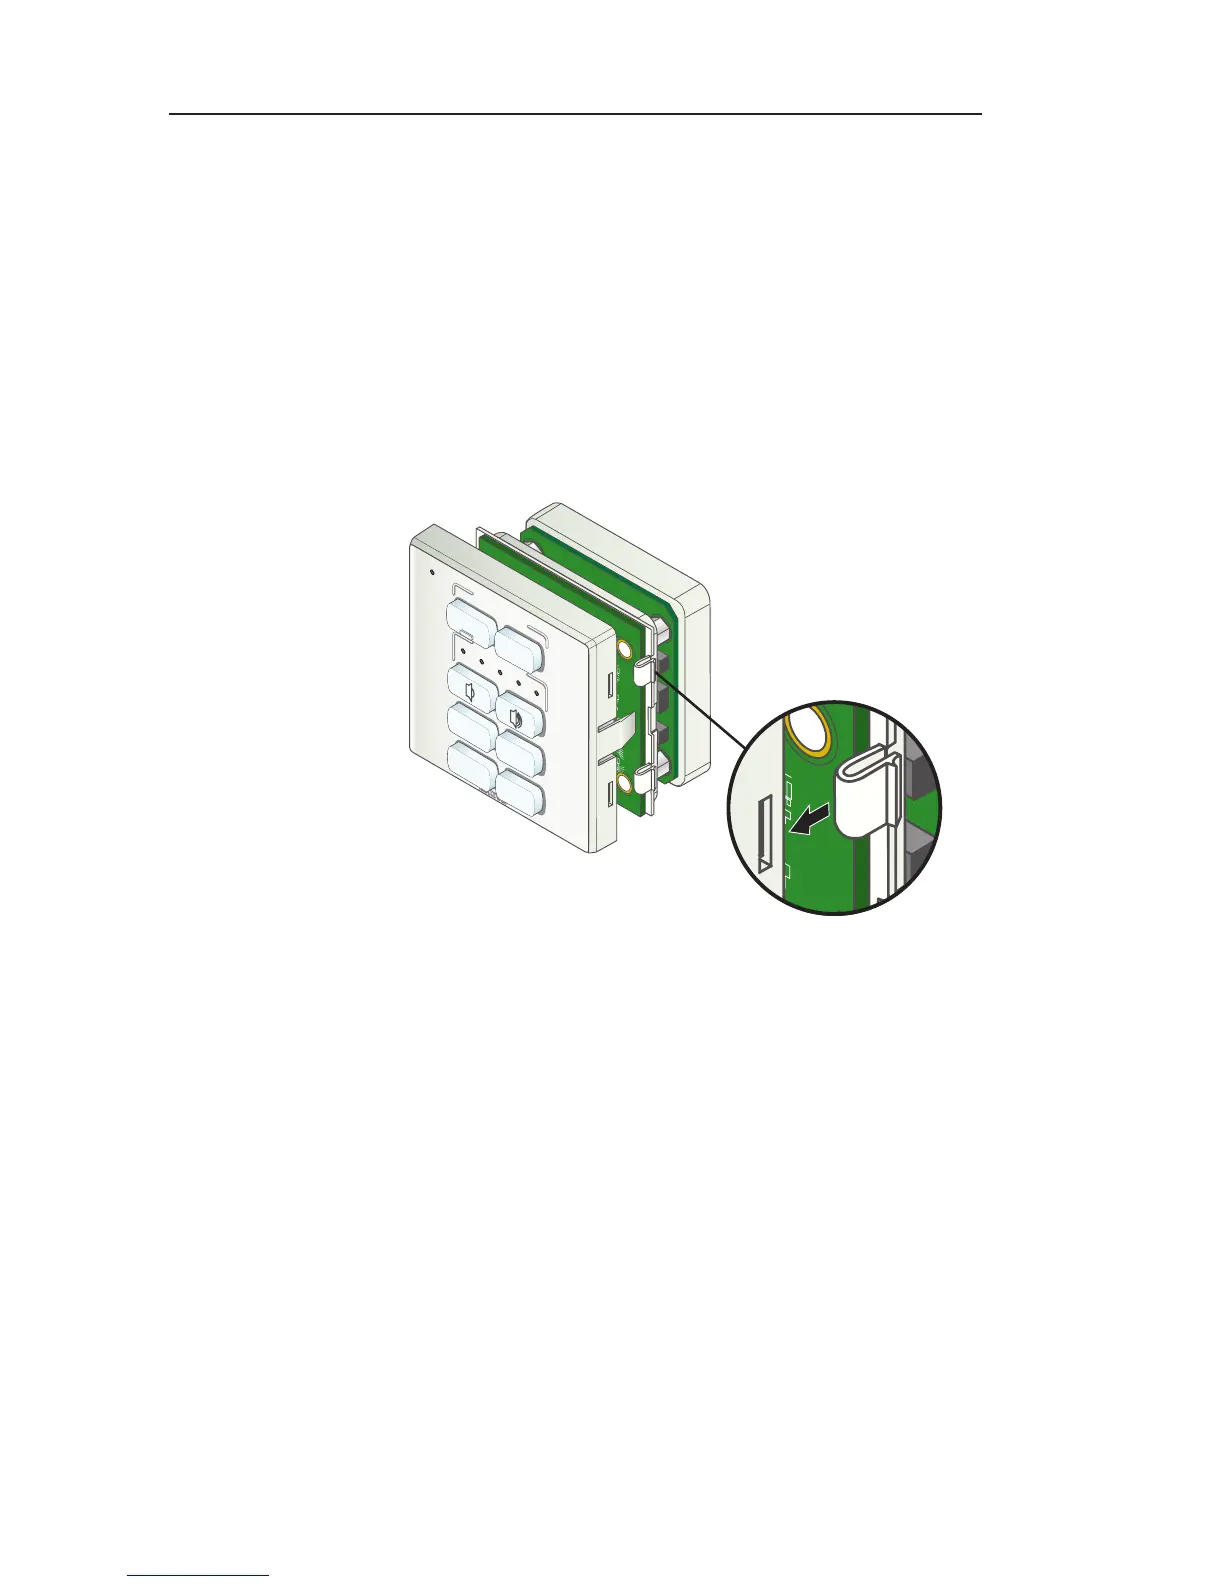
b. Press inward with the screwdriver until the tab snaps
free of its slot.
c. Repeat steps a and b for the other tab on the same side
of the faceplate.
d. Lift the MLC up and off the faceplate.
2. Switch buttons in the faceplate as desired. (See "Replacing
buttons" in the next section.)
3. Replace the faceplate as follows:
a. Hold the MLC with its board against the back of the
faceplate, aligning the two tabs on each side of the
MLC with the two slots on each side of the faceplate.
VOLUME
DISPLAY
PC
VIDEO
OFF
ON
MUTE
LAPTOP
Replacing the faceplate (MLC 62 RS EU)
b. Press the MLC into the faceplate until the tabs snap
into their slots. Check to make sure that all four tabs
have snapped into place.
Replacing buttons
Additional labeled buttons are provided with the MLC 62 and
can be used to replace the factory-installed buttons in the MLC's
faceplate. By default, the MLC 62 RS models are delivered with
faceplates containing four pairs of buttons. Each pair of buttons
is connected by a membrane. The entire membrane is removed,
so that the buttons are replaced in pairs.
1. Remove the faceplate from the MLC. (See "Removing and
replacing the faceplate", earlier in this chapter.)
2. From the front of the faceplate, press the button pair to be
replaced backward through its slots in the faceplate until
the membrane containing the two buttons is free.