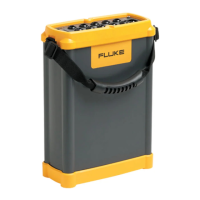
Power Recorder
Managing Image and Voice Files
45
Inserting Image or Voice Annotations
1. Set up the Recorder and begin monitoring.
2. Using your PDA-cam or another camera, take a picture of what you want
to capture.
3. In Power Analyze, go to 1750 Live mode and click
to open the
Annotate dialog box.
Or on your PDA, in Power View, click the Annotate icon to display the
Annotate screen.
4. Select Insert File.
5. Browse to find the picture file (for example, IMG_2435.jpg) or audio file
(for example, voice_123.wav) and select it; then click Insert.
The file name you specified is inserted into the data and associated with
the present date and time (and therefore, the present power
measurements).
Managing Image and Voice Files
If you are using the PDA, move the image or audio file to a location that will
make it easier to Transfer it to a PC later, when you download and move the
recorded data file to your PC. You can accomplish this in two ways:
• Place the file into the synchronization folder on your PDA, so that it
will be automatically transferred into the sync folder on the PC the
next time you dock the PDA.
You may find this approach useful if you download data using Power
Analyze on your PC. After synching the files from your PDA, be sure
to move the annotation files into the folder that contains your .odn
files (by default, \My Documents\Fluke\Power Analyze).
• Transfer the file onto an SD card for later transfer to your PC.
If you use the PDA to download data to an SD card, copying the
audio or image files to the SD card may be the easiest method; then
you can copy all associated files to your PC at once. Be sure to copy
the files into the same folder that contains the downloaded .odn file.

 Loading...