2-6 Section 2: Installing the Model 9100
Final Width = 215mm
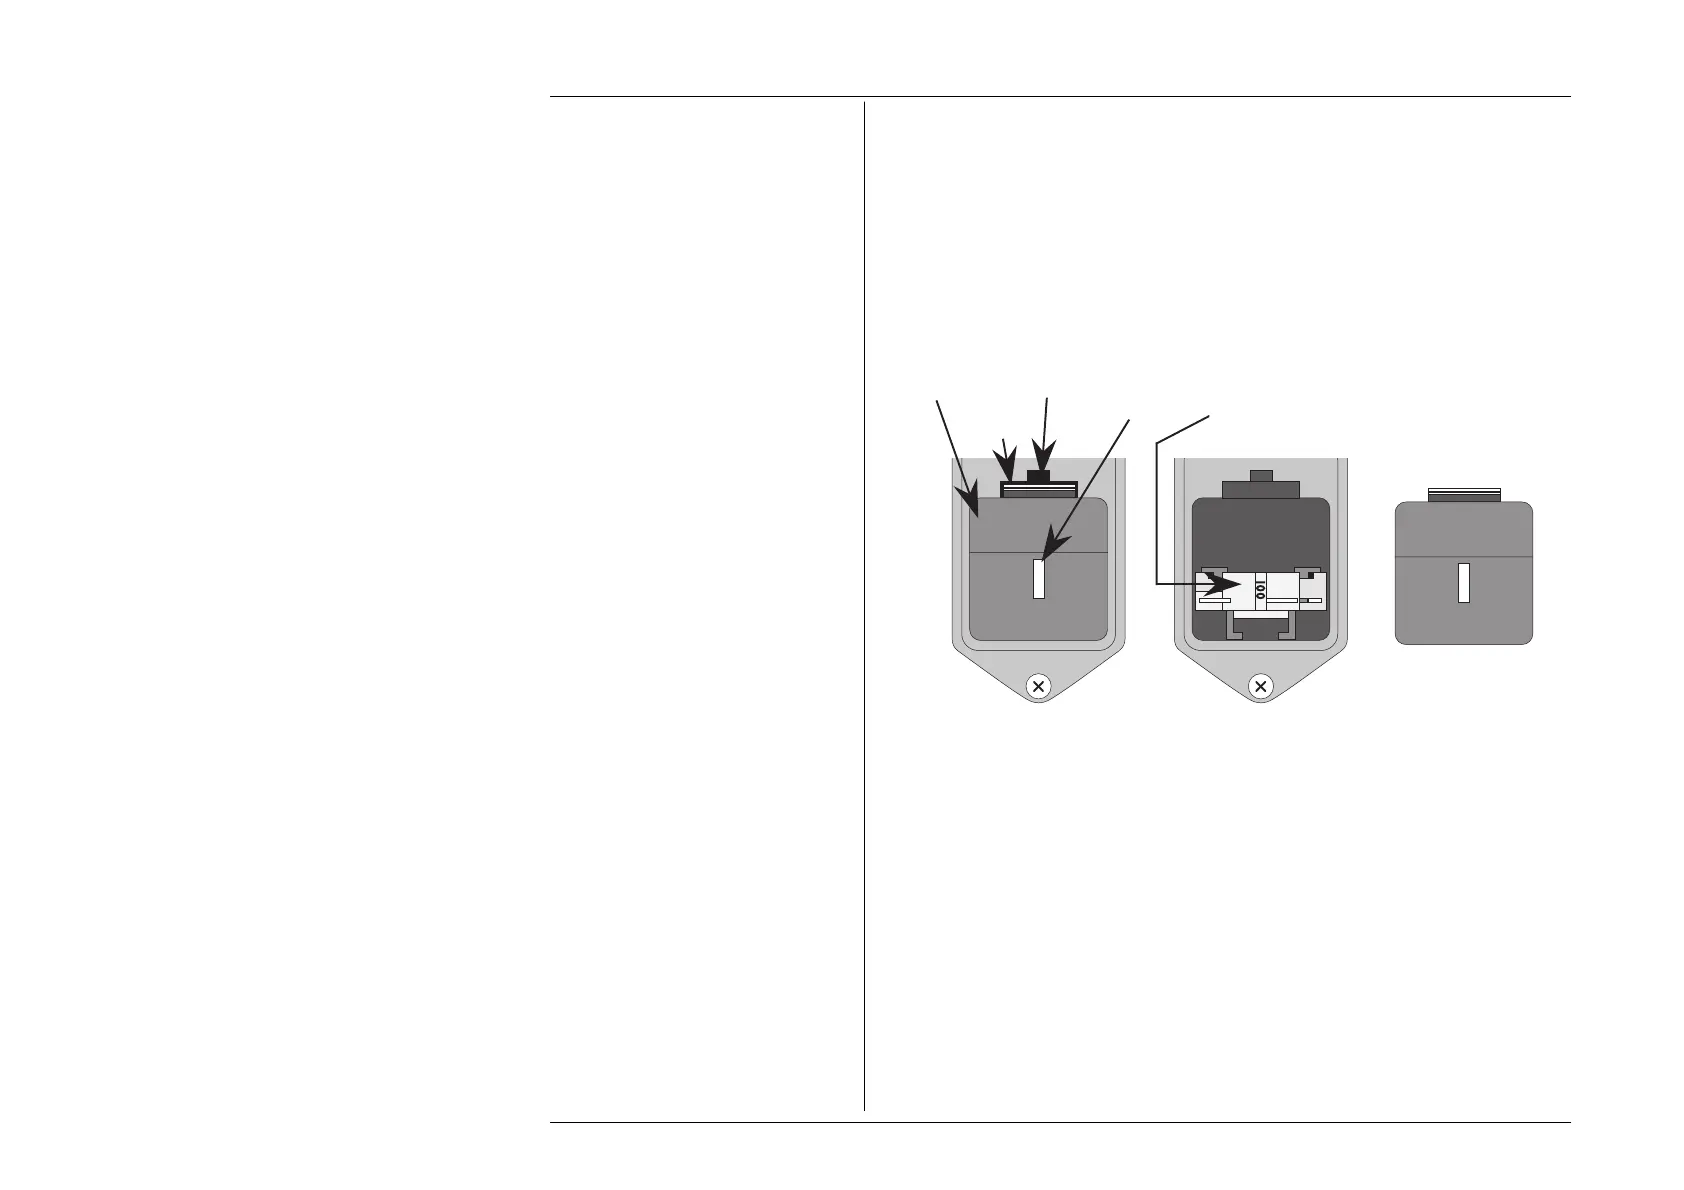
2.7.3 Line Voltage
The 9100 is operative for line voltages in the ranges: 100/120/220/240V, 48-63Hz.
To accommodate these ranges, a small voltage selector block is housed behind the
POWER FUSE drawer.
2.7.3.1 Selection of Operating Line Voltage
Ensure that the POWER CABLE is removed.
1. Insert a small screwdriver blade in the narrow recess above the catch over the fuse
drawer; lever the screwdriver handle gently upwards until the catch releases. Pull the
drawer out to reveal the grey voltage selector block.
2. Hook a small finger into the block in the square recess in its base; pull to disengage
its contacts, and remove from the module cavity.
3. Rotate the voltage selector board until the desired voltage faces outward.
4. Ensure that the block is upright. Reinsert the block firmly into its cavity in the module.
5. Check the fuse if required (see paras 2.7.4), then insert the fuse drawer into the module
and press until the catch is heard to click into place.
6. Check that the desired voltage is visible in the cutout in the fuse drawer.
Voltage
Selector
Block
Fuse Drawer
Removed
Release
Catch
Recess for
Screwdriver
Voltage
Indicator
Window
Fuse
Drawer