otherwise destroy electronic components
such as the alternator.
Always disconnect the starter battery in the
battery case in the driver's footwell first.
!
Always disconnect the battery in
the order described below. Never swap the
terminal clamps. You may otherwise dam-
age the vehicle electronics.
If the vehicle is expected to be out of use for
over 3 weeks, disconnect the batteries. This
will prevent battery discharge caused by off-
load current consumption.
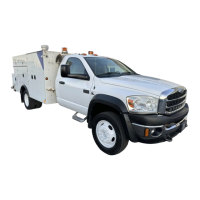
Battery cover in the driver's footwell
X
Switch off all electrical consumers.
X
Switch off the engine and remove the key
from the ignition lock.
X
Remove the floor covering in the driver's
footwell (Y page 260).
X
Loosen screws ; and slide battery
cover : in the direction of the arrow.
The screws must protrude beyond the
larger recesses.
X
Remove battery cover : upwards.
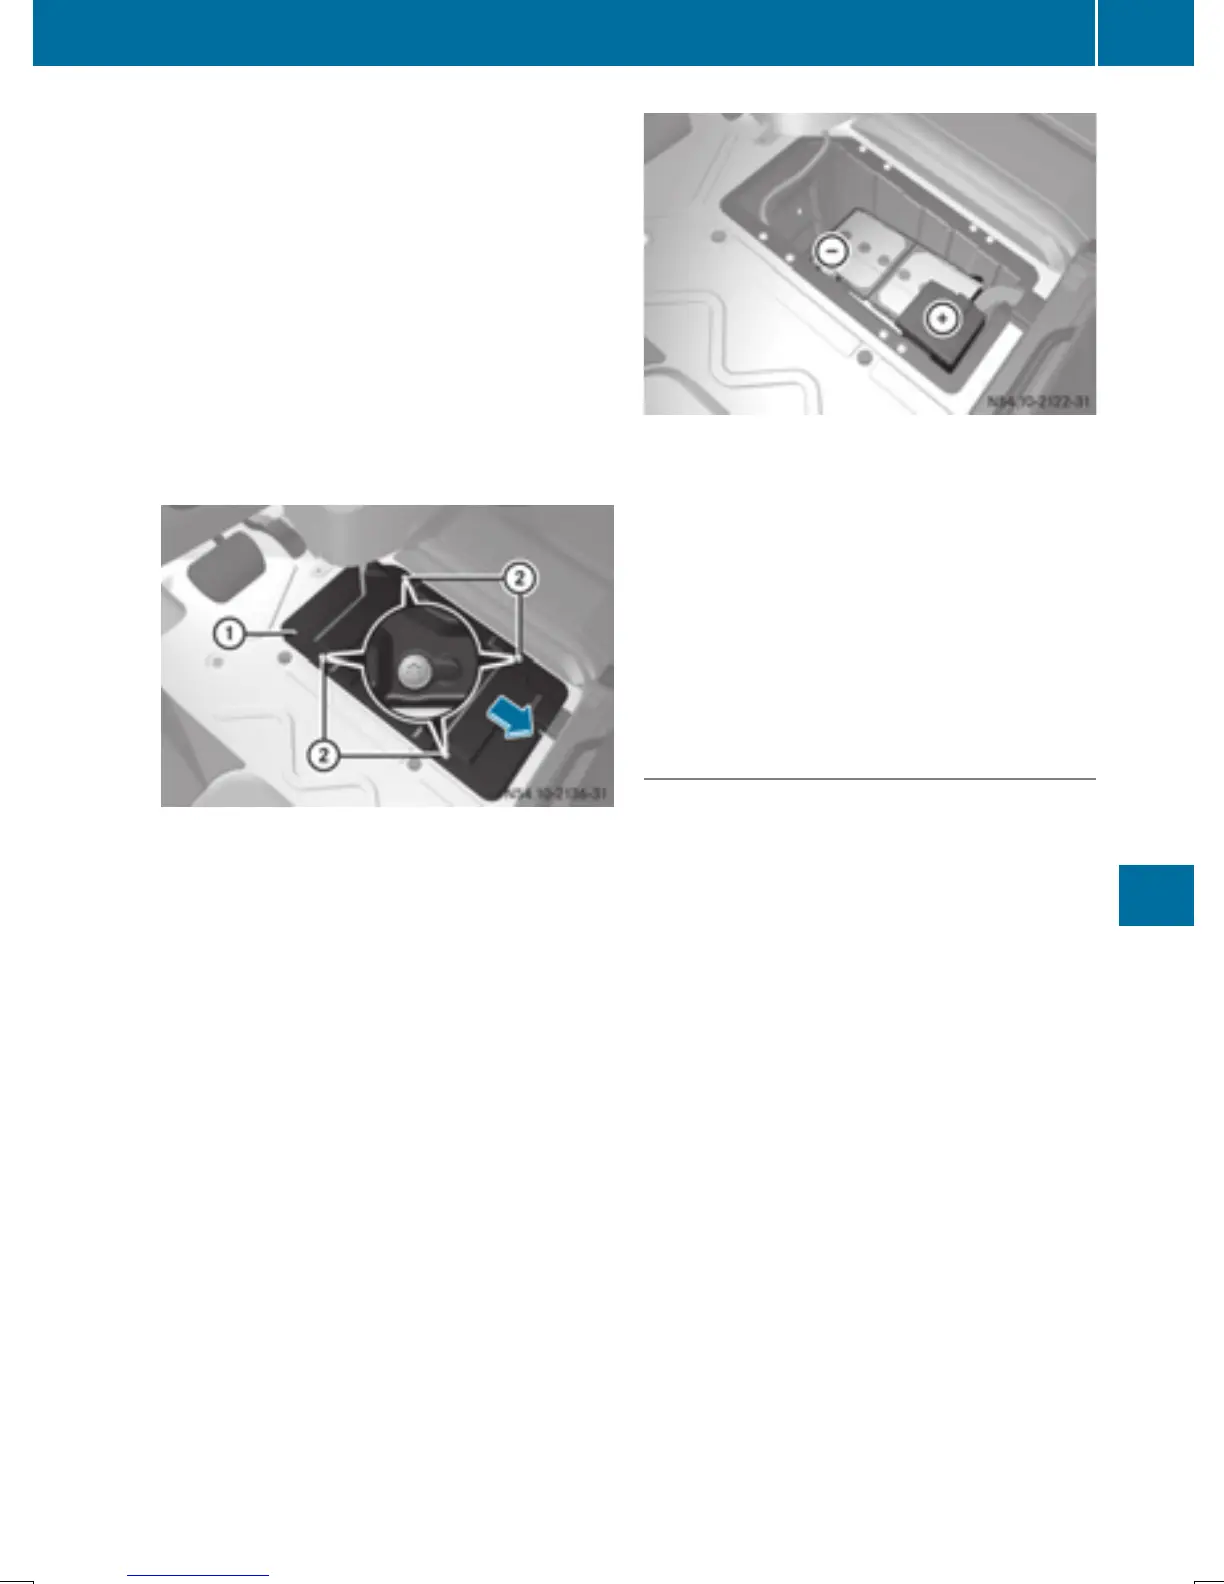
Starter battery in the driver's footwell
X
First loosen and remove the negative ter-
minal clamp so that it is no longer in contact
with the terminal.
X
Remove the cover from the positive termi-
nal.
X
Loosen the positive terminal clamp and fold
it up to the side together with the pre-fuse
box.
Reconnecting the starter battery
!
Always connect the battery in the order
described below. Never swap the terminal
clamps. You may otherwise damage the
vehicle electronics.
X
Fold the positive terminal clamp with the
pre-fuse box down to the terminal.
X
Connect the positive terminal clamp.
X
Attach the cover to the positive terminal.
X
Connect the negative terminal clamp.
X
Position battery cover : so that screws ;
are positioned over the large recesses.
X
Slide battery cover : in the direction of
travel into the smaller recesses.
X
Tighten screws ;.
X
Install the floor covering in the driver's foot-
well (Y page 260).
Carry out the following work after connecting
the battery:
X
Reset the side windows (Y page 79).
Battery
261
Maintenance and care
Z