16
For Fronius Galvo/Fronius Symo/Fronius Primo only and when linking multiple invert-
ers in Fronius Solar Net:
Set the Fronius Solar Net master/slave switch on the Fronius Datamanager 2.0 plug-
in card as required
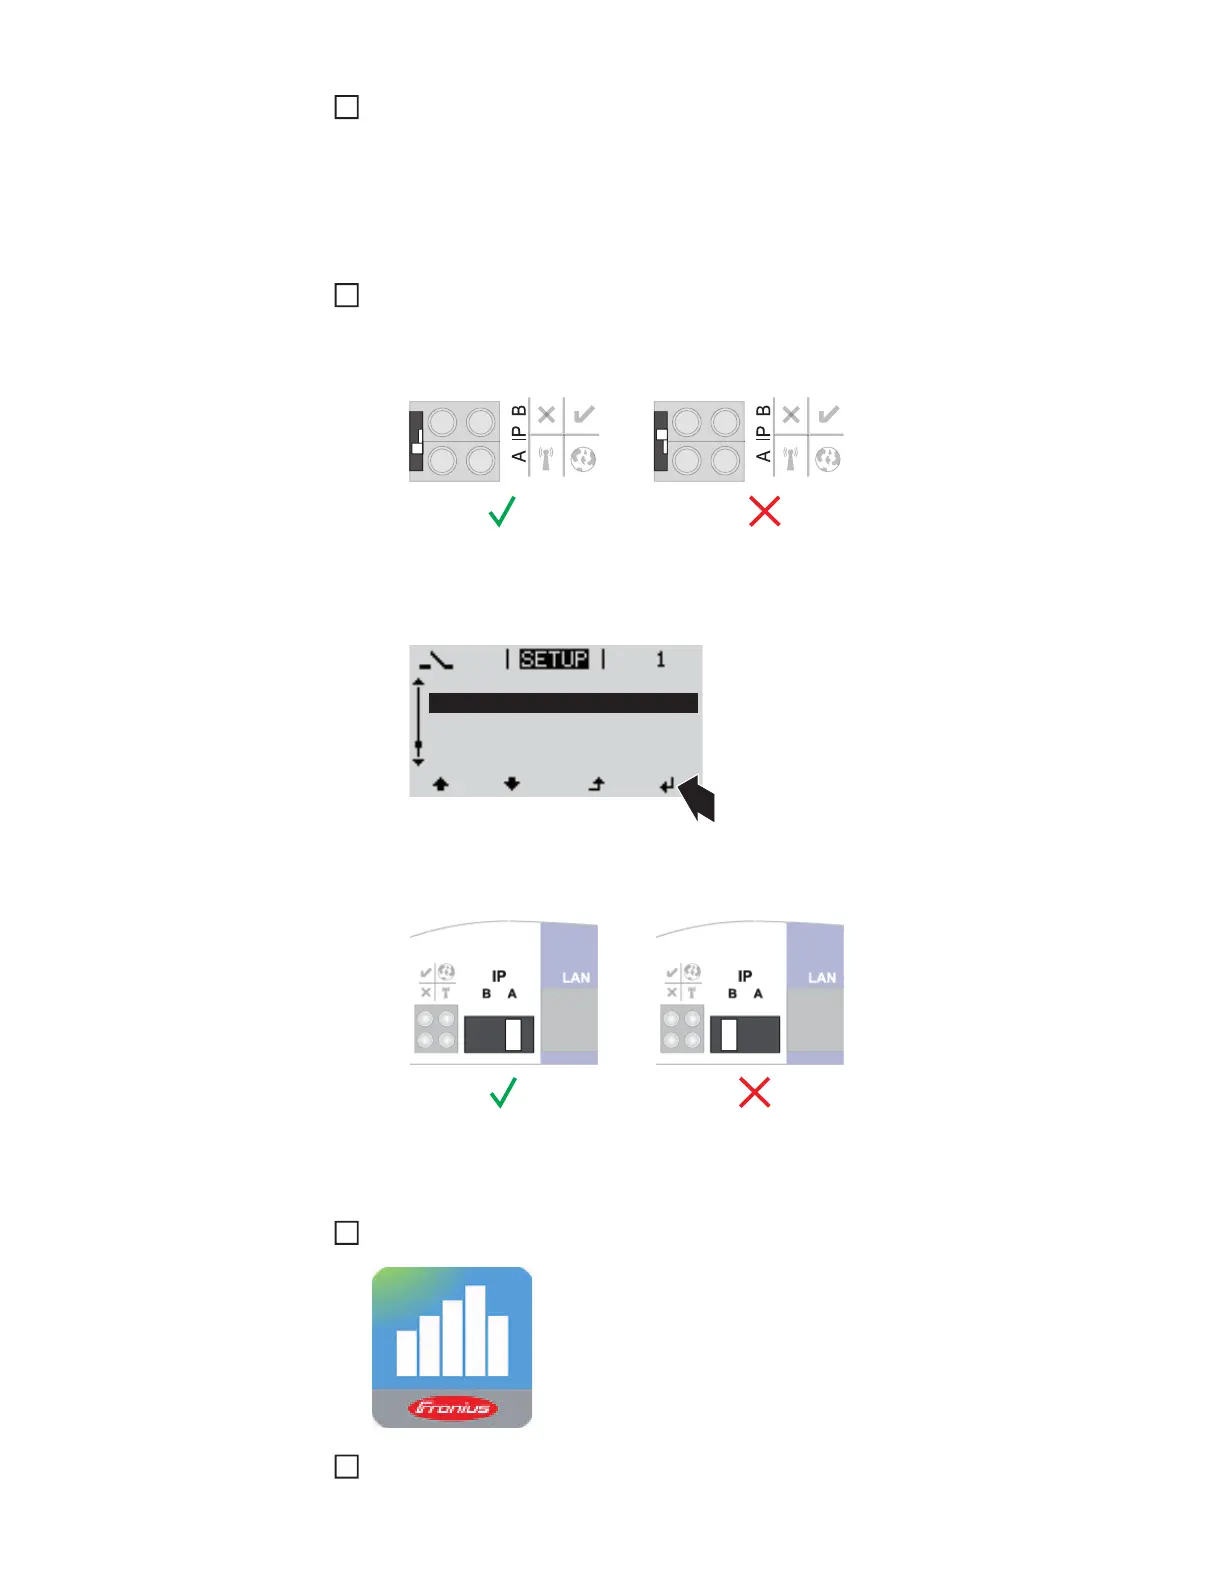
- One inverter with Fronius Datamanager 2.0 = master
- All other inverters with Fronius Datamanager 2.0 = slave (the LEDs on the Fro-
nius Datamanager 2.0 plug-in cards are off)
Switch the device to service mode
Inverter with Fronius Datamanager 2.0 plug-in card:
- Switch the IP switch on the Fronius Datamanager 2.0 plug-in card to position A
or
- Activate the WIFI Access Point via the Setup menu of the inverter
(the performance of this function depends on the inverter software)
Fronius Datamanager Box 2.0:
- Switch the IP switch on the Fronius Datamanager Box 2.0 to position A
The inverter/Fronius Datamanager Box 2.0 establishes the WLAN Access Point. The
WLAN Access Point stays open for one hour.
Download Fronius Solar.web App
Run Fronius Solar.web App
2
3
Stand by
WiFi Access Point
DATCOM
USB
Clock
4
5