Initial Power Up and Terminal Configuration
52
wireless at the speed of light …………….
NAbeam E-Series Installation Manual
Verifying Power Up Operation with STC
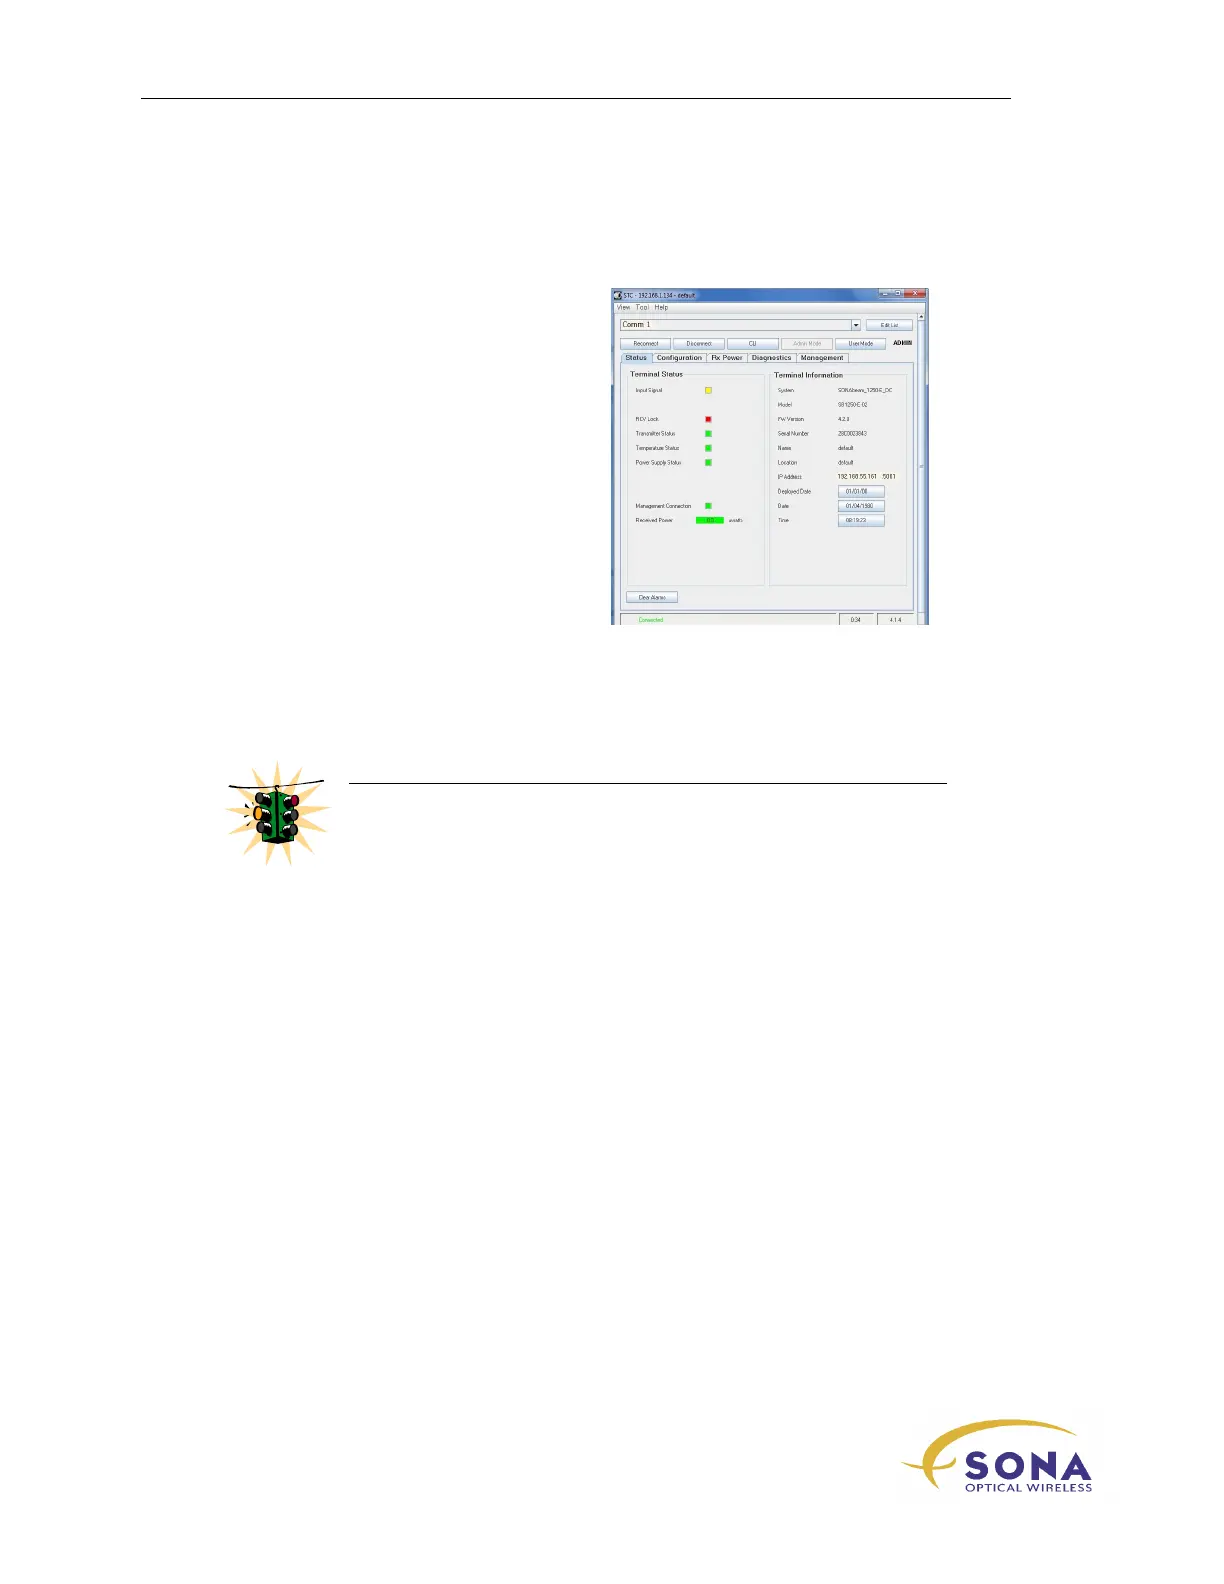
To verify that your SONAbeam is in fact
powered up and functioning, use your PC with
the SONAbeam Terminal Controller (STC)
software. Following the instructions found in
the section: Setting Up a New SONAbeam
Terminal/Link in the STC User’s Guide,
connect to the SONAbeam and verify that the
terminal reports itself as ready-to-go, as shown
in Figure 21.
Figure 21 – SONAbeam Terminal
Controller – Status Window
When your SONAbeam is operating properly, the
STC Status
window will report a
successful connection, identifying the terminal and the
STC Diagnostics
window will
display valid values for the prescribed SONAbeam parameters.
WARNING!
If the STC software fails to connect with the terminal, remove power
from the terminal and re-check all of your interface wiring!
Also confirm that the COM port selection for the STC software
coincides with the correct physical (PC) COM port used on your STC
host computer.
Setting Up your SONAbeam Terminal
There are three initial SONAbeam setups that should be performed at this time:
FSO data rate (Unless Default Data rate applies)
SONAbeam laser power (Unless Default Data rate applies)
SONAbeam terminal configuration, including network IP addressing
All of these operations can be readily performed using the
Initial Configuration
Wizard
that is part of the SONAbeam Terminal Controller software included with your
SONAbeam.
See the SONAbeam Terminal Controller Software User’s Guide for more information.