2 Product Overview
70
Product Overview
2
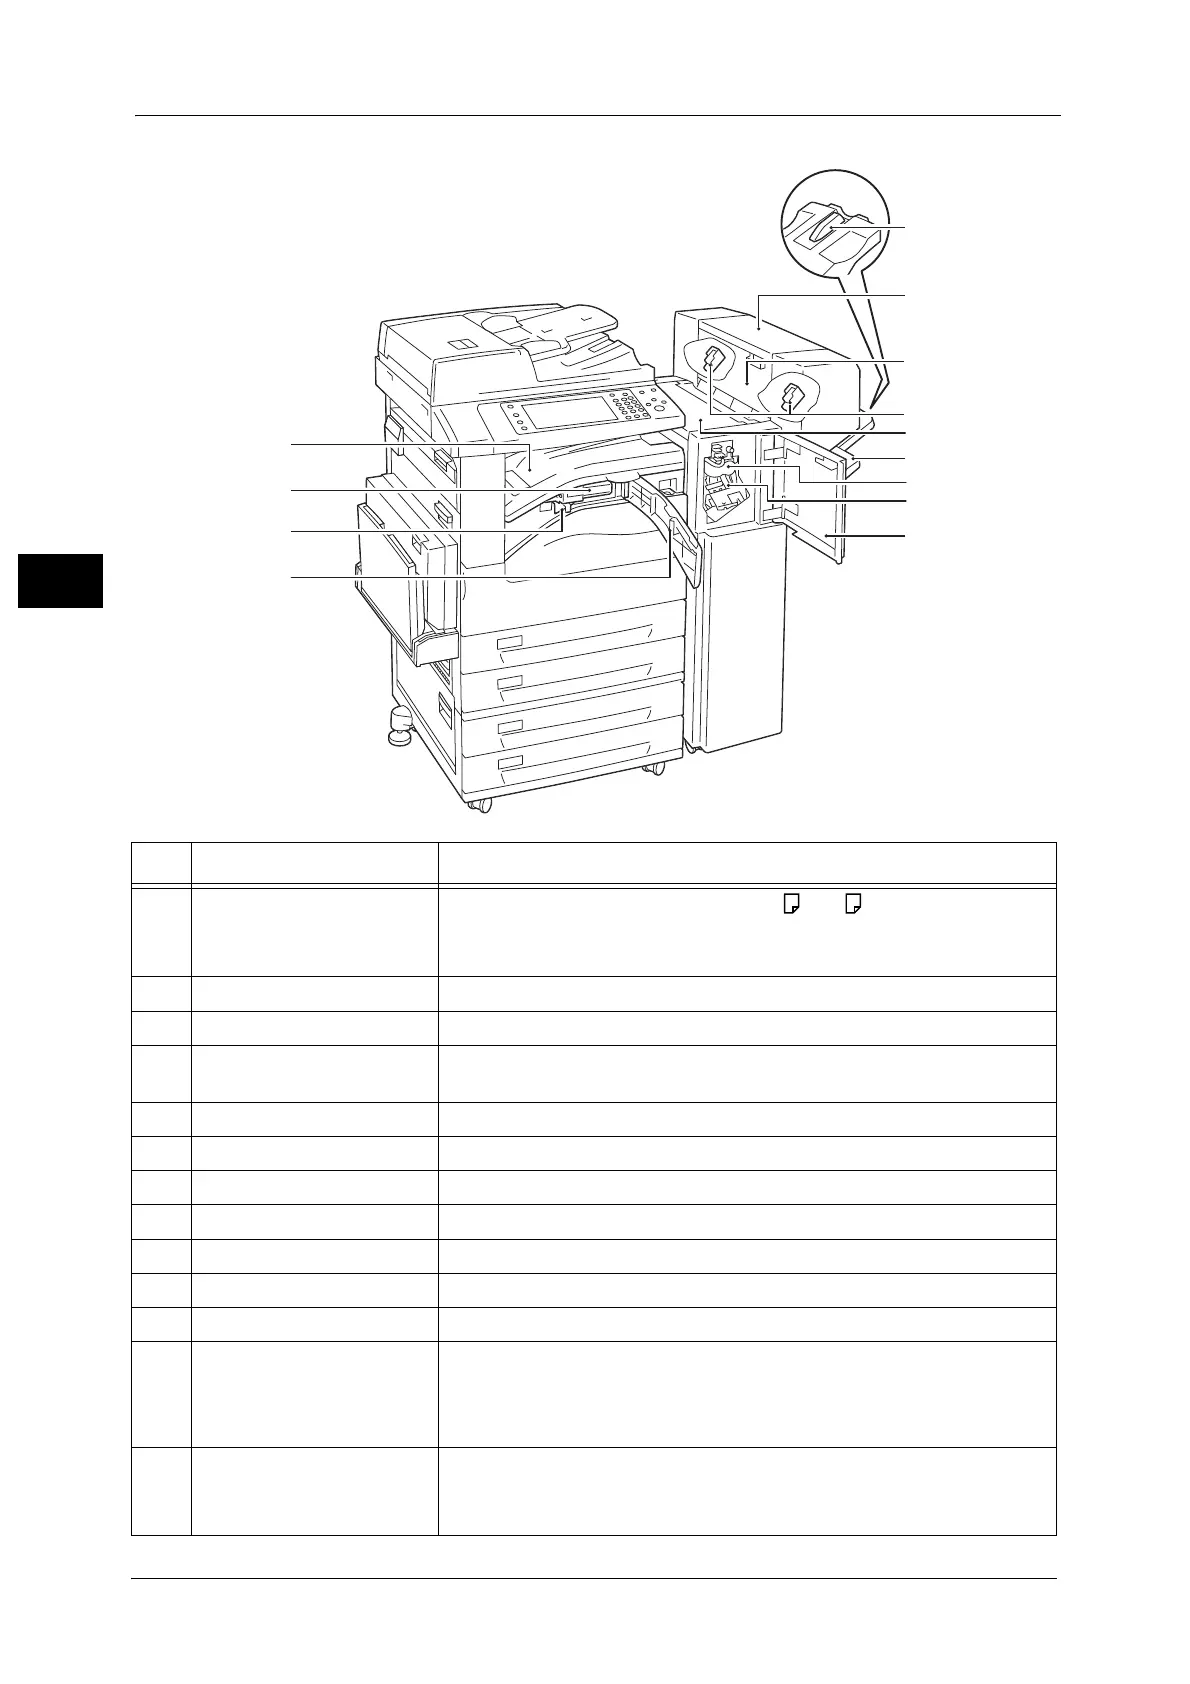
Finisher-B1 (optional)
3
4
5
6
7
8
9
13
12
11
2
1
10
No. Component Function
1 Tray attachment
Install this attachment when delivering A4 or B5 paper to the finisher
tray without stapling.
For more information, refer to "Installing the Tray Attachment on the Finisher-B1" (P.93).
2 Booklet unit (optional) Staples creased outputs.
3 Booklet unit side cover Open this cover when replacing the booklet staple cartridge.
4 Booklet staple cartridge Contains staples. Remove this cartridge when replacing or adding staples, or
clearing staple jams.
5 Top cover Open this cover to clear paper jams.
6 Finisher tray Stapled or creased outputs are delivered here.
7 Creaser unit Creases outputs in half.
8 Staple cartridge Contains staples.
9 Front door Open this cover when clearing paper jams or replacing staples.
10 Front transport cover Open this cover when discarding punch scraps.
11 Hole-punch waste container Collects scraps from the puncher.
12 US 2/3 Hole Punch Kit
(optional)
2/4 Hole Punch Kit
(optional)
Hole-punches outputs.
Note • The distance between the two holes made with the US 2/3 Hole Punch
Kit (US standard) is 70 mm, which is different from the 80 mm distance
made with the 2/4 Hole Punch Kit.
13 Center tray (Top cover of the
finisher transport)
Copies and prints are delivered here when they are unable to be delivered to
the finisher tray. Pull the cover upward when clearing paper jams.
Note • Remove outputs delivered to the center tray constantly.
 Loading...