6.1 Clearing Paper Jams 189
6 Troubleshooting
If you encounter a problem while using this printer and have trouble solving it, see if any of
the symptoms in the following pages “6.1 Clearing Paper Jams” (P. 189) through “6.7
Network-related Problems” (P. 231) match your problem.
If your problem is described in the following pages, apply the suggested solution provided
for the problem.
If your problem is not described, or could not be solved with the suggested solution, contact
our Customer Support Center or your dealer.
6.1 Clearing Paper Jams
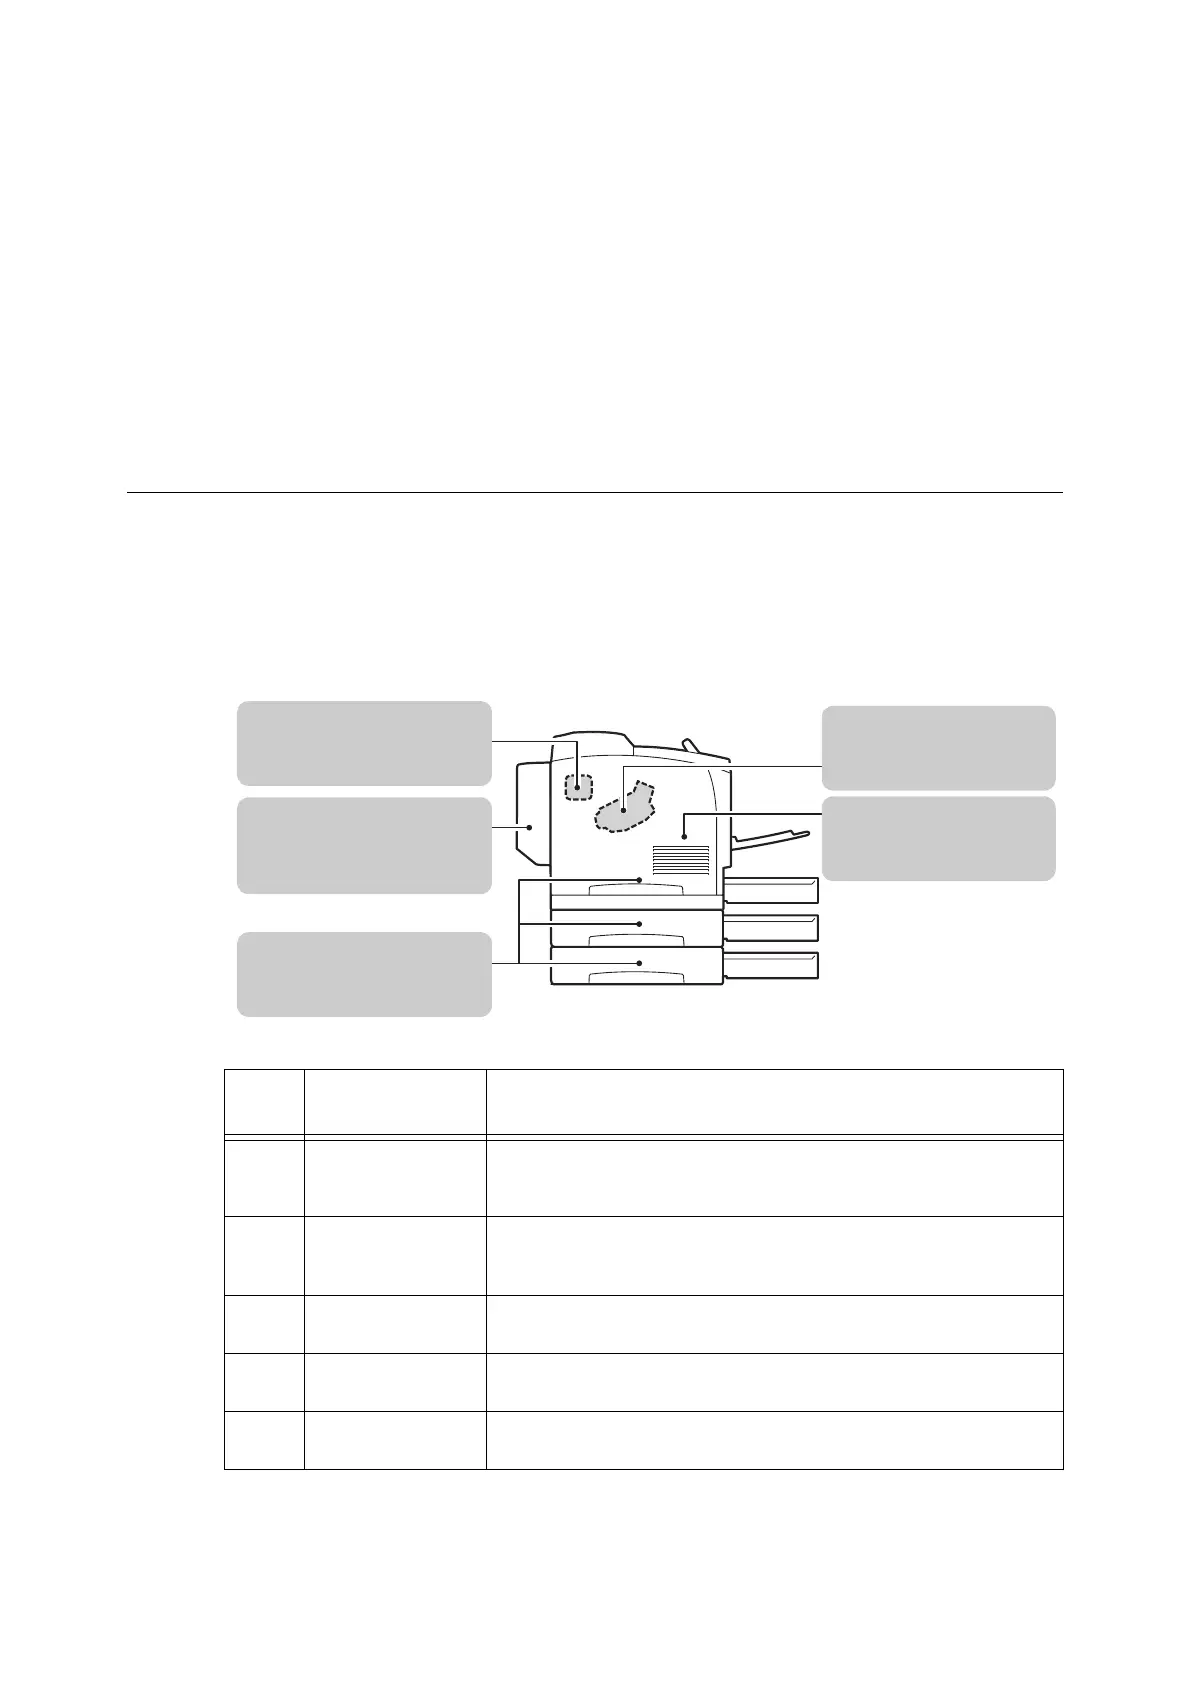
When a paper jam occurs, immediately remove the jammed paper by referring to the
following illustration and the procedures described below.
After the paper jam is cleared, printing restarts automatically from the point where printing
stopped due to the paper jam.
Note
• The following illustration is for a printer installed with two optional paper trays.
# in
Figure
Paper Jam
Location
Message Example
1 Paper jams in the
fuser unit area
Open covers C and B in this order and remove the jammed paper.
If the jammed paper cannot be removed, open cover A, remove the
cartridge, and remove the jammed paper.
2 Paper jams in the
Duplex unit
Open cover C, and remove the jammed paper. If the jammed paper
cannot be removed, open cover A, remove the cartridge, and remove the
jammed paper.
3 Paper Jam in Trays
1 - 3
Pull out tray N, remove the jammed paper, and check the positions of the
paper guides (N refers to Trays 1 - 3).
4 Paper jams in the
Print cartridge area
Open cover A, remove the cartridge, and remove the jammed paper.
5 Paper Jam in the
Bypass Tray
Pull out all the trays, including the bypass tray, remove any jammed paper
from inside the printer, and open/ close cover A.
4:“ Paper jams in the Print
cartridge area” (P. 197)
2:“ Paper jams in the Duplex
unit” (P. 199)
3:“ Paper Jam in Trays 1 - 3”
(P. 193)
5:“ Paper Jam in the Bypass
Tray” (P. 191)
1:“ Paper jams in the fuser unit
area” (P. 196)

 Loading...


