332 A Appendix
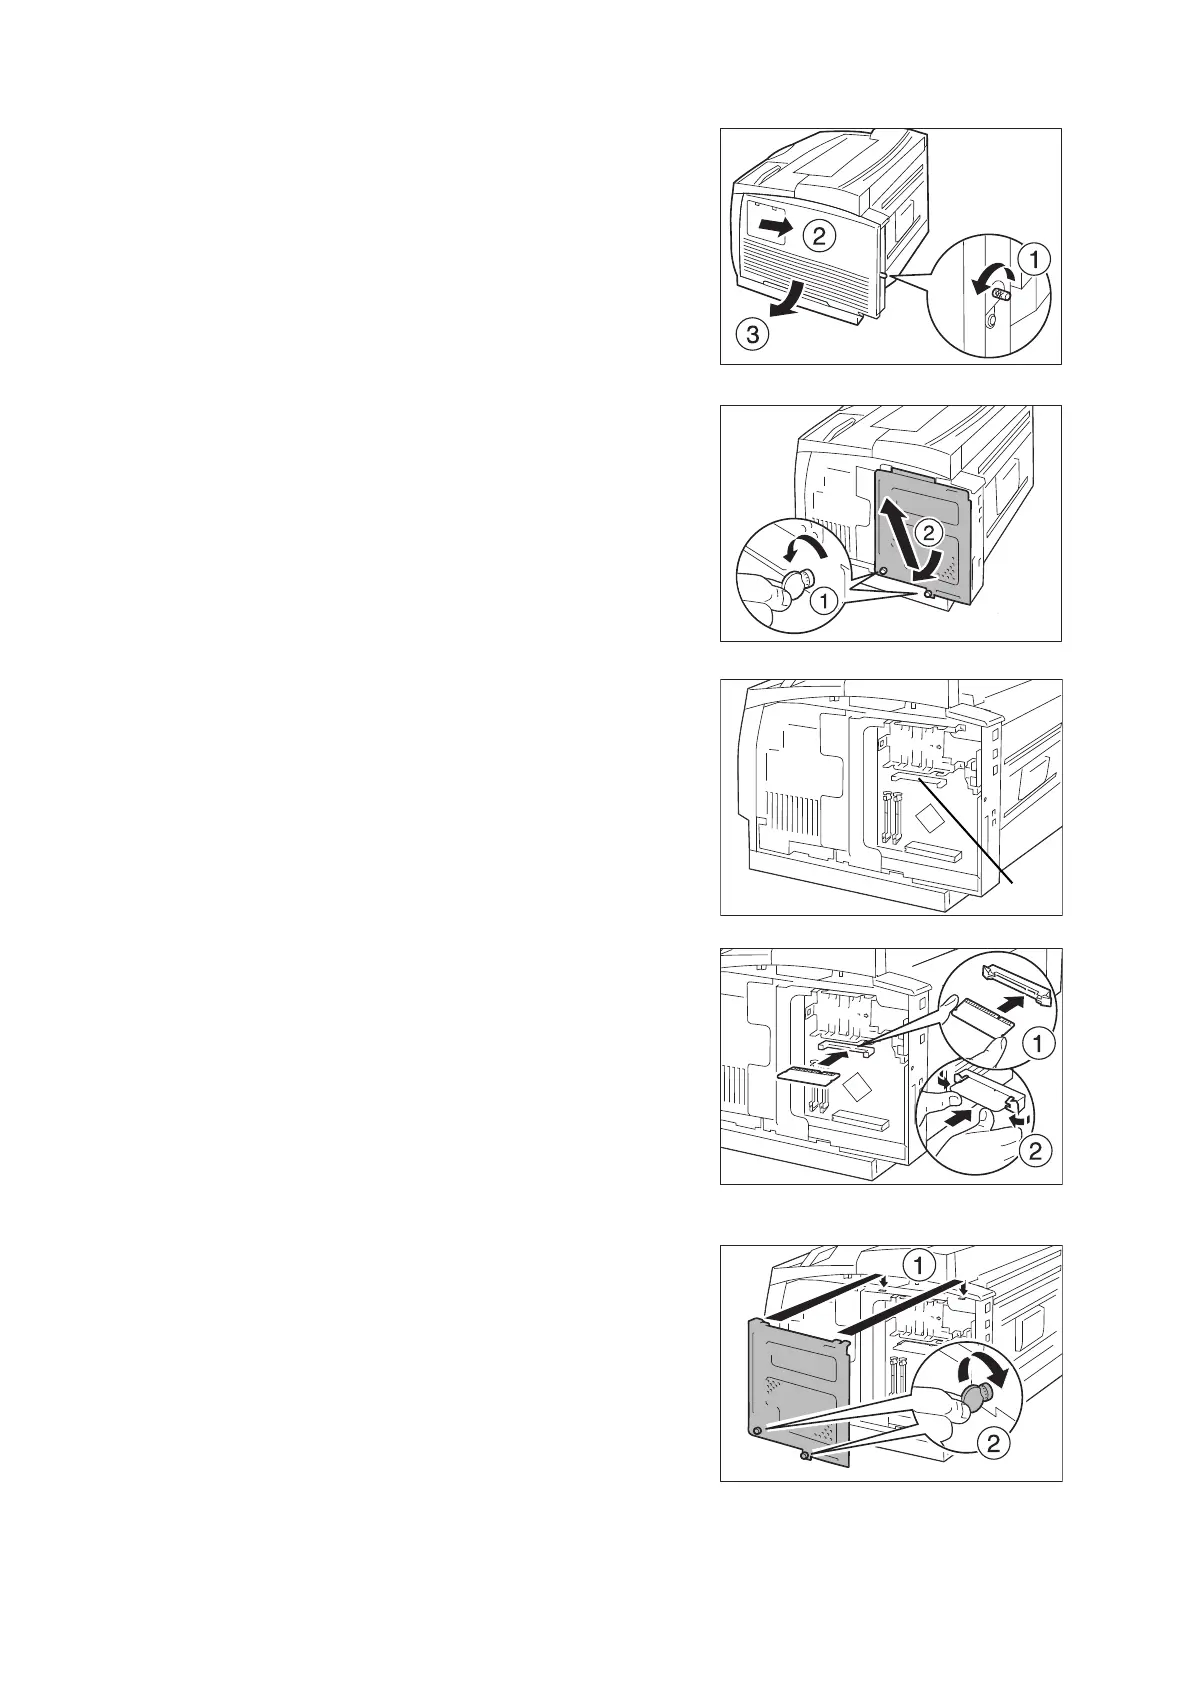
2. Loosen the screw of the rear panel of the
printer, slide the right cover backward, and
remove the cover by pulling the lower side
of the cover towards you.
3. Using a coin, etc., loosen the two screws at
the bottom of the inner cover and remove
the cover.
4. Insert the extension system memory into
the M2 slot shown in the illustration on the
right.
Important
• The R1/M2 slots are for other options. Do not insert
the extension system memory in these slots.
• 512 MB memory is installed as standard in the M1 slot.
Correctly align the notch on the extension
system memory module with the projecting
part of the M2 slot on the printer, insert the
memory module straight in, and then
strongly push it on both sides from the top
of the memory module.
Note
• Be sure to fully insert the extension system memory
module.
• The two retainer clips located on both sides will rise
when the extension system memory is fully pushed in.
5. Insert the two tabs at the top of the internal
cover into the recesses in the printer, and
close the cover. Using a coin, etc., tighten
the two screws at the bottom of the cover.
 Loading...
