A.6 Installing the HDD Extension Kit (HDD Extension Kit) 335
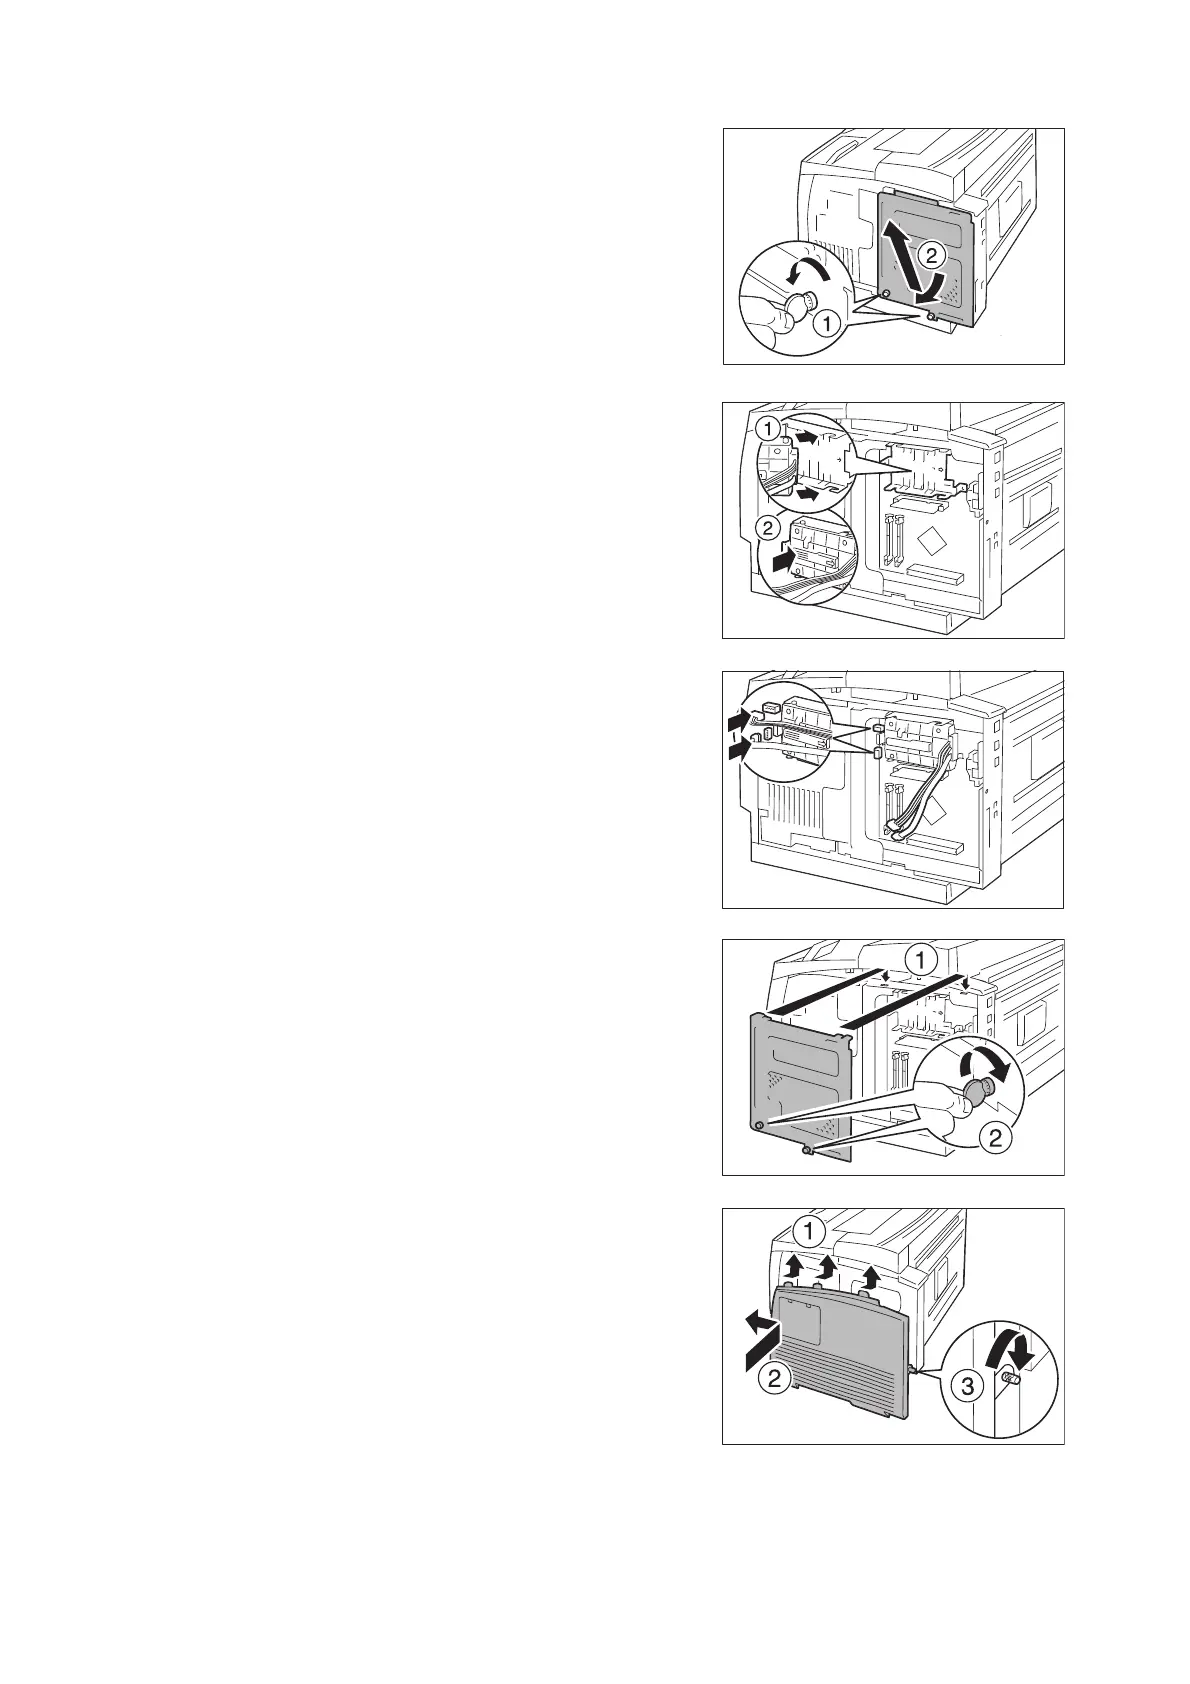
3. Using a coin, etc., loosen the two screws at
the bottom of the inner cover and remove
the cover.
4. Setting the connector cables that come out
of the HDD Extension Kit (optional) on the
outside, insert the HDD Extension Kit
(optional) in the metal frame on the
controller board. Correctly fit the projecting
part of the HDD Extension Kit (optional) into
the recess in the frame.
5. Connect the connector cables that come
out from the HDD Extension Kit (optional)
into the respective controller board
connectors.
6. Insert the two tabs at the top of the internal
cover into the recess in the printer, and
close the cover. Using a coin, etc., tighten
the two screws at the bottom of the cover.
7. Close the cover by pushing it up so that the
three projections at the top of the right
cover fit into the corresponding recesses on
the printer.Tighten the screw at the rear of
the printer.
8. Connect the power cord. Switch on the
power of the printer by pressing the <|>
side of the power switch.

 Loading...


