TELEMETRY : VARIO
Displaying data from the variometer
VARIO is a screen which displays / sets up the
variometer information from an optional altitude
sensor or GPS sensor.
The variometer of the model which is ying can
be known.
If it becomes higher or lower than the setting an
alarm and/or vibration will alert you.
To ensure that the pilot is aware as to the model's
status, the T14SG incorporates a different melody
for ascent and descent. Additionally, depending
upon the rate of climb or descent, the tones vary to
indicate whether or not the airplane is climbing or
descending at a rapid rate.
*It cannot be used in FASST mode and S-FHSS mode.
*Only receiver voltage and EXT voltage can be used in
FASSTest12CH mode.
*The FASSTest14CH mode can use all the telemetry functions.
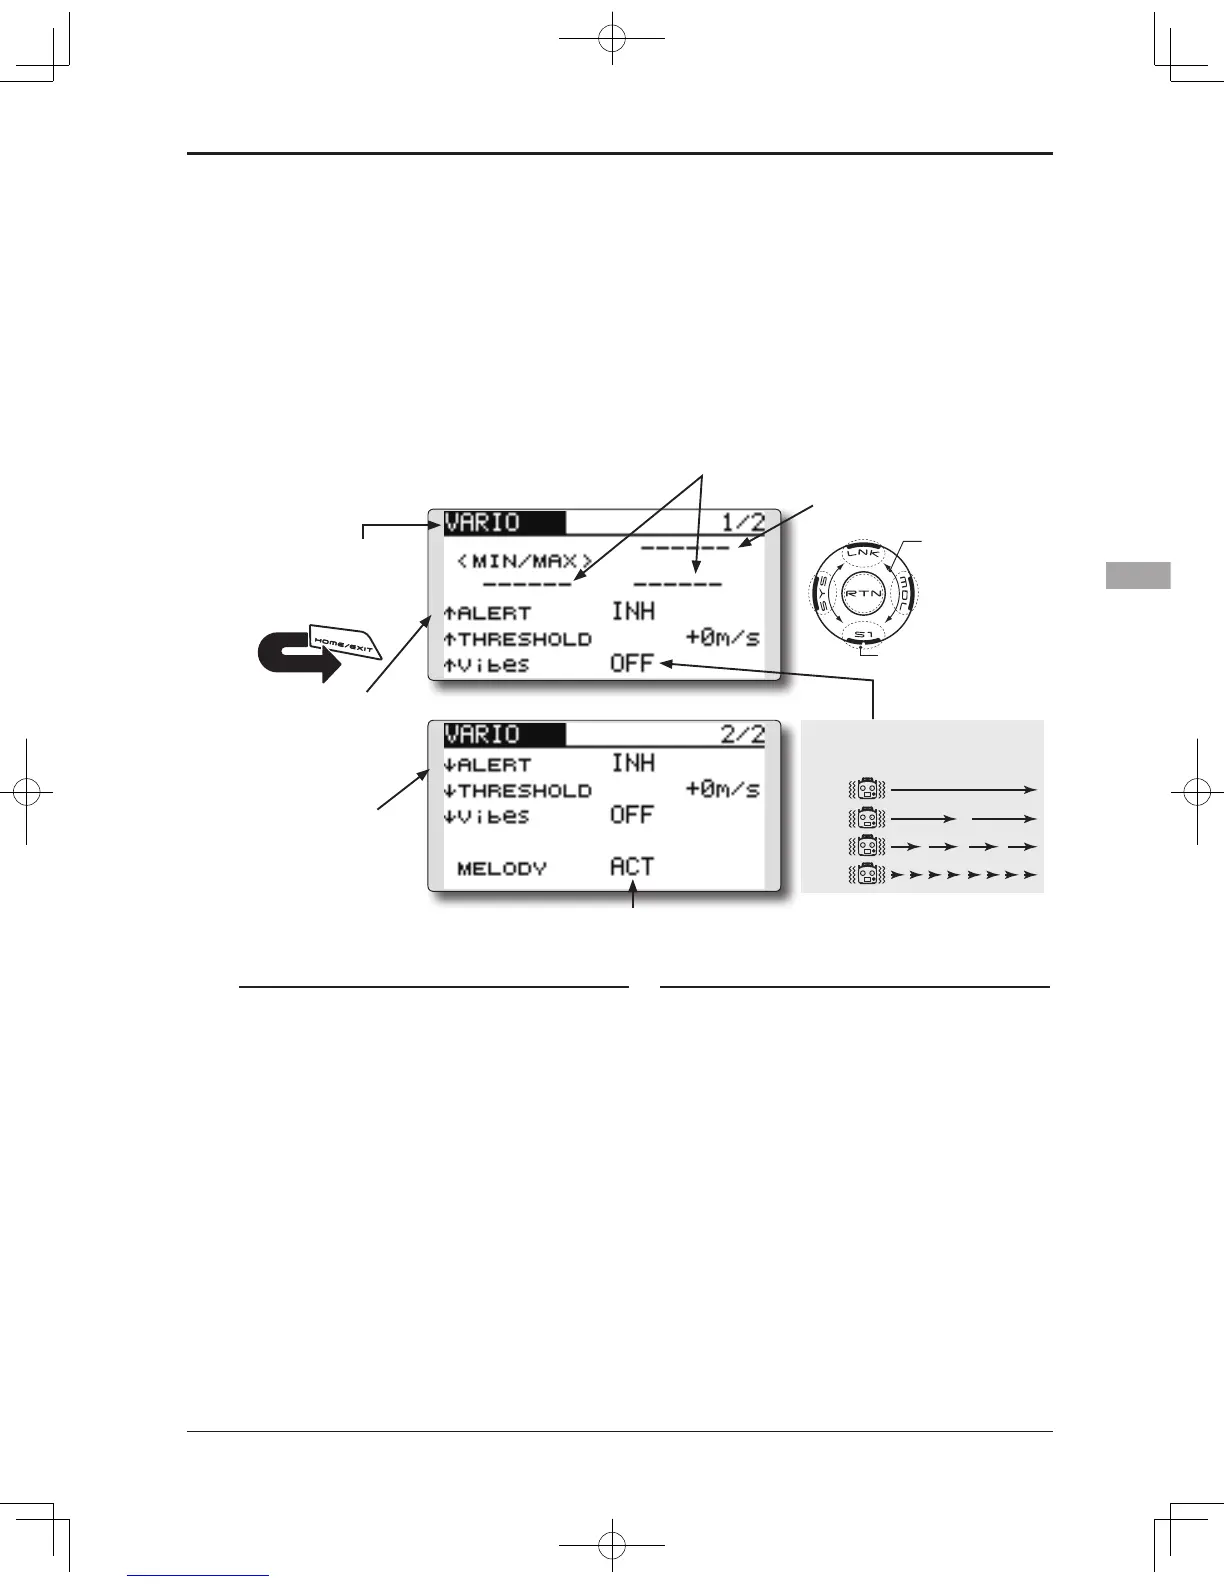
● Select [VARIO] in the TELEMETRY screen and
access the setup screen shown below by touching
the RTN button.
Scrolling
● Moving cursor
● Selecting mode
● Adjusting value
● To next page
● Variometer
● The maximum and the minimum when
powering ON are shown.
● If this is set to ACT, a melody will be activated during
the rise or dive, depending on your set values.
● ↓ An downward arrow
indicates the alarm
will sound when the
altitude reaches
below your set value.
● ↑ An upward arrow
indicates the alarm
will sound when the
altitude reaches
above your set value.
Alert set : Rise side
1. Move the cursor to the ↑ALERT item and
touch the RTN button to switch to the data
input mode.
2. Select the ACT mode by scrolling the touch
sensor.
3. Touch the RTN button. (To terminate the input
and return to the original state, touch the S1
button.)
4. Move the cursor to the ↑THRESHOLD [+0m/s]
item and touch the RTN button to switch to
the data input mode.
5. Ajust the rate by scrolling the touch sensor.
Initial value: +0m/s
Adjustment range: -49m/s~+50m/s
(↑THRESHOLD > ↓THRESHOLD)
*When the RTN button is touched for one second, the rate is
reset to the initial value.
6. Touch the RTN button. (To terminate the input
and return to the original state, touch the S1
button.)
Alert set : Dive side
1. Scroll to the second page by pushing S1.
Move the cursor to the ↓ALERT item and
touch the RTN button to switch to the data
input mode.
2. Select the ACT mode by scrolling the touch
sensor.
3. Touch the RTN button. (To terminate the input
and return to the original state, touch the S1
button.)
4. Move the cursor to the ↓THRESHOLD [+0m/s]
item and touch the RTN button to switch to
the data input mode.
5. Ajust the rate by scrolling the touch sensor.
Initial value: +0m/s
Adjustment range: -50m/s~+49m
(↑THRESHOLD > ↓THRESHOLD)
*When the RTN button is touched for one second, the rate is
reset to the initial value.
6. Touch the RTN button. (To terminate the input and
return to the original state, touch the S1 button.)
TYPE1
TYPE2
TYPE3
TYPE4
"Vibes" type
*An altitude sensor or GPS sensor must be installed in the aircraft.
If the following types are selected, the
transmitter will vibrate during the warning.
●Press the S1 button to advance to the next page.