Receiver Type Change & How To Link
First set up the receiver. Setting changes are immediately reected. Next, the transmitter
and receiver are linked and the receiver memorizes the transmitter ID number so that sig-
nals from other transmitters will not be received.
In addition, with the T-FHSS telemetry system,
the transmitter simultaneously memorizes the
receiver ID numbers so that data from other re-
ceivers will not be received.
The method of setting up the receiver type and the method of linking the transmitter and
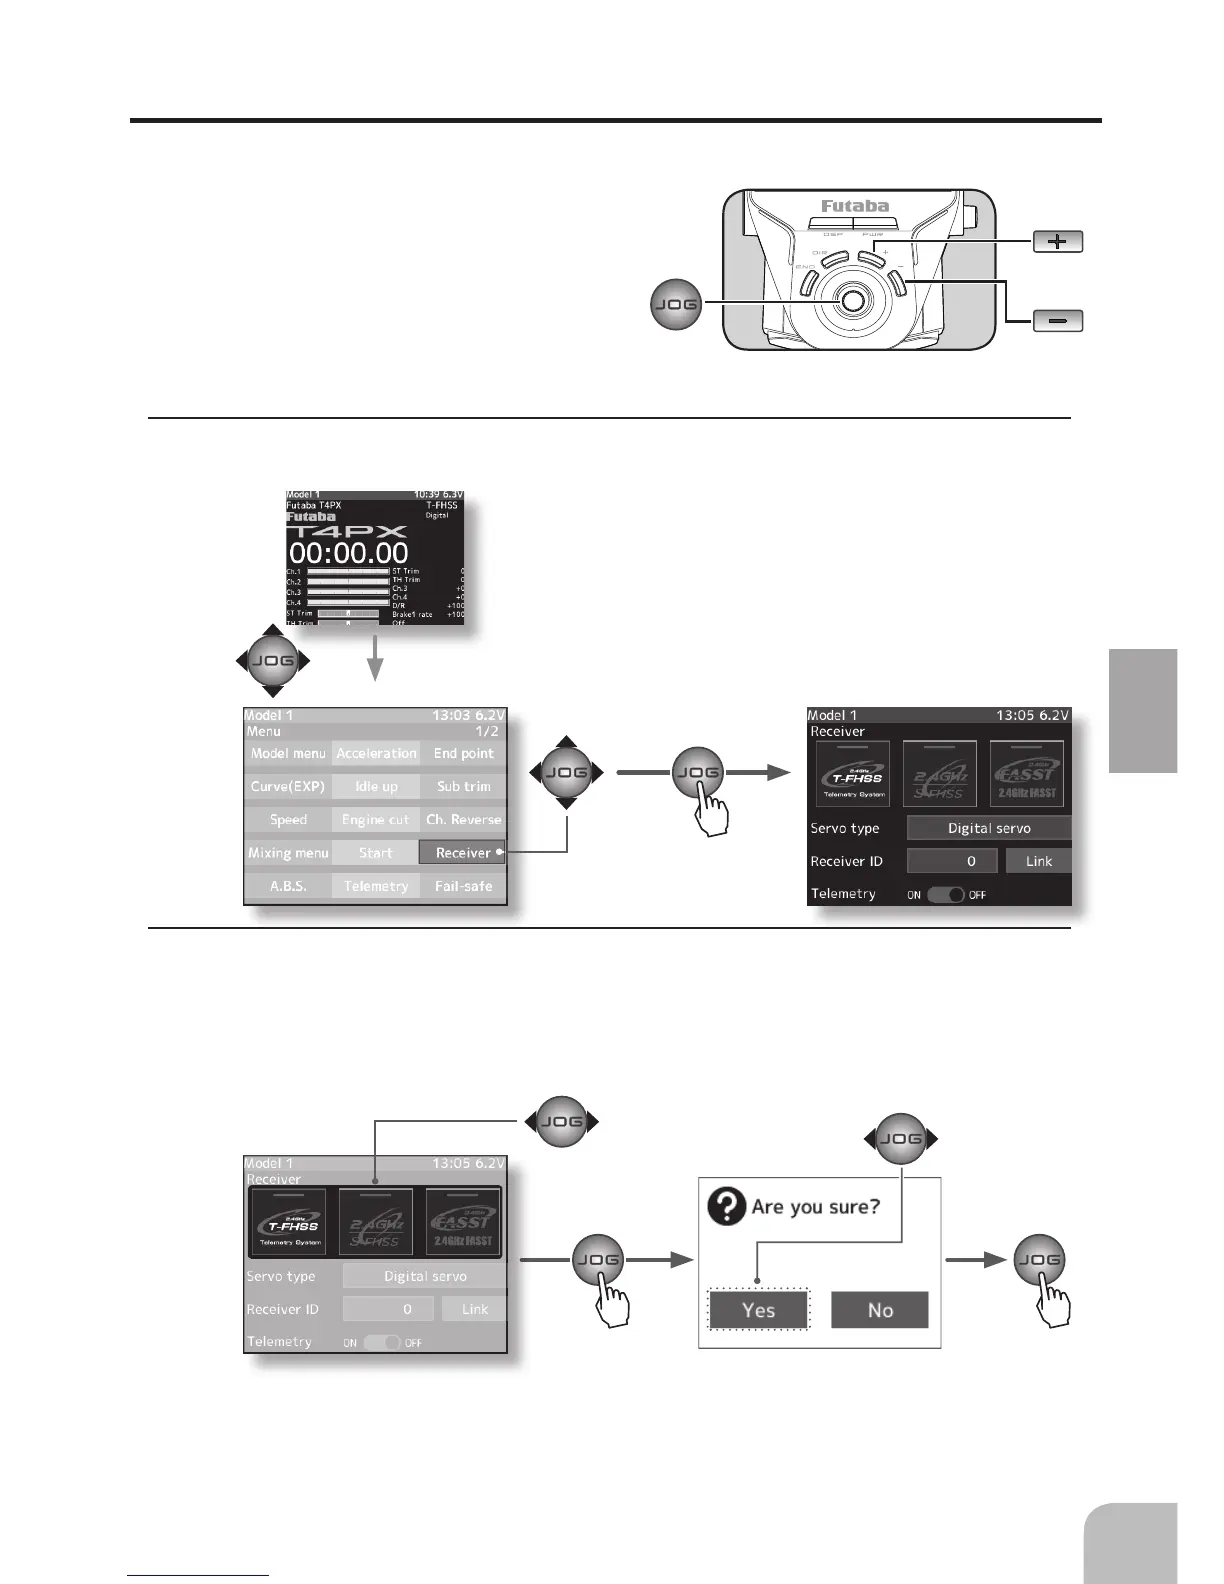
receiver are described. Refer to the gure at the right for the edit buttons used.
1
Set the transmitter "PWR" side power switch to ON.
Display the menu 1 screen by (JOG) button up, down,
left, or right operation at the home screen. Select "Re-
ceiver setup" by (JOG) button up, down, left, or right
operation and display the "Receiver setup" screen by
pressing the (JOG) button.
2
Select the receiver type to be changed by (JOG) button left or right operation. When the
(JOG) button is pressed, a conrmation screen is displayed. To execute the change, select
"YES" by JOG button. When the JOG button is pressed for about 1 second, an electronic
beeping sound is generated and setting is ended. To cancel the change, select "No" and
press the (JOG) button.
*
After set up this far is complete, when using a FASST system (R614FS/FF/FF-E) or S-
FHSS system (R2104GF, R204GF-E, etc.) receiver, go to "Receiver other than T-FHSS" on
P39. When using a telemetry function T-FHSS receiver (R304SB, etc.), go to step