26
Returntotableofcontents
4
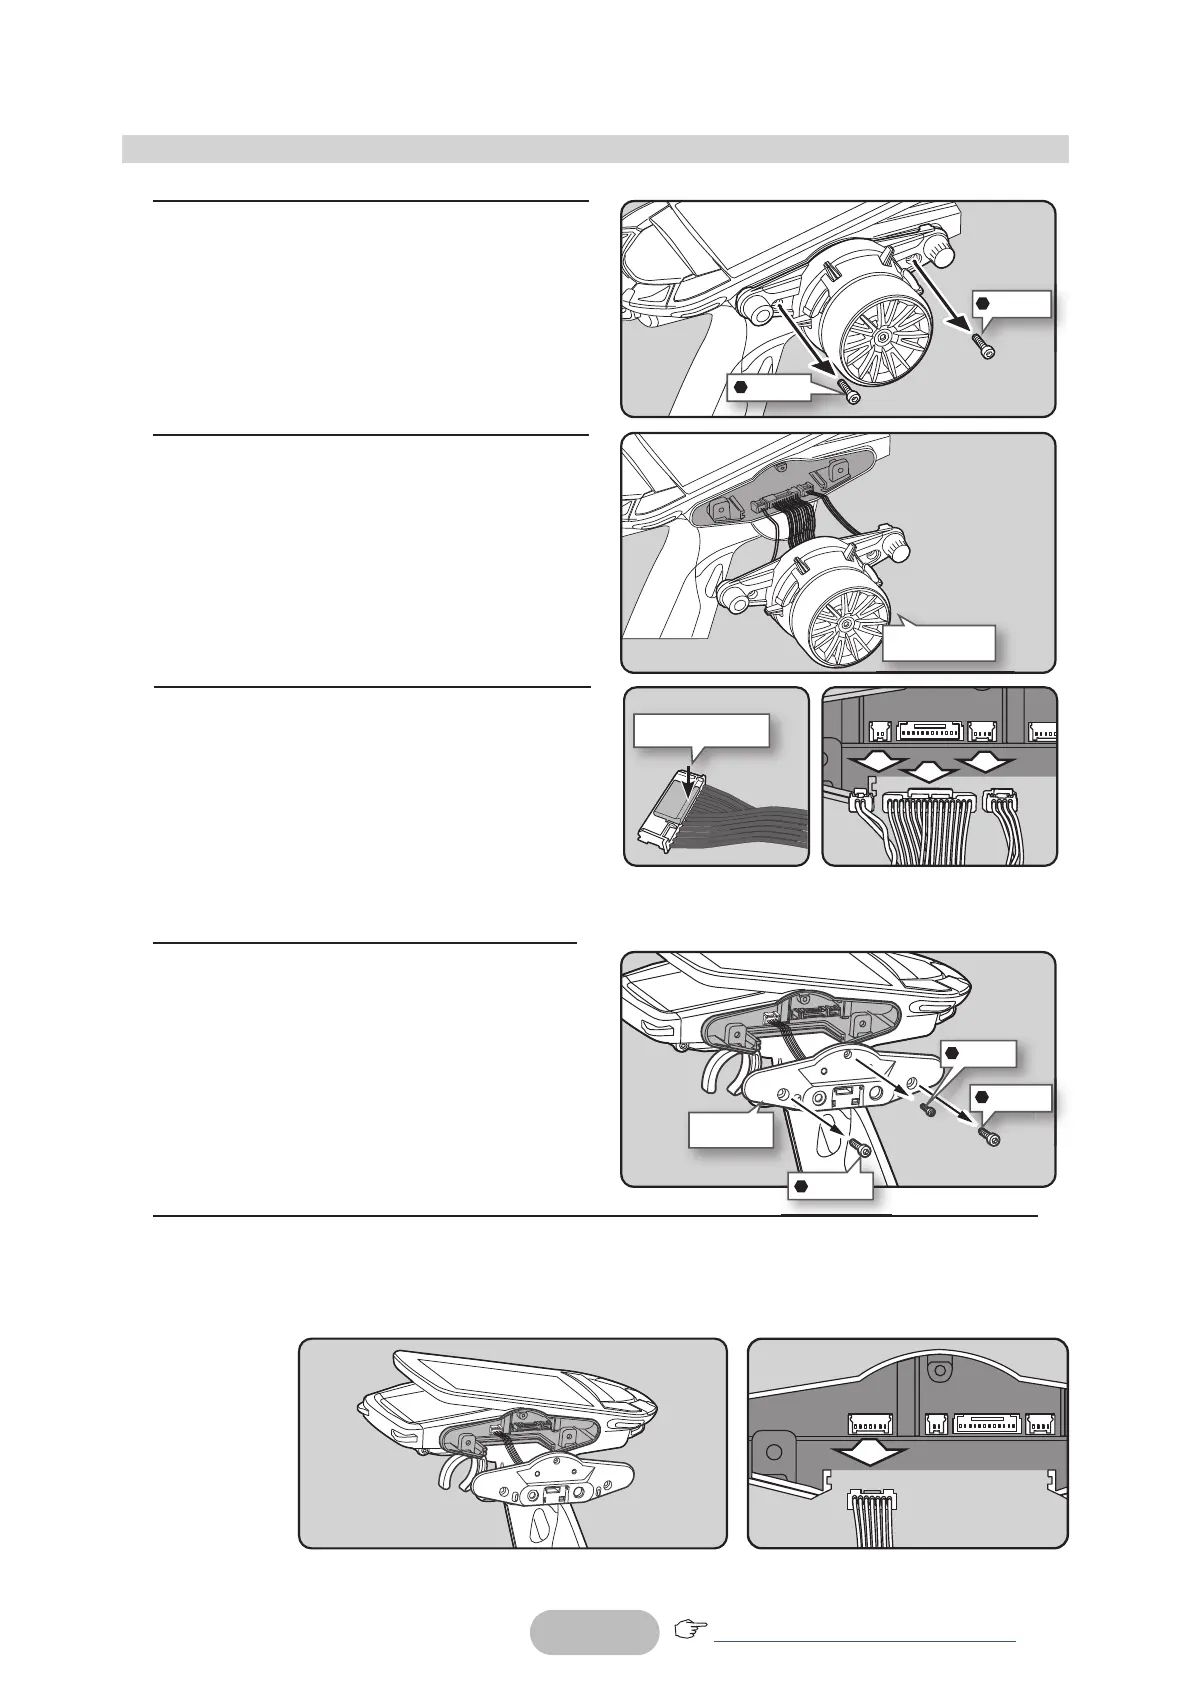
Next, remove the rear unit on the oppo-
site side. With a hex wrench, remove the
two M3x12 screws and one M2x6 screw
on the rear unit.
(Using a hex wrench.)
Remove the 3 mounting screws com-
pletely from the transmitter body.
M2×6
Modifying for left-hand use
1
Remove the 2 steering unit mounting
screws (M3x12 screw).
(Using a hex wrench.)
Remove the 2 mounting screws com-
pletely from the transmitter body.
Steering unit
Rear unit
2
Gently remove the steering unit, without
pulling excessively on the wiring.
- Remove the steering unit slowly so that
the internal wiring is not pulled unrea-
sonably.
Press to unlock
3
Remove the 3 connectors from the PC
board.
Press the upper side of the connector to
release the lock and remove it from the
PC board.
(The 3 connectors each have the same
lock type although they are different in
size.)
5
Gently remove the rear unit, without pulling excessively on the wiring.
- Remove the rear unit slowly so that the internal wiring is not pulled unreasonably.
M3×12
M3×12
M3×12
M3×12
 Loading...