56
Protect
This function gives the image protection from erasing. Follow the steps below to
perform the protect functions.
1. Set the mode dial to [
] and power on the camera.
2. Press the MENU button.
The menu screen appears.
3. Select Protect by using the c or d button and
press the SET button.
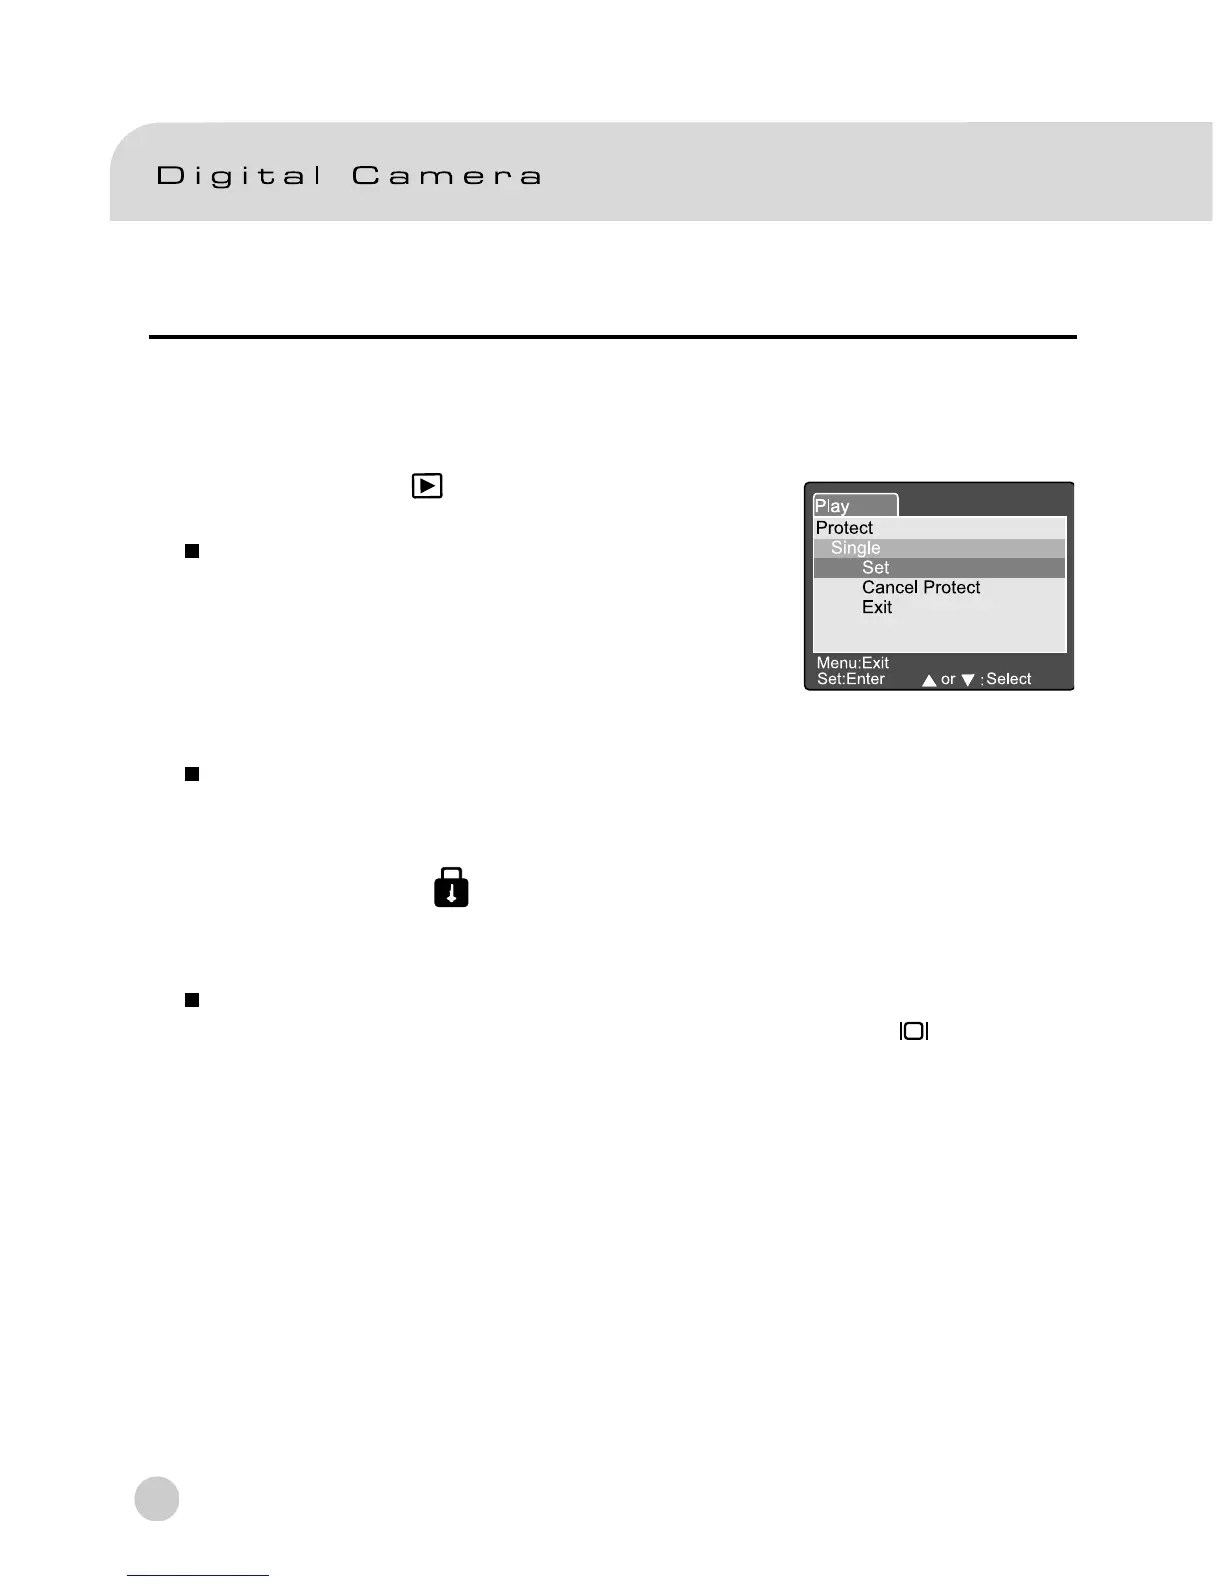
4. The Protect submenu appears, including Single,
All and Select. Use the c or d button to select
one of them and press the SET button to confirm.
5. Use the c or d button to select the desired setting and press the SET button.
In the Single/All submenu, use the c or d button to select the desired setting
and press the SET button.
[Set]: The one image displayed on the LCD monitor is locked and
[ ] is displayed on the LCD monitor.
[Cancel Protect]:Cancel image protection.
[Exit]: Exit from the menu screen.
If “Select” is selected, thumbnail display appears on the LCD monitor. Use
the c,d, e or f button to select the image and press the [
] button to
select lock/unlock and press the SET button to confirm.
Set:Enter or :Select
Protect
Single
Set
Cancel Protect
Exit