CHAPTER4: Upgrading Your Computer
42
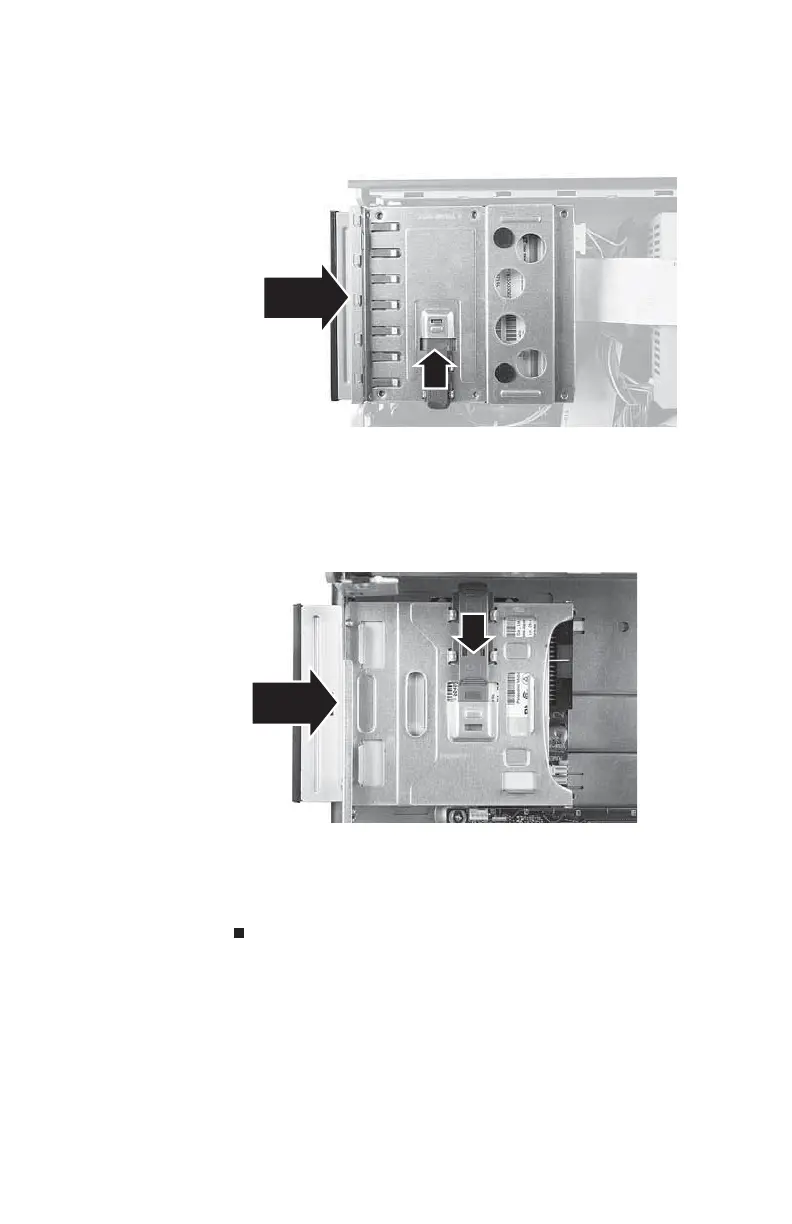
8 Slide the new 3.5-inch component into the bay, then
push down on the release latch to move it to the Lock
position.
9 Reconnect the cables on the 3.5-inch component, using
the notes you took previously.
10 Replace the 5.25-inch component bay into the chassis.
11 Slide the 5.25-inch component into the bay and push up
on the release latch to move it to the Lock position.
12 Reconnect the cables on the 5.25-inch component, using
the notes you took previously.
13 Replace the front bezel and the hard drive bracket, then
replace the side panel.
8512732.book Page 42 Thursday, September 27, 2007 11:33 AM