CHAPTER4: Upgrading Your Computer
54
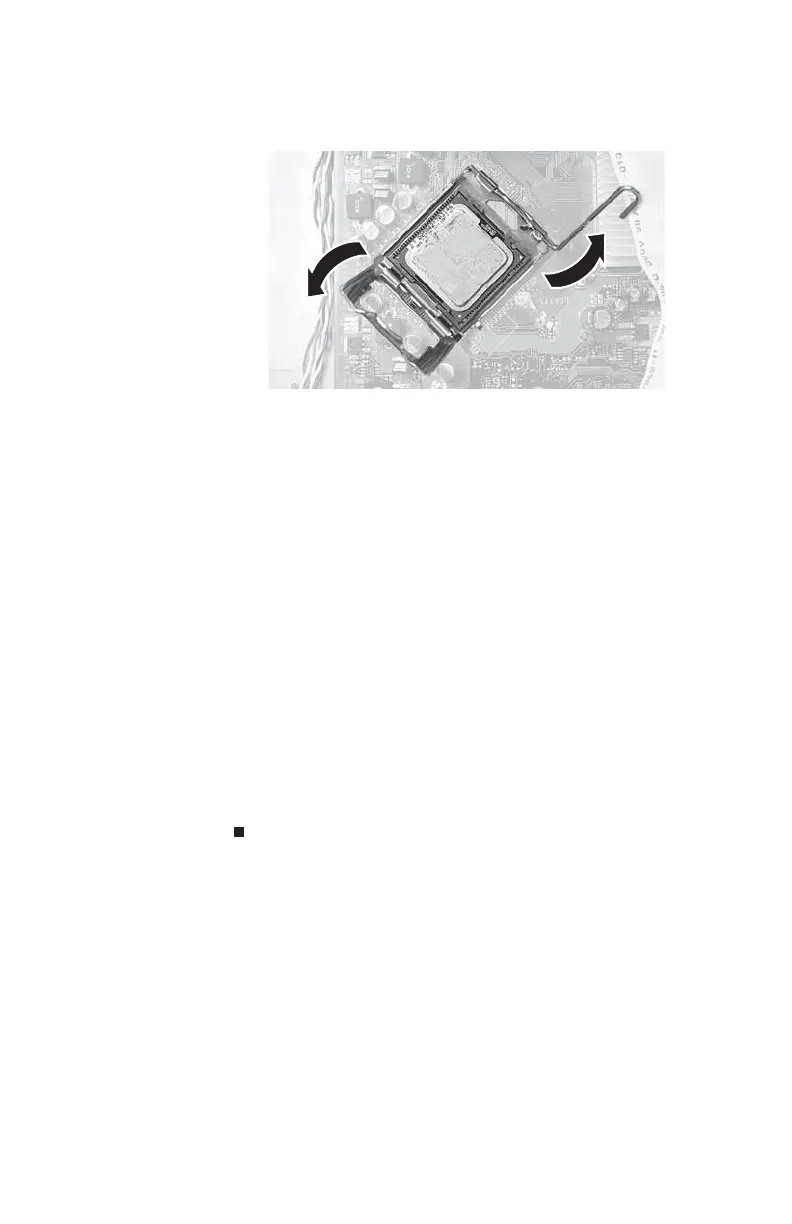
7 Release the processor by pushing down on the lever and
then lifting the lever completely up.
8 Remove the processor from the system board.
9 Install the new processor onto the system board, making
sure that Pin 1 on the processor (indicated by the printed
arrow on the corner of the processor) aligns with Pin1
on the processor socket (indicated by the absence of a
pin hole in the processor socket), then return the lever
to its locked position.
10 Place the new heat sink on the processor, making sure
the thermal paste is aligned between the heat sink and
the processor, then tighten the screws that secure the
heat sink to the system board.
11 Connect the fan cable to the system board, then reinstall
the fan.
12 Replace the 5.25-inch component bay into the chassis.
13 Replace the front bezel, then replace the hard drive
bracket, being careful not to pinch or kink the hard drive
cables.
14 Replace the side panel.
8512732.book Page 54 Thursday, September 27, 2007 11:33 AM