JF-240UV User Manual
123
5.3.8 How to set UV Lamp Curing mode for bright color printing
Apply “Delay Curing” in UV lamp Curing mode can enhance color brightness, and therefore create
vivid color gamut and glossy effect to the printed images.
There are five options under UV lamp curing mode, including Normal Curing (Default), Delay Curing,
Delay Curing 2, Delay Curing 3 and Delay Curing 4. The larger the number, the brighter the color can
be created under Delay curing mode, i.e. Delay Curing 4 creates greater color brightness than Delay
Curing 3; Delay Curing 2 creates greater color brightness than Delay Curing, and so on.
Note:Applying the Delay Curing option will reduce the print sharpness and ink adhesion, please use
Delay Curing function according to the printing effect that wants to achieve.
How to set UV Lamp Curing mode?
If your JF-240UV is not equipped with Varnish ink, please apply the following steps.
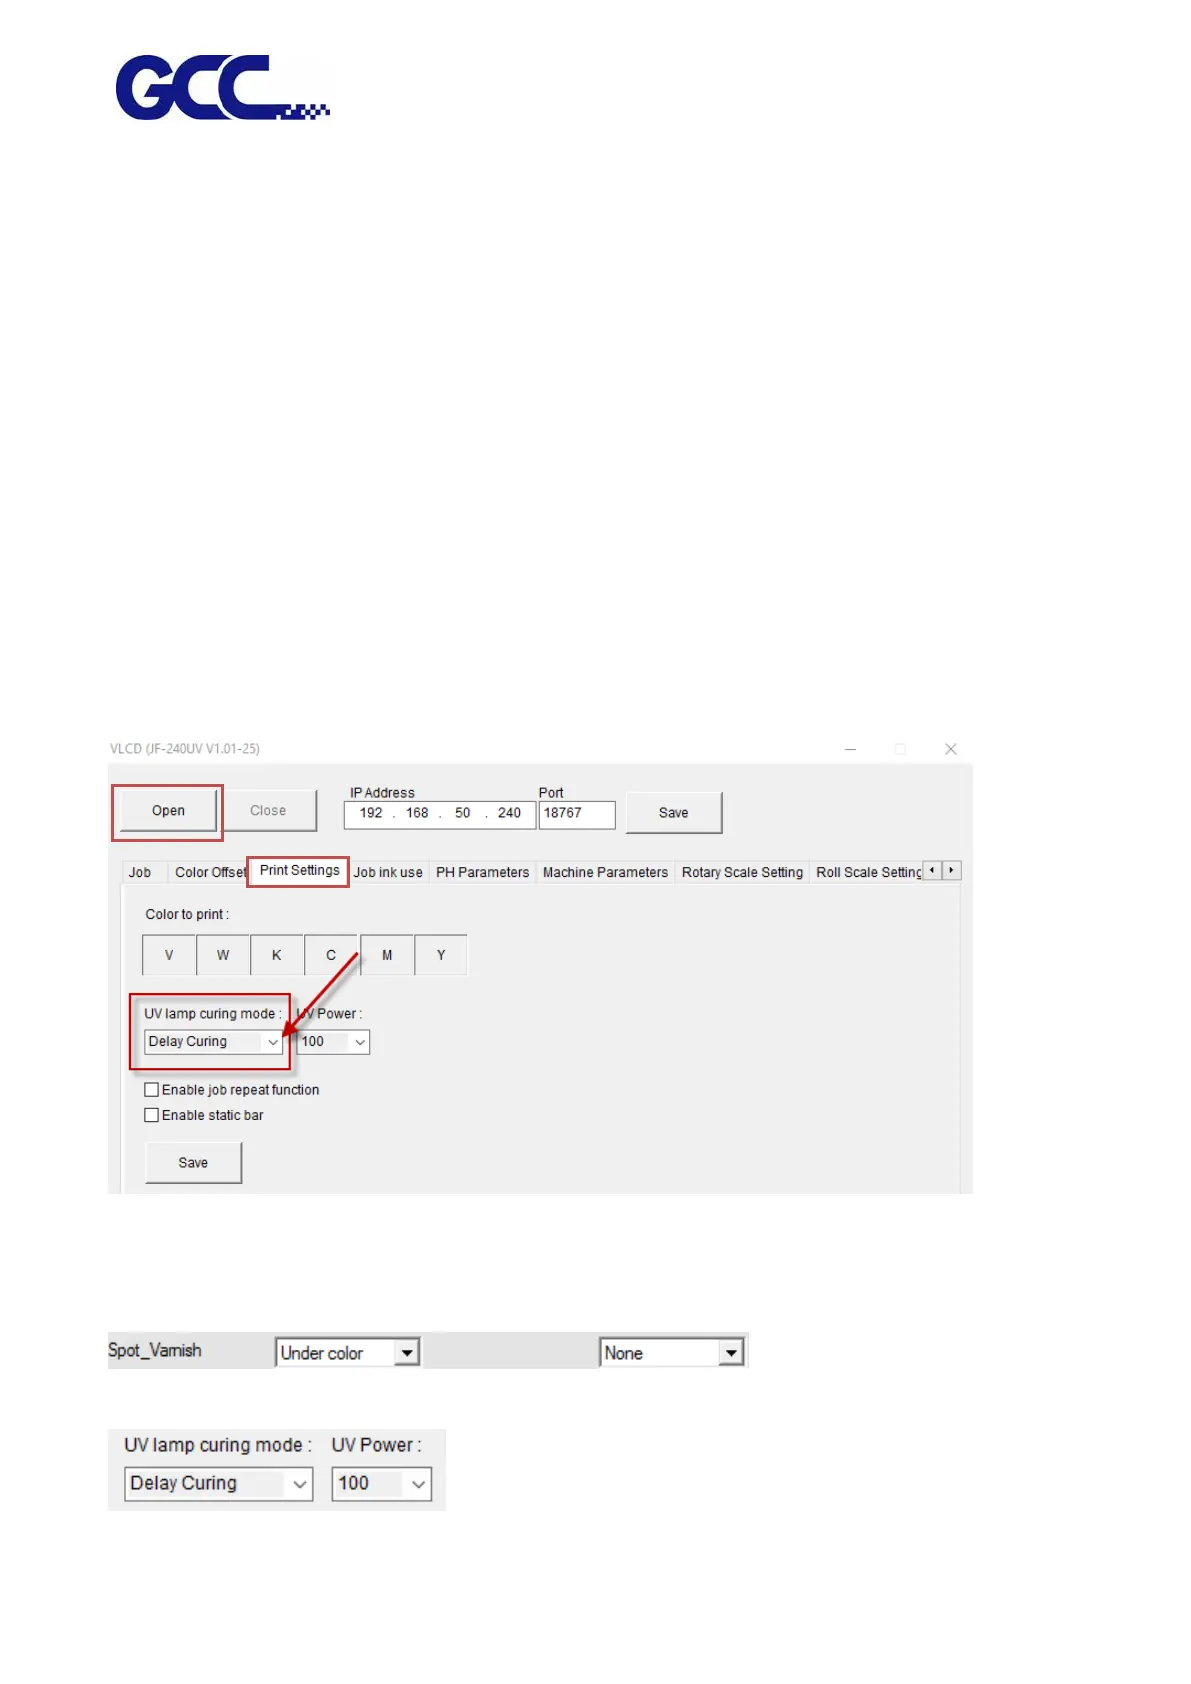
Step 1 Launch FlexiPRINT GCC Edition and open VLCD
Step 2 Select Open → Print Settings → UV lamp Curing mode, select “Delay Curing” and click Save.
If your JF-240UV is equipped with Varnish ink, please apply the following steps.
Step 1 Spot_Varnish→Under color、None
Step 2 UV lamp Curing mode → Delay Curing → Save