Chapter 5: Advanced setup
TruVision DVR 10 User Manual 51
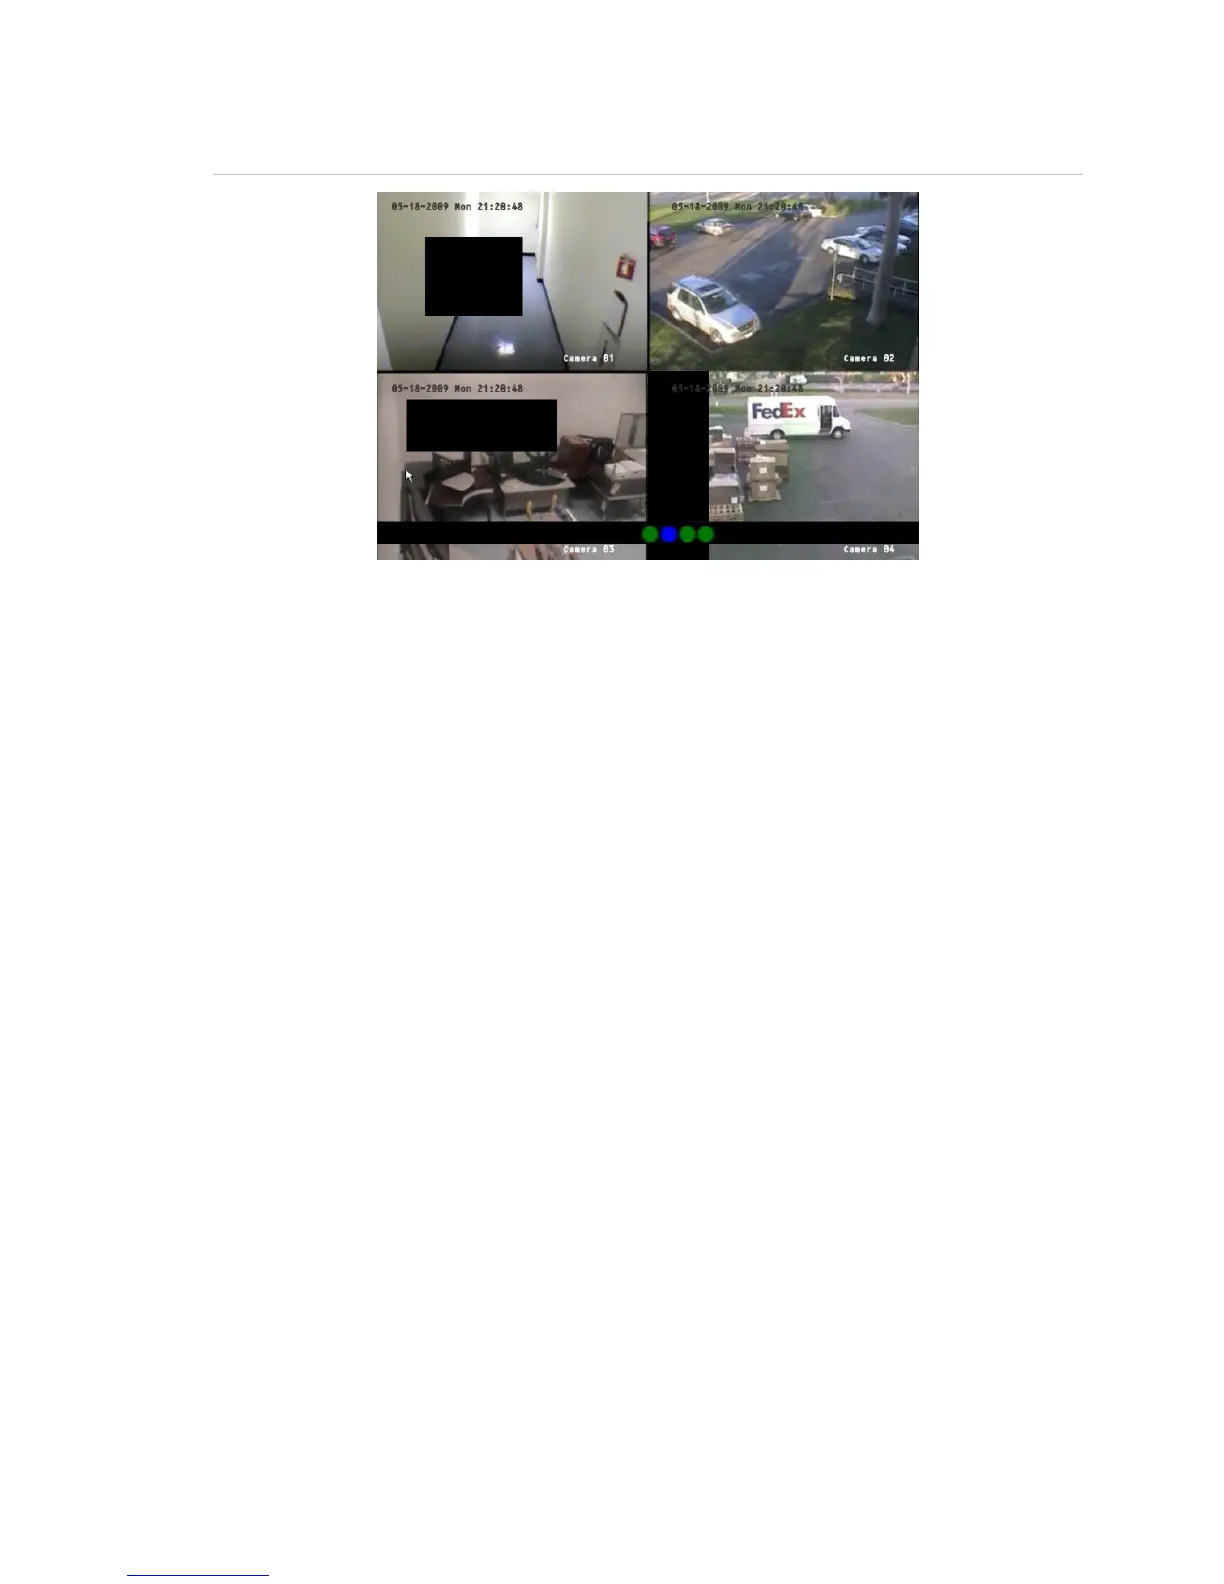
Figure 18: Area masked
To define privacy masking:
1. Display the Camera Configuration screen and select a camera.
2. Click Advanced Settings Setup to display the Advanced Settings screen.
3. Select the Enable the Privacy Masking check box to enable privacy masking.
4. Click Privacy Masking Zone to enter the Mask Area Setup interface.
The setup interface displays a grid (22 x 18 panes for PAL, 22 x 15 for NTSC). A
single pane in yellow is displayed at the top left corner. The yellow pane indicates
the area to be masked.
5. Select the areas to be masked.
Move the pointer and click or use the directional arrow buttons (Up, Down, Left, or
Right) to move the yellow pane to the zone you want to mask. Click the mouse
again to select that area for privacy masking. The yellow panes turn red,
indicating that this area will be hidden from view. Drag the mouse or use the
directional arrow buttons to extend or shrink privacy masking as shown in the
figure below.
 Loading...