Chapter 5: Advanced setup
TruVision DVR 10 User Manual 57
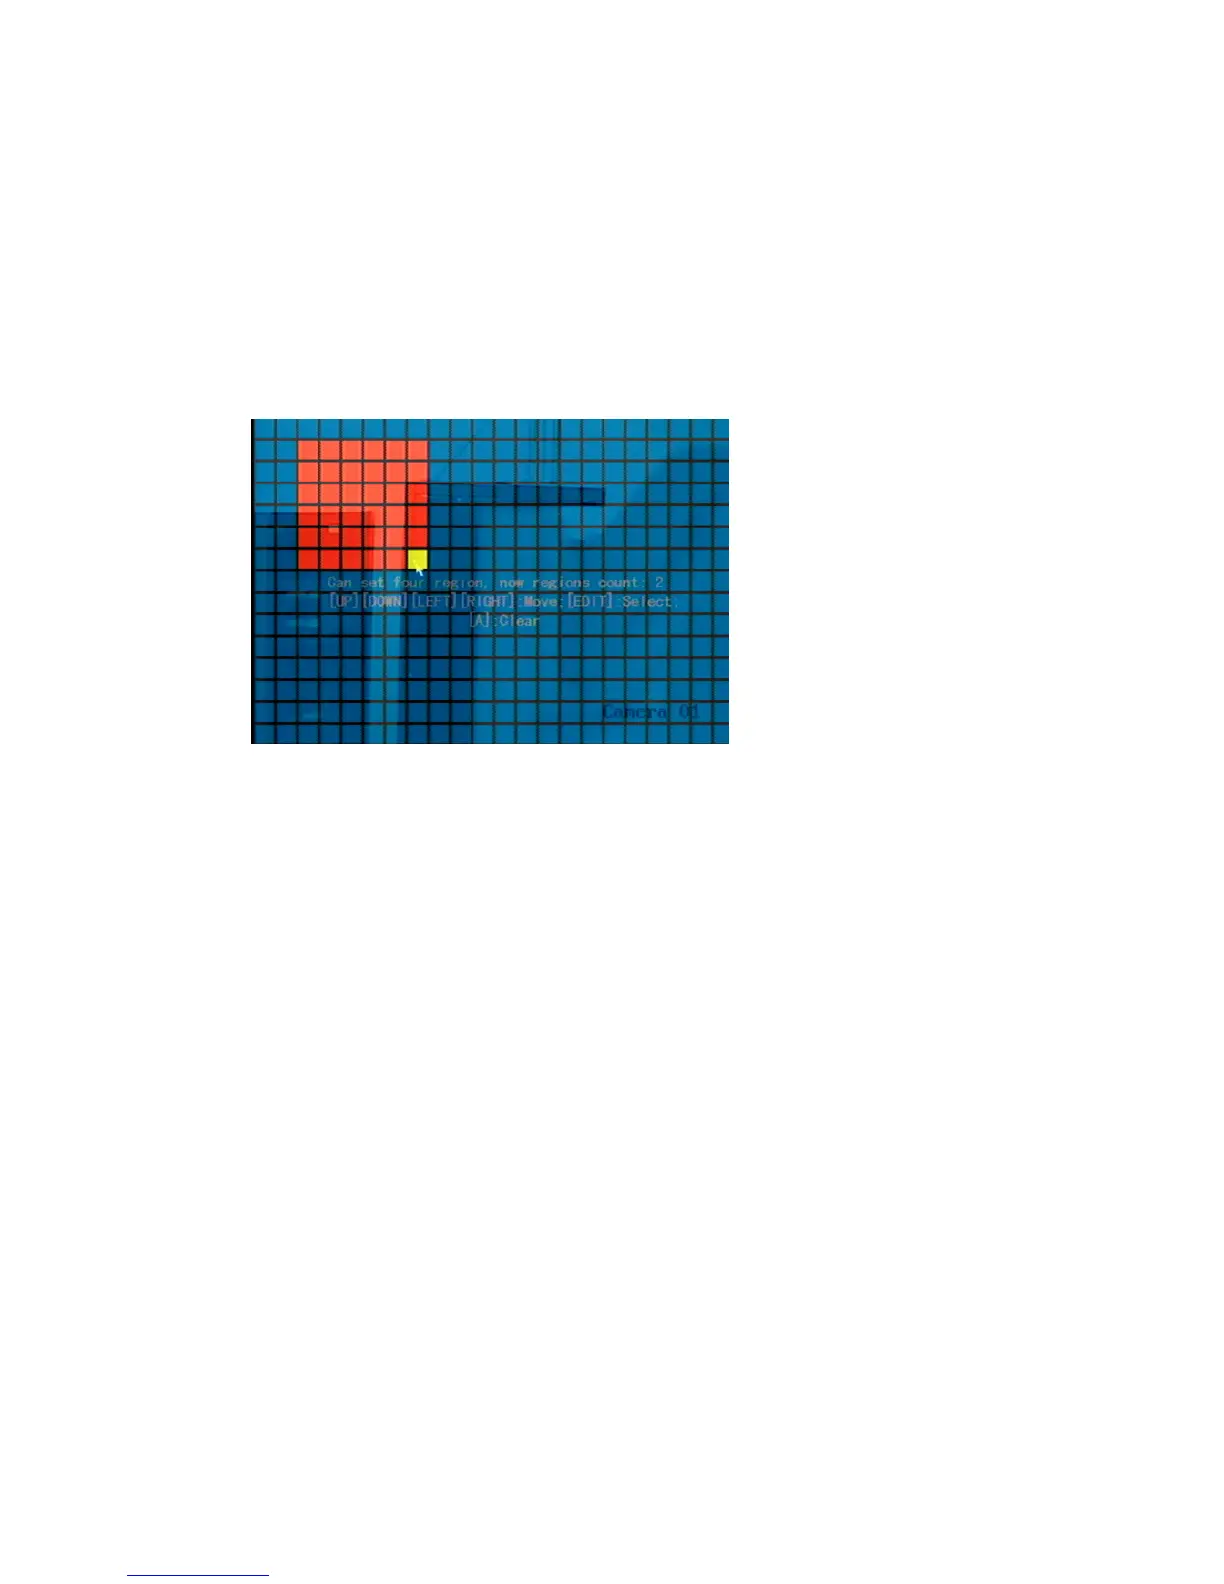
4. Define the motion detection area.
Move the pointer or use the directional arrow buttons (Up, Down, Left, or Right) to
move the yellow pane to the zone you want to mask. Click to select that area for
motion detection. The yellow panes turn red, indicating an alarm will trigger if
motion is detected within this area. Drag the mouse or use the directional arrow
buttons to extend or shrink the motion detection area.
5. Click in the red area to save that area for motion detection and return to the
yellow pane to continue defining areas as shown in the figure below.
6. Repeat steps 4 to 6 for additional motion detection areas. You can set up four
masked areas on a screen.
7. To clear part of a motion detection area, move the yellow pane to the motion
detection area you want to delete and press REC. To clear all motion detection
zones, press #.
8. Click the mouse to return to the Camera Configuration screen.
To define the motion alarm response rules:
1. Display the Motion Detection Alarm Rules screen.
Click Motion Detection Rules to display the Motion Rules dialog screen as shown in
the figure below.
 Loading...