Onboard Help
LOGIQ V2/LOGIQ V1 – User Guide 6-35
Direction 5610736-100 Rev. 9
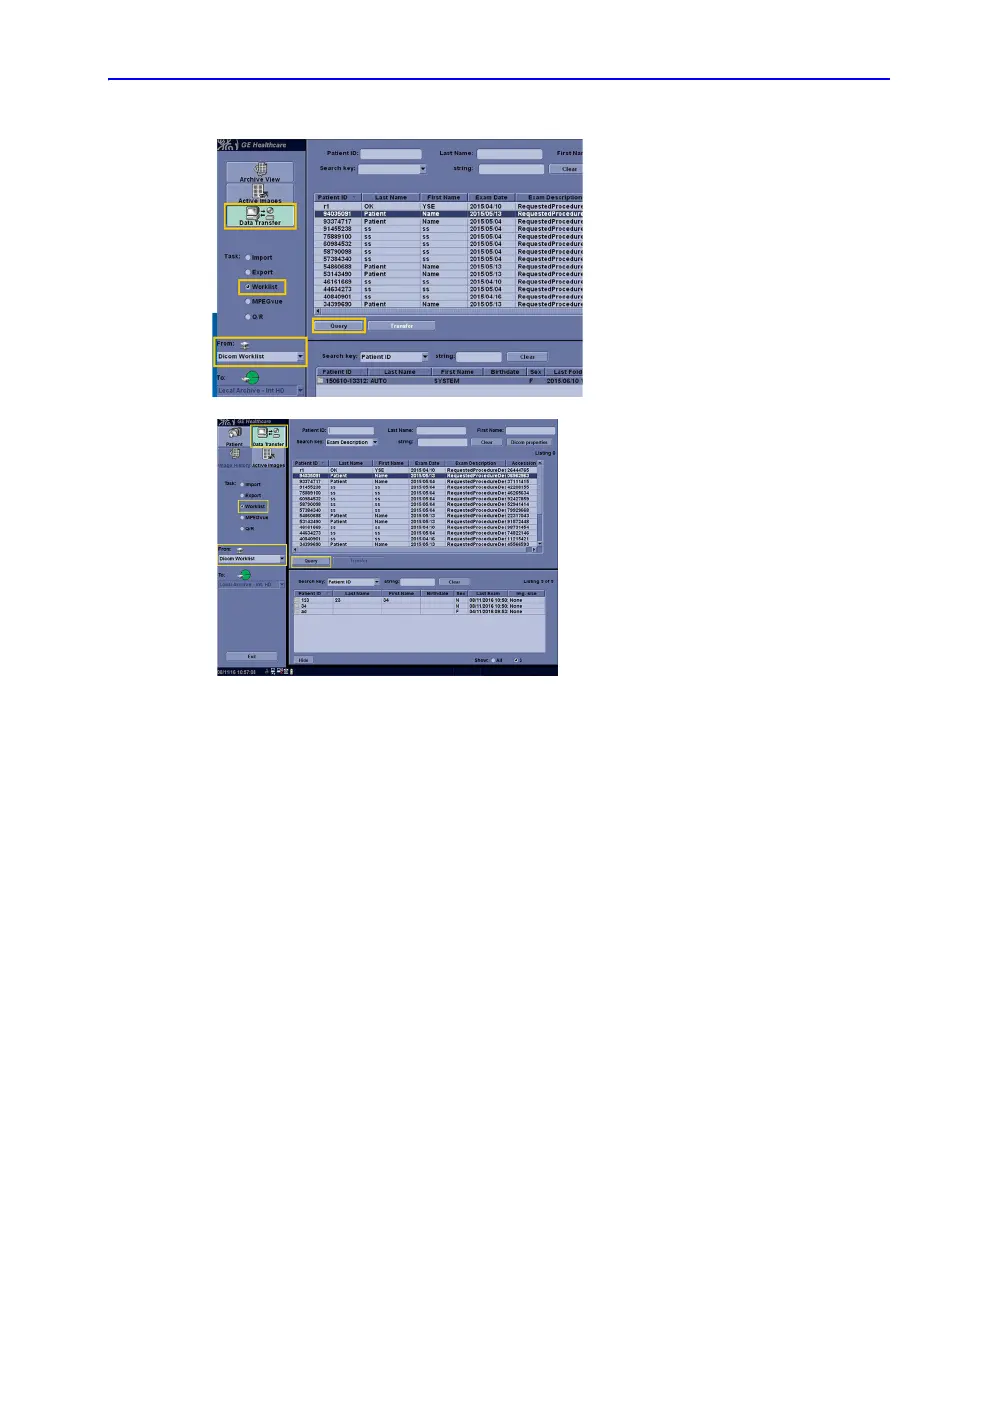
Figure 6-25. Dicom Setting
6/6
For R1.0.x software:
Press Archive on the control panel to
transfer data from the Dicom Worklist
to Local Archive Internal HD (hard
disk). Click on Data Transfer tab in
upper left corner, and ensure the task
selected is Worklist and the from
destination displays the configured
Dicom worklist destination. Click
Query button and the patient list will
be refreshed. Select the ID(s) to be
transferred and click on Transfer tab.
This current example shows Patient
ID 94035091 has been selected.
For R1.1.x software:
Press Patient on the control panel to
transfer data from the Dicom Worklist
to Local Archive Internal HD (hard
disk). Click on Data Transfer tab in
upper right corner, and ensure the task
selected is Worklist and the from
destination displays the configured
Dicom worklist destination. Click
Query button and the patient list will
be refreshed. Select the ID(s) to be
transferred and click on Transfer tab.
This current example shows Patient ID
94035091 has been selected.

 Loading...


