3. Under Display Style, customize the text style and date/time format.
4. Under Orientation, use the Direction drop-down list to select a direction, turn the
camera toward the corresponding direction, and click Demarcate.
After you have set the position and OSD content, the symbol appears in the Status
column, which means that the OSD is set successfully. You may set multiple lines of
contents for each area and use and to adjust the sequence of display.
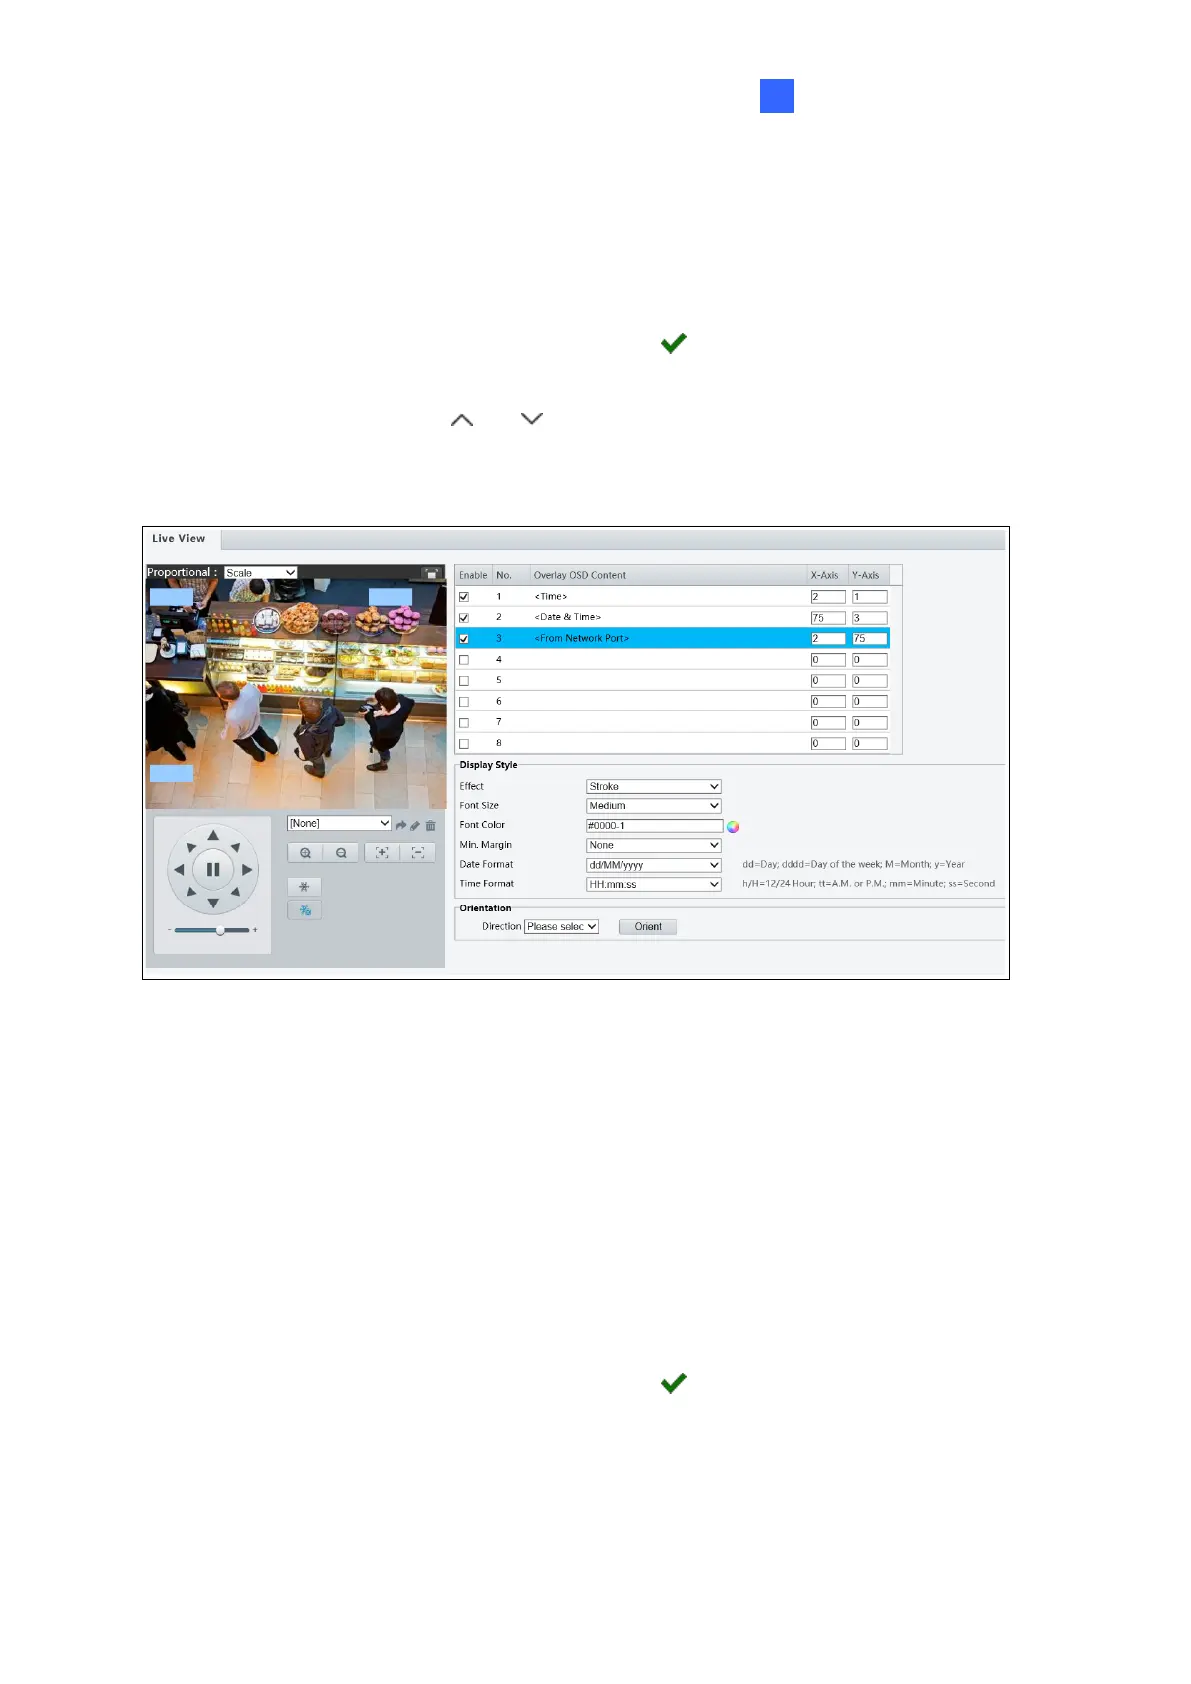
For GV-SD2722-IR / SD3732-IR / SD4825-IR / SD4834-IR
Figure 4-35
1. Enable a No. to select an area #, and click the Overlay OSD Content column to select
the content to display on screen.
2. Adjust the position of the Area boxes on the live view either by dragging directly or by
specifying the coordinates under the X-Axis / Y-Axis column.
3. Under Display Style, customize the text style and date/time format.
4. Under Orientation, use the Direction drop-down list to select a direction, turn the
camera toward the corresponding direction, and click Orient.
After you have set the position and OSD content, the symbol appears in the Status
column, which means that the OSD is set successfully.

 Loading...