Instruction Manual ProfiLux 4 / 4e
EN 2019-01-22 37
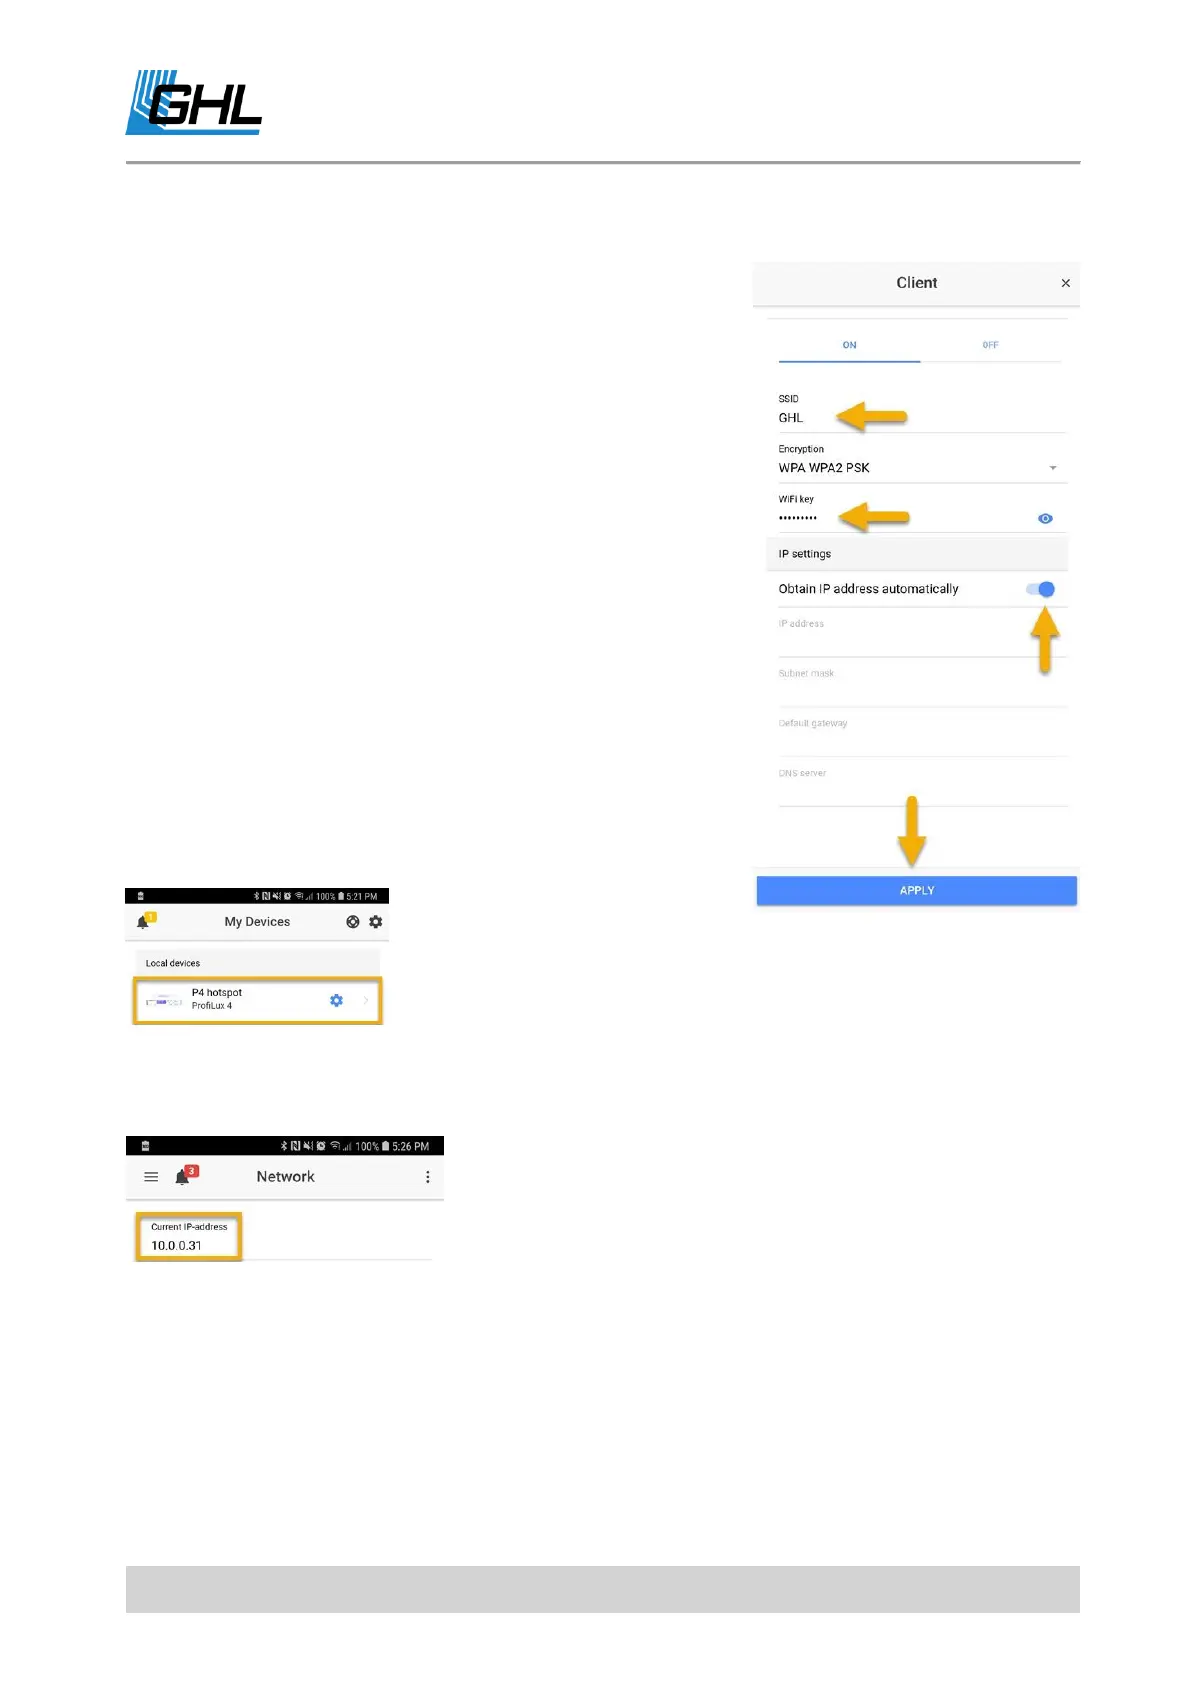
6.2.5 WI-FI Setup – Adding the P4/4e to your network
Step 1: Connect to your P4 / P4e’s hotspot signal, press
menu icon (top left), select Network, and select Client. In
the SSID field, type-in the EXACT name of your Wi-Fi
network (case sensitive).
Step 2: Type-in the EXACT password to your Wi-Fi network
(case sensitive).
Step 3: Select Obtain IP address automatically
Step 4: Press Apply, press Save, then confirm by pressing
YES.
NOTE: If Wi-Fi settings were entered correctly, the GREEN
Wi-Fi light on the P4 / P4e itself will turn ON. This indicates
that your P4 / P4e is now on your Wi-Fi network. Some
flashing of this LED is normal.
Step 5: Reconnect to your P4 / P4e by selecting the
dedicated hotspot connection.
Step 6: Press menu icon, select Network, and see the displayed Current IP address. This
number is the assigned IP address of your P4 / P4e within your network. Write it down.
NOTE: IP address shown is for illustration purposely only.
Please write down the IP address you see on your
smartphone or tablet.