32
Fryer Operation
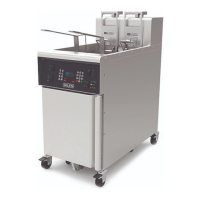
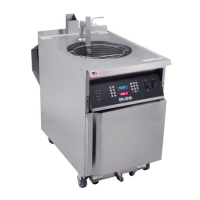
GBF-70 Fryer
4.01.2 Controller - General Overview
● POWER UP:
Place Power Switch in [ON] position. Controller will power up and sound an alarm. The message “POWER
FAILURE [PRESS START TO PREHEAT]” is shown on the Upper Display. This is normal
, intended to prevent fryer
from heating after power interruptions until attended by an operator. Pressing the [START] key silences the
alarm and places fryer into PREHEAT mode. If Heat Switch is in the [HEAT] position, and temperature setpoint is
higher than the current actual oil temperature, heating elements will turn ON and cooking oil will begin to heat.
DO NOT place Heat Switch in [HEAT] position unless vat is filled with cooking oil to the FULL level
.
● PREHEAT:
During the PREHEAT phase, real‐time actual oil temperature will be displayed on the Lower Display. When oil
reaches the programmed setpoint, an alarm will sound and Upper Display will show message “ALARM ‐ STIR
OIL”. At that point vigorously stir cooking oil and press the [ALARM] key. Typically, the temperature drops
when oil is stirred. Controller delays for 10 seconds and if temp has dropped below setpoint during that time,
PREHEAT phase continues until it returns to setpoint. This process helps to ensure a more consistent
temperature throughout the total volume of oil, leading to better cooking performance. Upon returning to
setpoint, alarm sounds again and Upper Display shows “ALARM ‐ SETPOINT REACHED”. Pressing the [ALARM]
key, places fryer into READY state.
● READY STATE:
Fryer is ready for cooking. The Lower Display changes to show the current controller temp setpoint. The last
used fryer cook settings will be shown on the Upper Display.
While fryer is in PREHEAT or READY state, user may change cook setting either by selecting a different Menu
Item Preset, see Section 4.01.5.2, Selecting a Menu Preset • OR • manually inputting different settings (time
and/or temp), see Section 4.01.3, Setting the Cooking Temperature & Section 4.01.4, Manually Setting the
Cook Time.
NOTE: If the PASSCODE ENABLE parameter is set to ON, user cannot
manually set cook time without first
entering the proper password. This lockout feature provides a measure of control over cooking procedures.
‐
● START:
Current cook times (preset or manually input), are shown on the Upper Display for each basket side. To start a
cooking cycle press the [START} key + select side: [4]=Left, [6]=Right, [5]=Both. When the selected timer starts,
the cook cycle countdown appears in the Lower Display.
+
+
The following is general operational information only. Detailed procedures and instructions are covered in later
Manual sections. During operation, instructions and prompts will be shown on the Upper Display to help guide
user through processes. Additionally, some controller keys and indicator lights will illuminate as a further aid.